Commands
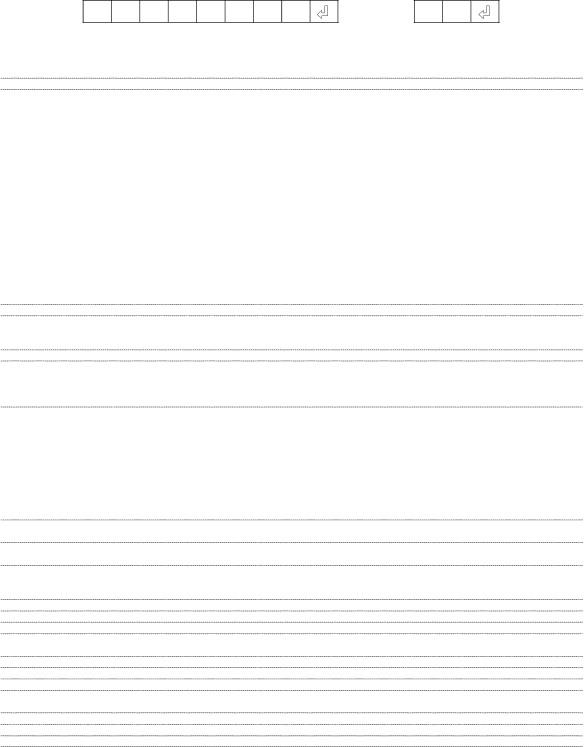
Example: When turning on the projector, make the following setting.
Computer
P O W R _ _ _ 1
→
←
Projector
O K
|
|
|
|
|
|
|
|
| RETURN |
|
CONTROL CONTENTS | COMMAND | PARAMETER | Power ON | Standby mode | ||||||
|
|
|
|
|
|
|
|
| (or | |
|
|
|
|
|
|
|
|
|
| |
Power Off | P | O | W | R | _ | _ | _ | 0 | OK or ERR | OK |
Power On | P | O | W | R | _ | _ | _ | 1 | OK | OK or ERR |
Power Status | P | O | W | R | ? | ? | ? | ? | 1 | 0 |
Projector Condition | T | A | B | N | _ | _ | _ | 1 | 0:Normal | 0:Normal |
|
|
|
|
|
|
|
|
| 1:Temp High | 1:Temp High |
|
|
|
|
|
|
|
|
| 8:Lamp Life 5% or less | 2:Fan Error |
|
|
|
|
|
|
|
|
| 16:Lamp | 4:Cover Open |
|
|
|
|
|
|
|
|
| 32:Lamp Ignition Failure | 8:Lamp Life 5% or less |
|
|
|
|
|
|
|
|
|
| 16:Lamp |
|
|
|
|
|
|
|
|
|
| 32:Lamp Ignition Failure |
|
|
|
|
|
|
|
|
|
| 64:Temp Abnormally High |
Lamp Status | T | L | P | S | _ | _ | _ | 1 | 0:Off, 1:On, 2:Retry, 3:Waiting, 4:Lamp Error | 0:Off, 4:Lamp Error |
Lamp Power Status | T | P | O | W | _ | _ | _ | 1 | 1:On, 2:Cooling | 0:Standby |
Lamp Quantity | T | L | P | N | _ | _ | _ | 1 | 1 |
|
Lamp Usage Time (Hour) | T | L | T | T | _ | _ | _ | 1 | 0 - 9999 (Integer) |
|
Lamp Usage Time (Minute) | T | L | T | M | _ | _ | _ | 1 | 0, 15, 30, 45 |
|
Lamp Life (Percentage) | T | L | T | L | _ | _ | _ | 1 | 0% - 100% (Integer) |
|
Model Name Check | T | N | A | M | _ | _ | _ | 1 | XGC465X / XGC435X |
|
Model Name Check | M | N | R | D | _ | _ | _ | 1 |
| |
Serial No. Check *1 | S | N | R | D | _ | _ | _ | 1 | Serial No. |
|
Projector Name Setting 1 (First four characters) *2 | P | J | N | 1 | * | * | * | * | OK or ERR |
|
Projector Name Setting 2 (Middle four characters) *2 | P | J | N | 2 | * | * | * | * | OK or ERR |
|
Projector Name Setting 3 (Last four characters) *2 | P | J | N | 3 | * | * | * | * | OK or ERR |
|
Projector Name Check | P | J | N | 0 | _ | _ | _ | 1 | Projector Name |
|
COMPUTER 1 (RGB1) | I | R | G | B | _ | _ | _ | 1 | OK or ERR | ERR |
COMPUTER 2 (RGB2) | I | R | G | B | _ | _ | _ | 2 | OK or ERR | ERR |
DVI (RGB3) | I | R | G | B | _ | _ | _ | 3 | OK or ERR | ERR |
INPUT RGB Check | I | R | G | B | ? | ? | ? | ? | 1:RGB1(COMPUTER1), 2:RGB2(COMPUTER2), | ERR |
|
|
|
|
|
|
|
|
| 3:RGB3(DVI) or ERR |
|
I | V | E | D | _ | _ | _ | 1 | OK or ERR | ERR | |
VIDEO (Video2) | I | V | E | D | _ | _ | _ | 2 | OK or ERR | ERR |
INPUT Video Check | I | V | E | D | ? | ? | ? | ? | ERR | |
INPUT Mode Check | I | M | O | D | ? | ? | ? | ? | 1:RGB, 2:Video | ERR |
INPUT Check | I | C | H | K | ? | ? | ? | ? | 1:COMPUTER1, 2:COMPUTER2, 3:DVI, | ERR |
|
|
|
|
|
|
|
|
|
| |
All Reset | A | L | R | E | _ | _ | _ | 1 | OK or ERR | ERR |
Volume (0 - 60) | V | O | L | A | _ | _ | * | * | OK or ERR | ERR |
Volume up / down (– 10 - + 10) | V | O | U | D | _ | * | * | * | OK or ERR | ERR |
Keystone (– 127 - + 127) | K | E | Y | S | _ | * | * | * | OK or ERR | ERR |
AV Mute Off | I | M | B | K | _ | _ | _ | 0 | OK or ERR | ERR |
AV Mute On | I | M | B | K | _ | _ | _ | 1 | OK or ERR | ERR |
Freeze Off | F | R | E | Z | _ | _ | _ | 0 | OK or ERR | ERR |
Freeze On | F | R | E | Z | _ | _ | _ | 1 | OK or ERR | ERR |
Eco+Quiet Mode : Off | T | H | M | D | _ | _ | _ | 0 | OK or ERR | ERR |
Eco+Quiet Mode : On | T | H | M | D | _ | _ | _ | 1 | OK or ERR | ERR |
Auto Sync Start | A | D | J | S | _ | _ | _ | 1 | OK or ERR | ERR |
COMPUTER 1 Resize : Normal | R | A | S | R | _ | _ | _ | 1 | OK or ERR | ERR |
COMPUTER 1 Resize : Stretch | R | A | S | R | _ | _ | _ | 2 | OK or ERR | ERR |
COMPUTER 1 Resize : Dot By Dot | R | A | S | R | _ | _ | _ | 3 | OK or ERR | ERR |
COMPUTER 1 Resize : Full | R | A | S | R | _ | _ | _ | 5 | OK or ERR | ERR |
COMPUTER 1 Resize : Border | R | A | S | R | _ | _ | _ | 6 | OK or ERR | ERR |
COMPUTER 2 Resize : Normal | R | B | S | R | _ | _ | _ | 1 | OK or ERR | ERR |
COMPUTER 2 Resize : Stretch | R | B | S | R | _ | _ | _ | 2 | OK or ERR | ERR |
COMPUTER 2 Resize : Dot By Dot | R | B | S | R | _ | _ | _ | 3 | OK or ERR | ERR |
COMPUTER 2 Resize : Full | R | B | S | R | _ | _ | _ | 5 | OK or ERR | ERR |
COMPUTER 2 Resize : Border | R | B | S | R | _ | _ | _ | 6 | OK or ERR | ERR |
DVI Resize : Normal | R | C | S | R | _ | _ | _ | 1 | OK or ERR | ERR |
DVI Resize : Stretch | R | C | S | R | _ | _ | _ | 2 | OK or ERR | ERR |
DVI Resize : Dot By Dot | R | C | S | R | _ | _ | _ | 3 | OK or ERR | ERR |
DVI Resize : Full | R | C | S | R | _ | _ | _ | 5 | OK or ERR | ERR |
DVI Resize : Border | R | C | S | R | _ | _ | _ | 6 | OK or ERR | ERR |
![]() -14
-14