Sharp XG-C435X, XG-C465X Mail Recipient Settings, Occurs Service & Support Access URL

Page 28

Controlling the Projector via LAN

Setting Error Items and Destination Addresses to which E-mail is to be Sent when an Error Occurs

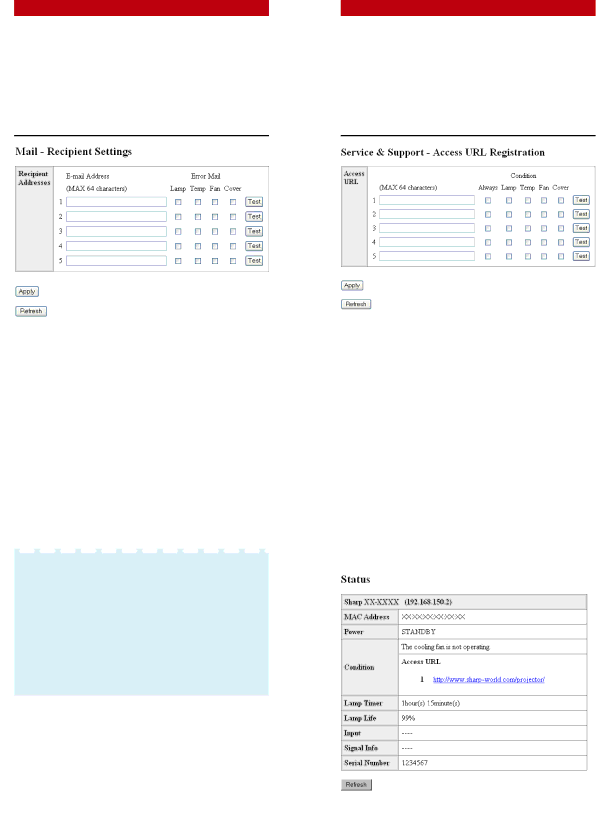
(Mail – Recipient Settings)

Setting Error Items and the URL that are to be Displayed when an Error

Occurs (Service & Support –

Access URL)

On this screen, you can input e-mail destina- tions to which error notification (error items) e-mails are sent.

Items

Description

E-mail

Set addresses to which error

Address

notification e-mail is sent. You


can set up to five addresses.

Error Mail

Error e-mail is sent on the error

(Lamp, Temp,

items checked in their check

Fan, Cover)

boxes.

Test

Send test e-mail. This allows


you to confirm that the settings


for e-mail transmission are


properly set.

Note

E-mail Address can be up to 64 characters.

You can input the characters below :

a-z, A-Z, 0-9, !, #, $, %, &, *, +, -, /, =, ?, ^, {, , }, ~, _, ’, ., @, `

(You can input “@” only one time.)

For details about error items, refer to the projector’s operation manual.

On this screen, you can make settings of the URL and error items that are to be displayed when the projector has generated an error.

Items

Description

Access

Set the URL that is to be

URL

displayed when an error


occurs. You can set up to five


addresses.

Condition

The URL is displayed when an

(Always, Lamp,

error checked in their check

Temp, Fan, Cover)

boxes occurs.

Test

The set URL site is test-


displayed. This allows you to


confirm that the URL site is


properly displayed.


Example of the display when an error occurs

-28

Image 28
Contents Setup Manual Setting up the Screen Standard Setup Front ProjectionScreen Size and Projection Distance Throw DistanceScreen 12.2 15.2m 50ftNormal Mode Stretch ModeStandard Zoom Lens F1.7-F1.9, f=28.0-33.6 mmWide-zoom Lens AN-C12MZ F2.2-F2.7, f=24.5-30.7 mmTele-zoom Lens AN-C18MZ F1.7-F2.2, f=36.5-46.3 mmTele-zoom Lens AN-C27MZ F2.0-F2.8, f=53.8-82.9 mmTele-zoom Lens AN-C41MZ F2.1-F2.8, f=83.5-117.2 mmChanging the Lens InfoReplace the lens housing cover Insert the lens into the projectorConnecting Pin Assignments COMPUTER-RGB Input/Output Component Input/OutputConnecting Pin Assignments Pin No. SignalComputer control Communication conditions RS-232C Specifications and CommandsBasic format Commands W RReturn DVI Signal Type D. PC Comp OK or ERR Lamp Timer Reset command is available only in standby mode Setting up the Projector Network Environment Network settings on the computerConnecting the Pro- jector to a Computer Setting an IP Address for the Computer Confirm or change an IP address for the setup computer Setting up a Network Connection for the Projector Dhcp Controlling the Projector via LAN Controlling the Projector Using Internet ExplorerVersion 5.0 or later Confirming the Projector Controlling the ProjectorStatus Status ControlSetting and Adjusting Setting the SecurityProjector Settings & Adjustments Network SecurityMaking General Settings for the Network Network Setting for Sending E-mail when an Error OccursMail Originator Settings GeneralOccurs Service & Support Access URL Mail Recipient SettingsExample of the display when an error occurs Setting up the Projector Using RS-232C or Telnet When Connecting Using RS-232CInput setup and press the Enter key Launch general purpose terminal emulatorWhen Connecting Using Telnet ClickStartfrom theWindows desk- top and select RunSetup Menu Main Menu VView All Setting View Setting Detail ListSet Items Save Settings and Quit Quit without Saving SetSSave & Quit Tings QQuit UnchangedIP Address Setting Default Gateway SettingSubnet Mask Setting User Name SettingPassword Setting Projector Name SettingDhcp Client Setting RS-232C Baud Rate SetDisconnecting All Connec Setting Auto Logout TimeEntering Advanced Setup Menu Data Port SettingCarrying out Network Ping Test Setting of Accept IP Ad- dressAccepting All IP Addresses Return to Default Settings Setting of Search PortReturn to Main Menu Resetting the Lamp Timer of the Projector via LAN Resetting the Lamp Timer of the Projector via LAN Close HyperTerminalTroubleshooting When connecting the projector using serial-connectionTroubleshooting \ After the initialization, carry out setting again Dimensions Units inches mmWhen AN-C12MZ is installed When AN-C18MZ is installedWhen AN-C27MZ is installed When AN-C41MZ is installed