Woodstock W1683 Switch, Knife Setting Jig, To mount the switch, To assemble the knife setting jig

Page 16

Switch

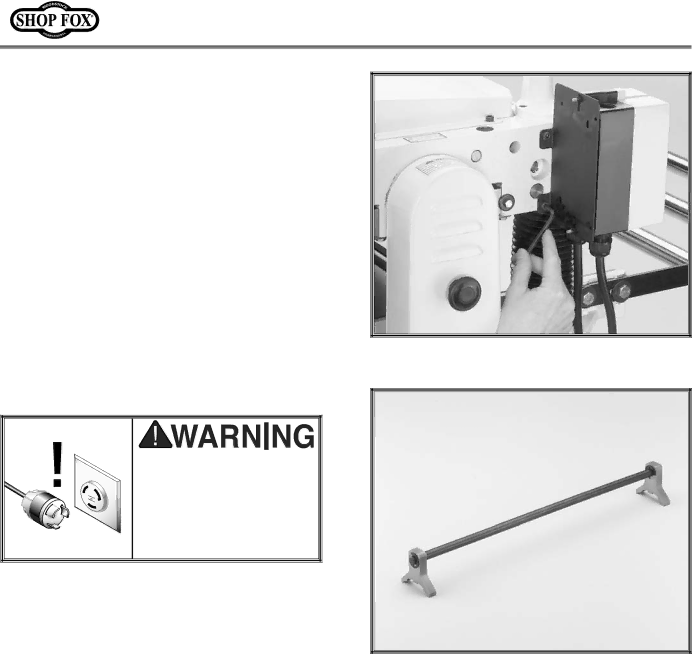
The prewired magnetic switch needs to be mounted to the planer head casting.

To mount the switch:

1.Match the holes at the back of the switch with the tapped holes in the front, left- hand corner of the planer.

2.Secure the switch to the head casting with the cap screws as shown in Figure 6.

3.Read Section 2: Circuit Requirements in this manual, then install an appropriate plug to the power wire.

DO NOT connect machine to the power at this time! Wait until all other assembly instructions and adjustments have been completed.

Knife Setting Jig

We have provided a jig to make the knife setting process easy and quick. Please refer to Figure 7 for jig component identification while assembling.

To assemble the knife setting jig:

1.Snap one of the E-clips over the notch on one end of the knife setting rod.

2.Slide the aluminum knife setting jig brackets onto the rod.

3.Snap the other E-clip on the other end of the knife setting rod.

Refer to page 17 for use.

Figure 6. Attaching switch to the planer.

Figure 7. Knife setting jig.

12

Image 16
Contents Planer Instruction Sheet Spiral Cutterhead PlanerW1718 Replacement Parts Page Table Of Contents Woodstock Service and Support Introduction About Your NEW PlanerWarranty and Returns Planer Machine SpecificationsSafety First Disconnect machine when cleaning, adjusting or servicingKeep proper footing and balance at all times Additional Safety Instructions for Planers Read the manualElectrical Requirements 220V OperationExtension Cords GroundingBox Contents AssemblyOverview Shop Preparation Cleaning Machine When assembling, adjusting or operating equipmentExtension Rollers Checking roller extension with a StraightedgeTo install the dust hood HandwheelDust Hood To mount the handwheelSwitch Knife Setting JigTo mount the switch To assemble the knife setting jigAdjustments Location of ControlsTo move the bed rollers Moving Bed RollersTo check the table Make sure machine is unplugged To adjust the table less than Checking table/head casting in frontTo adjust the table more than Remove the front cabinet coverChecking Knives To check the knivesKnife Adjustment 5 6 4 Feed Rollers, Chip Breaker & Pressure Bar Board position on tableChipbreaker adjustment controls Chip Deflector Anti-Kickback PawlsChain Tensioner Planer. To adjust the roller spring tensionSpring Tension To adjust the table roller height Table RollersAlways Wear Safety Glasses When Operating This machine OperationsTest Run Feed RateOperational Tips Face joint the concave side of cupped Stock before planingTroubleshooting Planing Results Aftermarket Setup Accessories Planer Pal knife setting jigMaintenance CleaningGeneral Table And BaseLubrication Worm gearPulley Alignment Belt TensionTo align the pulleys Wiring Diagram HP Magnetic Switch -L.Z. TypeTroubleshooting Symptom Possible Cause Corrective ActionClosure 107 100 103 108 101 104 102 8894 109 Headcasting 204 333 334 331 332 Page Middle Table 509 508 540 G8IKJ Warranty Card BOX BELLINGHAM, WA