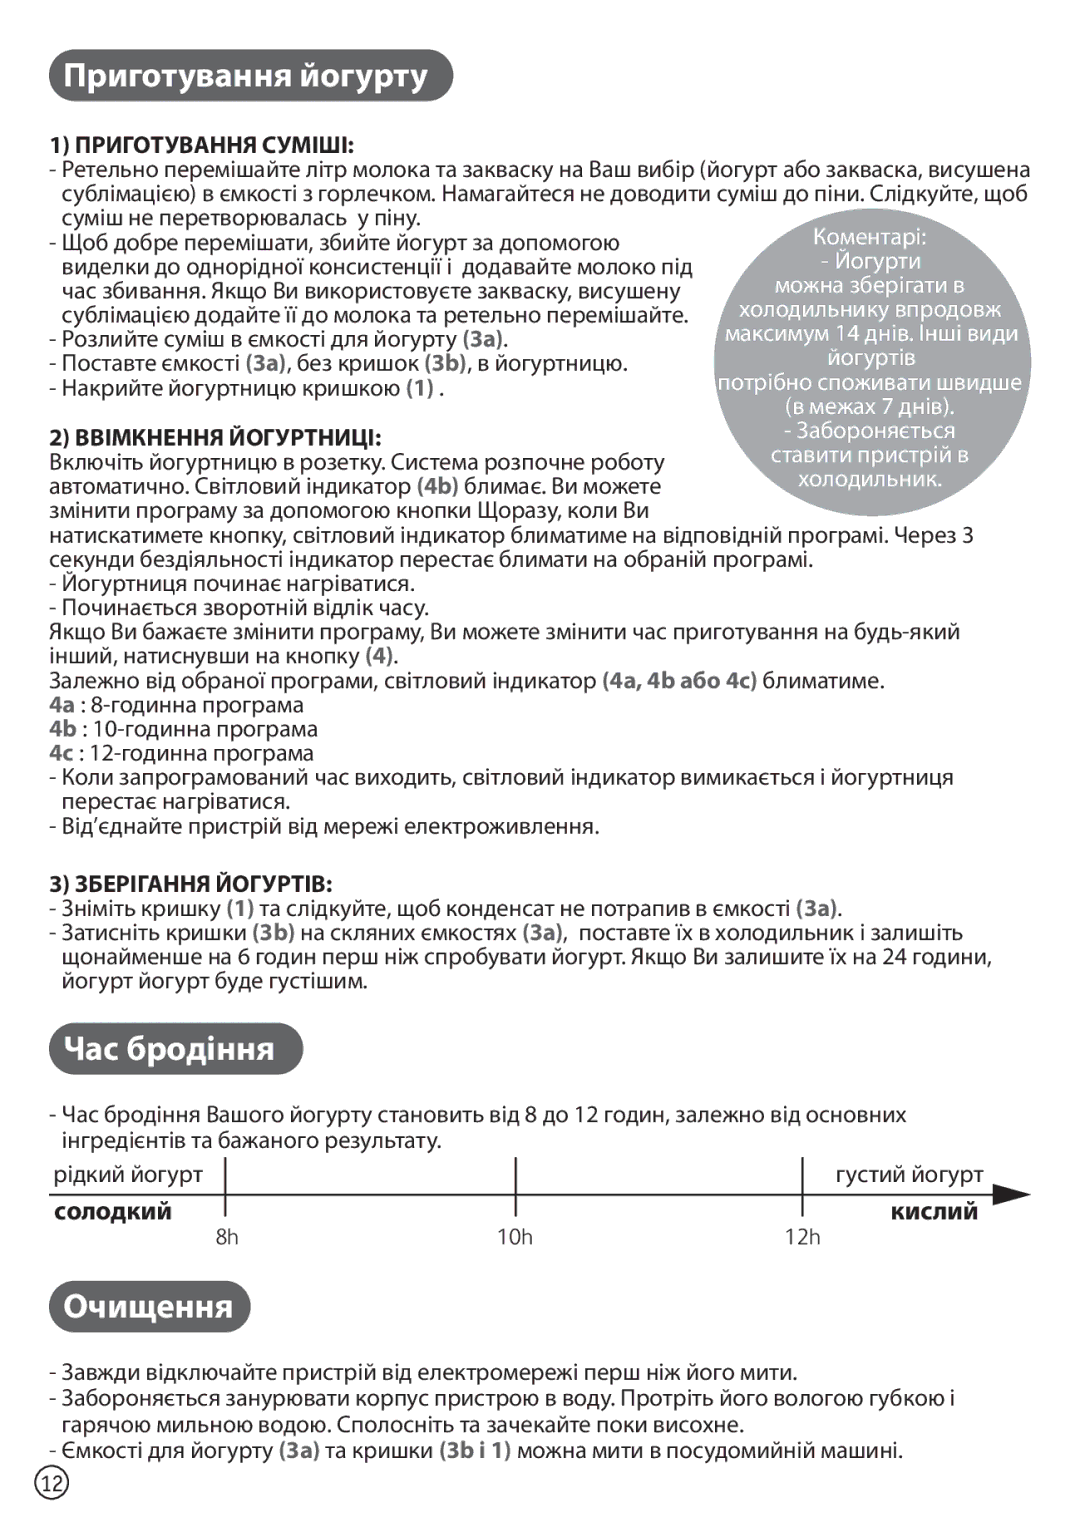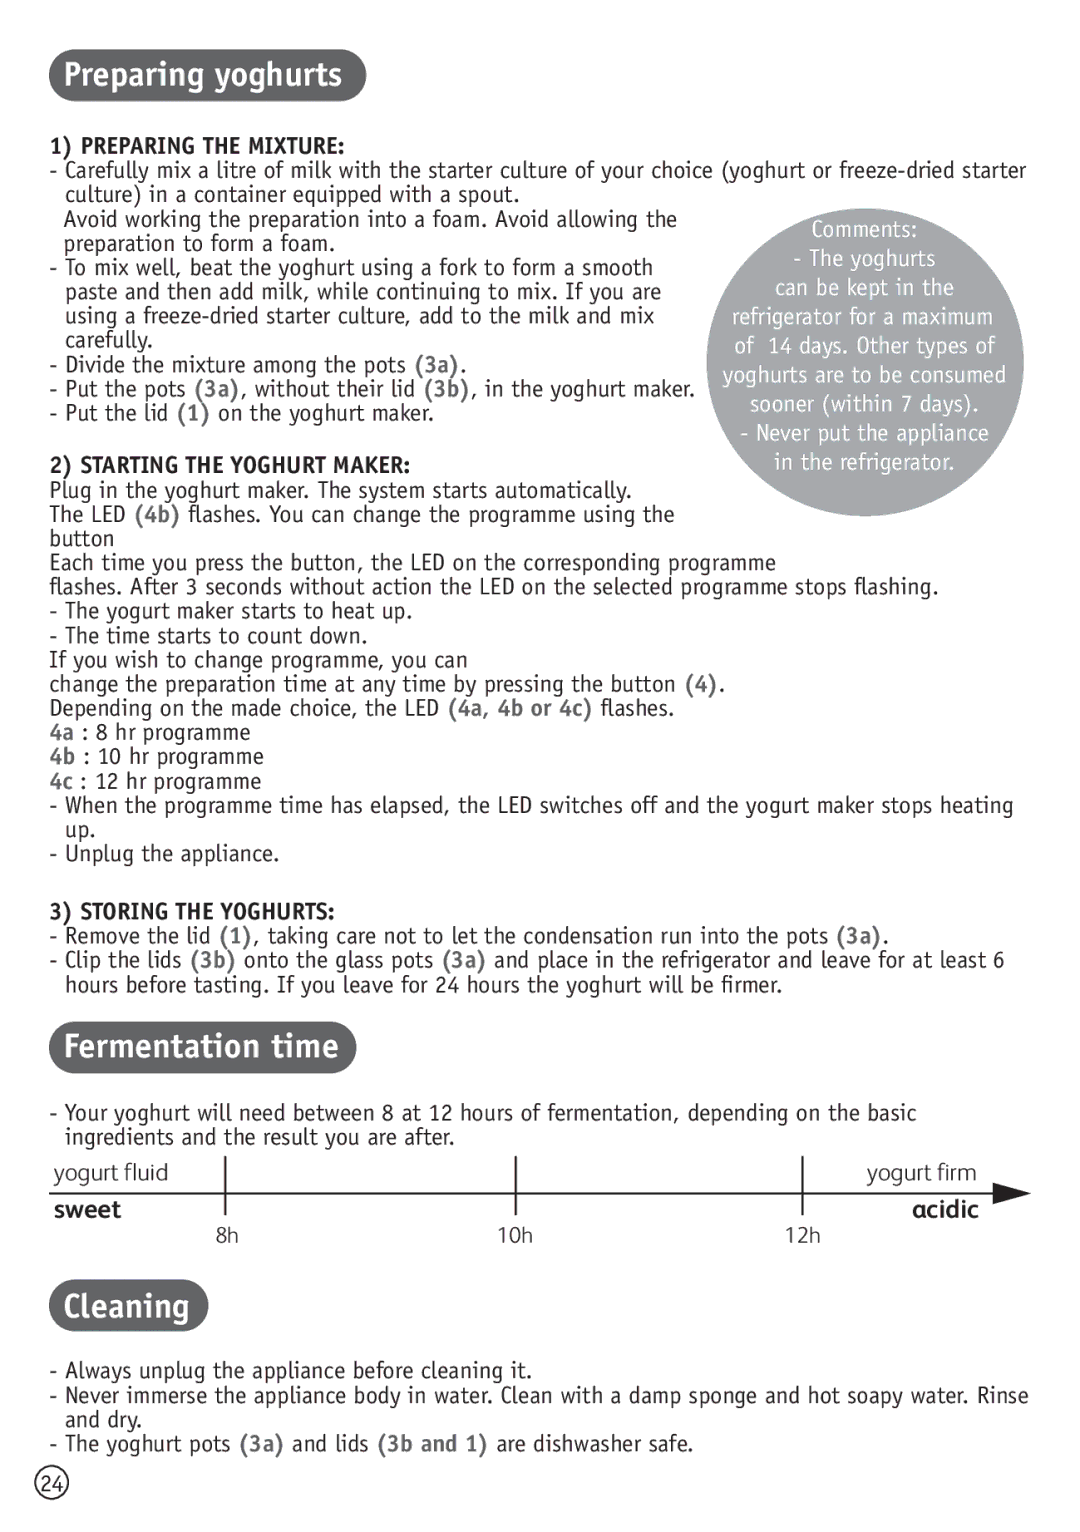
Preparing yoghurts
1) PREPARING THE MIXTURE:
-Carefully mix a litre of milk with the starter culture of your choice (yoghurt or
Avoid working the preparation into a foam. Avoid allowing the preparation to form a foam.
- To mix well, beat the yoghurt using a fork to form a smooth paste and then add milk, while continuing to mix. If you are using a
- Divide the mixture among the pots (3a).
- Put the pots (3a), without their lid (3b), in the yoghurt maker. - Put the lid (1) on the yoghurt maker.
2) STARTING THE YOGHURT MAKER:
Plug in the yoghurt maker. The system starts automatically. The LED (4b) flashes. You can change the programme using the button
Each time you press the button, the LED on the corresponding programme
flashes. After 3 seconds without action the LED on the selected programme stops flashing.
-The yogurt maker starts to heat up.
-The time starts to count down.
If you wish to change programme, you can
change the preparation time at any time by pressing the button (4). Depending on the made choice, the LED (4a, 4b or 4c) flashes.
4a : 8 hr programme
4b : 10 hr programme
4c : 12 hr programme
-When the programme time has elapsed, the LED switches off and the yogurt maker stops heating up.
-Unplug the appliance.
3) STORING THE YOGHURTS:
-Remove the lid (1), taking care not to let the condensation run into the pots (3a).
-Clip the lids (3b) onto the glass pots (3a) and place in the refrigerator and leave for at least 6 hours before tasting. If you leave for 24 hours the yoghurt will be firmer.
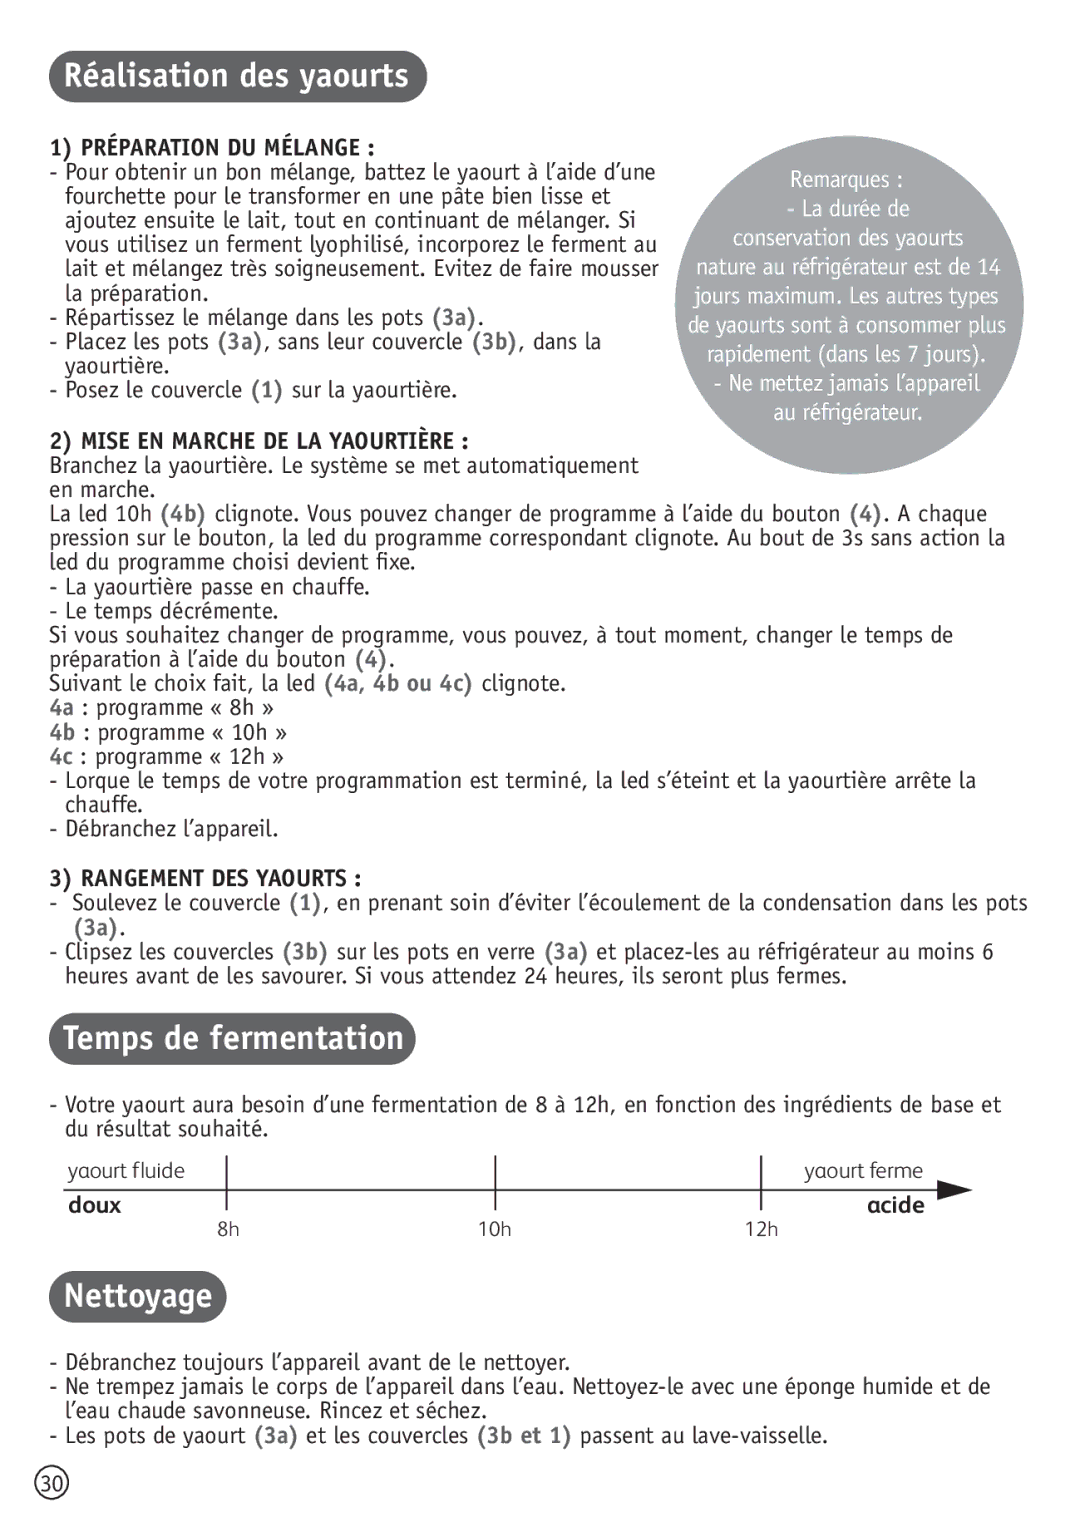
Fermentation time
-Your yoghurt will need between 8 at 12 hours of fermentation, depending on the basic ingredients and the result you are after.
yogurt fluid |
|
|
|
|
| yogurt firm |
sweet |
|
|
|
|
| acidic |
|
|
|
| |||
8h | 10h | 12h | ||||
Cleaning
-Always unplug the appliance before cleaning it.
-Never immerse the appliance body in water. Clean with a damp sponge and hot soapy water. Rinse and dry.
-The yoghurt pots (3a) and lids (3b and 1) are dishwasher safe.
24
