24CHAPTER 2: INSTALLING THE SWITCH
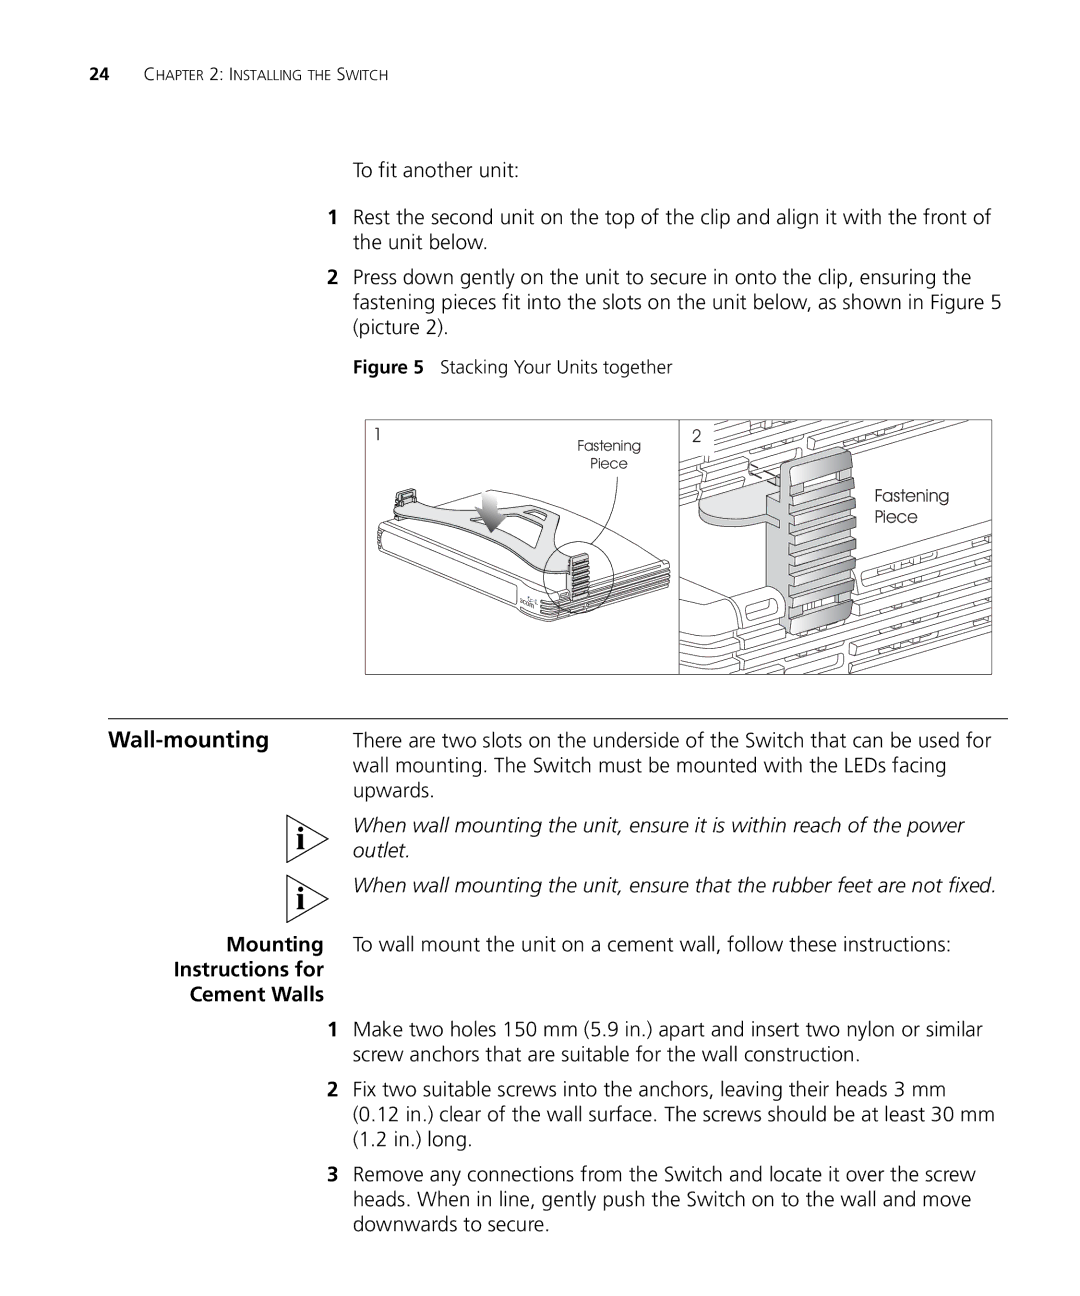
To fit another unit:
1Rest the second unit on the top of the clip and align it with the front of the unit below.
2Press down gently on the unit to secure in onto the clip, ensuring the fastening pieces fit into the slots on the unit below, as shown in Figure 5 (picture 2).
Figure 5 Stacking Your Units together
1 | Fastening | 2 |
|
| |
| Piece |
|
|
| Fastening |
|
| Piece |
| There are two slots on the underside of the Switch that can be used for |
| wall mounting. The Switch must be mounted with the LEDs facing |
| upwards. |
| When wall mounting the unit, ensure it is within reach of the power |
| outlet. |
| When wall mounting the unit, ensure that the rubber feet are not fixed. |
Mounting | To wall mount the unit on a cement wall, follow these instructions: |
Instructions for |
|
Cement Walls |
|
1Make two holes 150 mm (5.9 in.) apart and insert two nylon or similar screw anchors that are suitable for the wall construction.
2Fix two suitable screws into the anchors, leaving their heads 3 mm
(0.12 in.) clear of the wall surface. The screws should be at least 30 mm (1.2 in.) long.
3Remove any connections from the Switch and locate it over the screw heads. When in line, gently push the Switch on to the wall and move downwards to secure.
