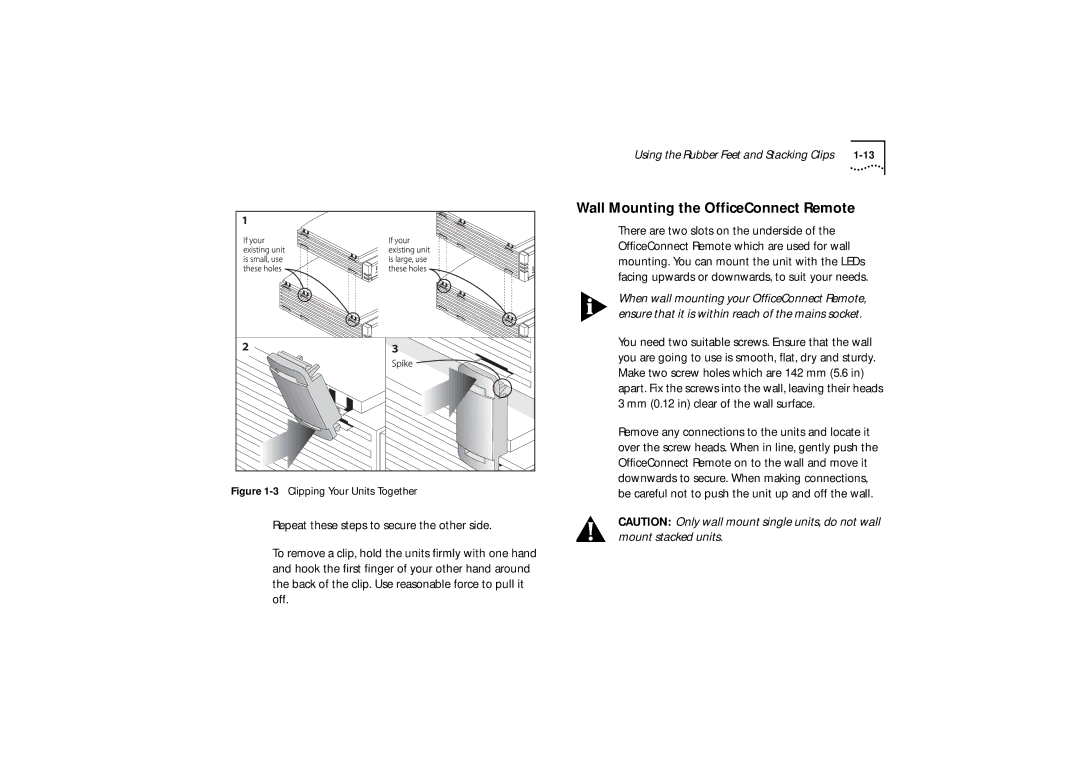
Figure 1-3 Clipping Your Units Together
Repeat these steps to secure the other side.
To remove a clip, hold the units firmly with one hand and hook the first finger of your other hand around the back of the clip. Use reasonable force to pull it off.
Using the Rubber Feet and Stacking Clips |
Wall Mounting the OfficeConnect Remote
There are two slots on the underside of the OfficeConnect Remote which are used for wall mounting. You can mount the unit with the LEDs facing upwards or downwards, to suit your needs.
When wall mounting your OfficeConnect Remote, ensure that it is within reach of the mains socket.
You need two suitable screws. Ensure that the wall you are going to use is smooth, flat, dry and sturdy. Make two screw holes which are 142 mm (5.6 in) apart. Fix the screws into the wall, leaving their heads 3 mm (0.12 in) clear of the wall surface.
Remove any connections to the units and locate it over the screw heads. When in line, gently push the OfficeConnect Remote on to the wall and move it downwards to secure. When making connections, be careful not to push the unit up and off the wall.
CAUTION: Only wall mount single units, do not wall mount stacked units.