46

3 System upgrade

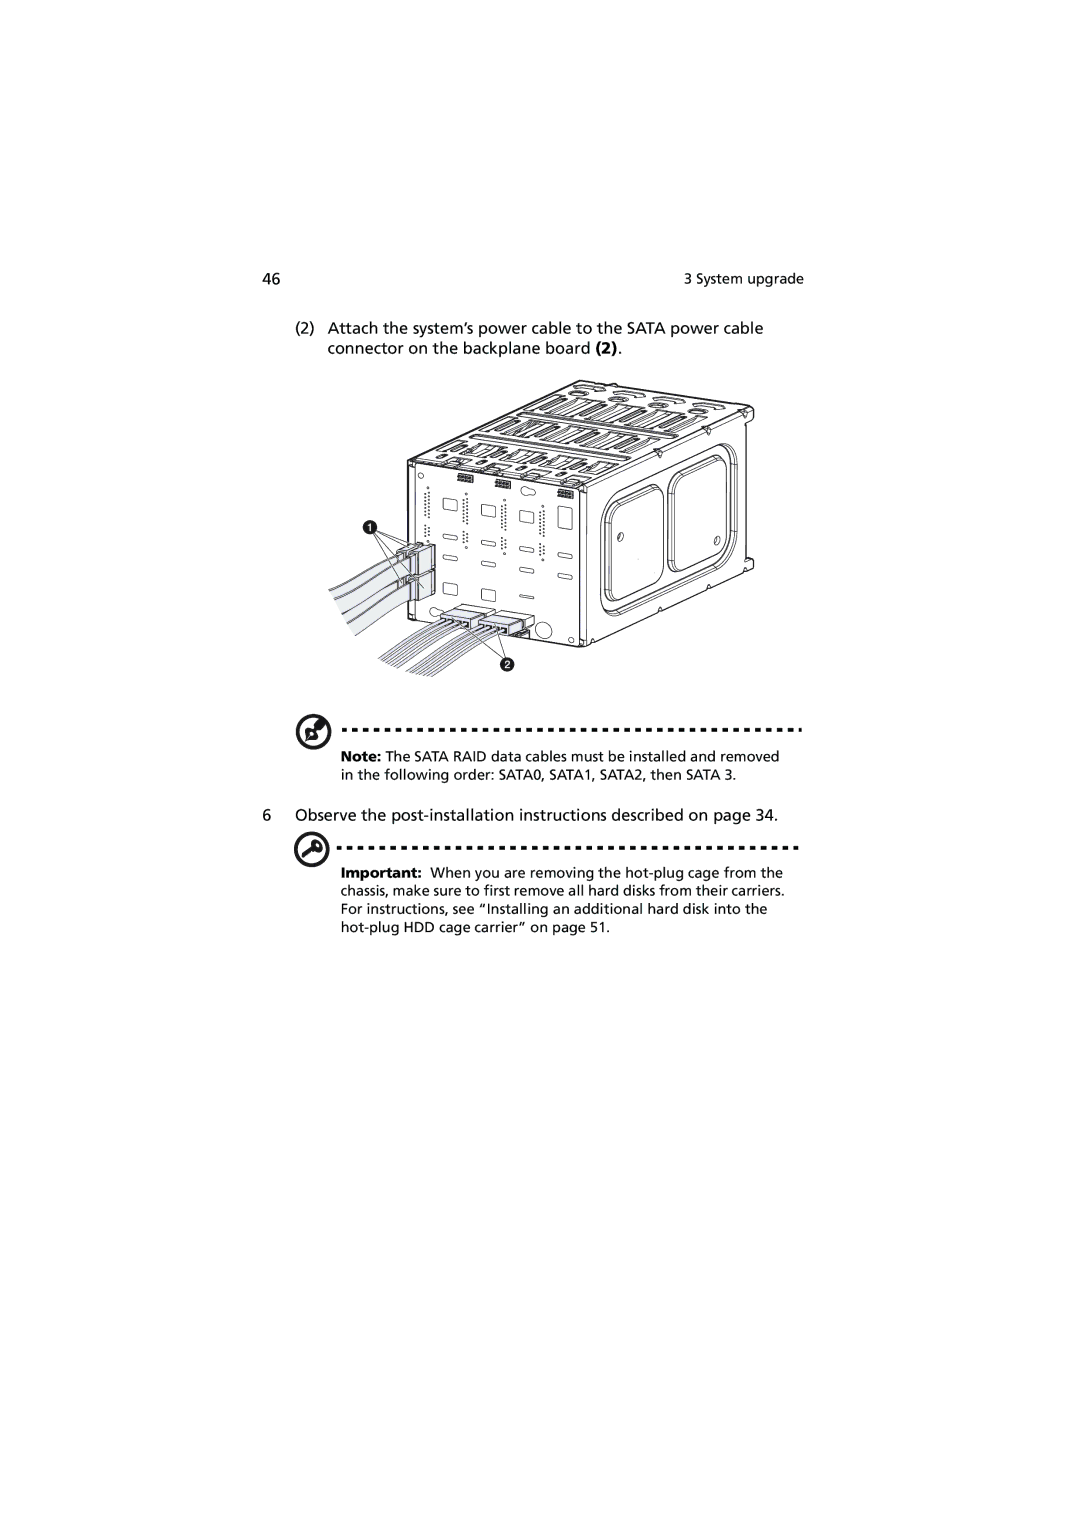
(2)Attach the system’s power cable to the SATA power cable connector on the backplane board (2).

Note: The SATA RAID data cables must be installed and removed

in the following order: SATA0, SATA1, SATA2, then SATA 3.

6 Observe the post-installation instructions described on page 34.

Important: When you are removing the hot-plug cage from the chassis, make sure to first remove all hard disks from their carriers. For instructions, see “Installing an additional hard disk into the hot-plug HDD cage carrier” on page 51.

Page 56
Image 56
Acer G5350 Series manual Following order SATA0, SATA1, SATA2, then Sata