ASSEMBLY
ASSEMBLY
DUAL TAIL WHEEL INSTALLATION - LIFT TYPE (Model RX84 Only)
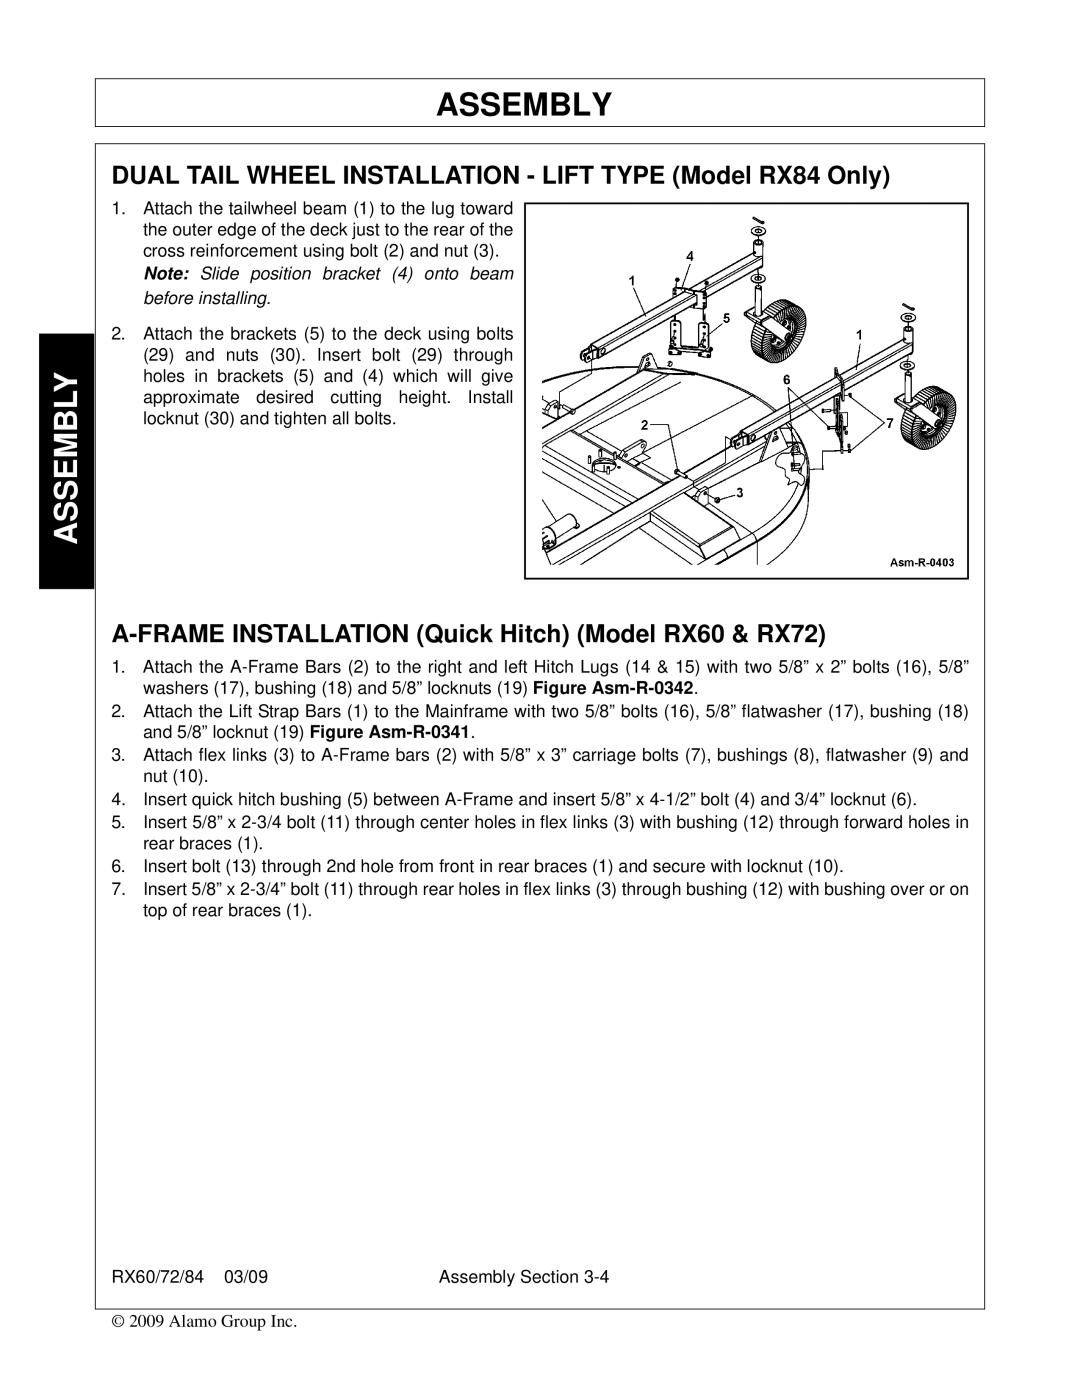
1.Attach the tailwheel beam (1) to the lug toward the outer edge of the deck just to the rear of the cross reinforcement using bolt (2) and nut (3).
Note: Slide position bracket (4) onto beam before installing.
2.Attach the brackets (5) to the deck using bolts
(29)and nuts (30). Insert bolt (29) through holes in brackets (5) and (4) which will give approximate desired cutting height. Install locknut (30) and tighten all bolts.
A-FRAME INSTALLATION (Quick Hitch) (Model RX60 & RX72)
1.Attach the
2.Attach the Lift Strap Bars (1) to the Mainframe with two 5/8” bolts (16), 5/8” flatwasher (17), bushing (18) and 5/8” locknut (19) Figure
3.Attach flex links (3) to
4.Insert quick hitch bushing (5) between
5.Insert 5/8” x
6.Insert bolt (13) through 2nd hole from front in rear braces (1) and secure with locknut (10).
7.Insert 5/8” x
RX60/72/84 03/09 | Assembly Section |
© 2009 Alamo Group Inc.
