Switching from the disc menu
For some discs, the audio language, angle and subtitles can be switched from the disc menu.
1 Touch [MENU] or [TOP MENU] to display the menu.
2 Select an item to confirm it.
See “If a menu screen appears” on page 18.
•To play back a
Displaying the Disc Status for DVD/Video
CD ![]()
![]()
![]()
![]()
![]()
Use the procedure described below to display the status (title number, chapter number, group number, etc.) of the currently playing DVD or of the currently playing Video CD (track number, etc.) on the monitor.
1 During playback, touch the display panel.
The operation menu screen is displayed.
2 Touch [ESC] within 5 seconds.
The display status is displayed for 5 seconds.
•To play back a
About DivX®
DivX® is a codec (software) programme to compress moving images while maintaining image quality using a highly advanced compression ratio and operating speed.
•Official DivX® Certified product
•Plays all versions of DivX® video (including DivX® 5) with standard playback of DivX® media files
•DivX, DivX Certified, and associated logos are trademarks of DivX, Inc. and are used under license
The unit can play back
The optimum size for DivX® disc playback is as follows:
Screen Size: 32 to 720 pixel (horizontal) × 32 to 576 pixel (vertical)
With an aspect ratio other than 16:9, black bars may be displayed on the left and right sides, or at the top and bottom of the screen.
Image bit rate: “average 4 Mbps, Peak 8 Mbps” Home Theater Profile supported
The following audio recording systems are supported.
MPEG1 Layer II | 64 to 384 kbps |
MPEG1 Layer III | 32 to 320 kbps |
MPEG2 Layer III | 8 to 160 kbps |
MPEG2.5 Layer III | 8 to 160 kbps |
Dolby Digital | 64 to 448 kbps (Max. 5.1ch) |
Other Useful
Features
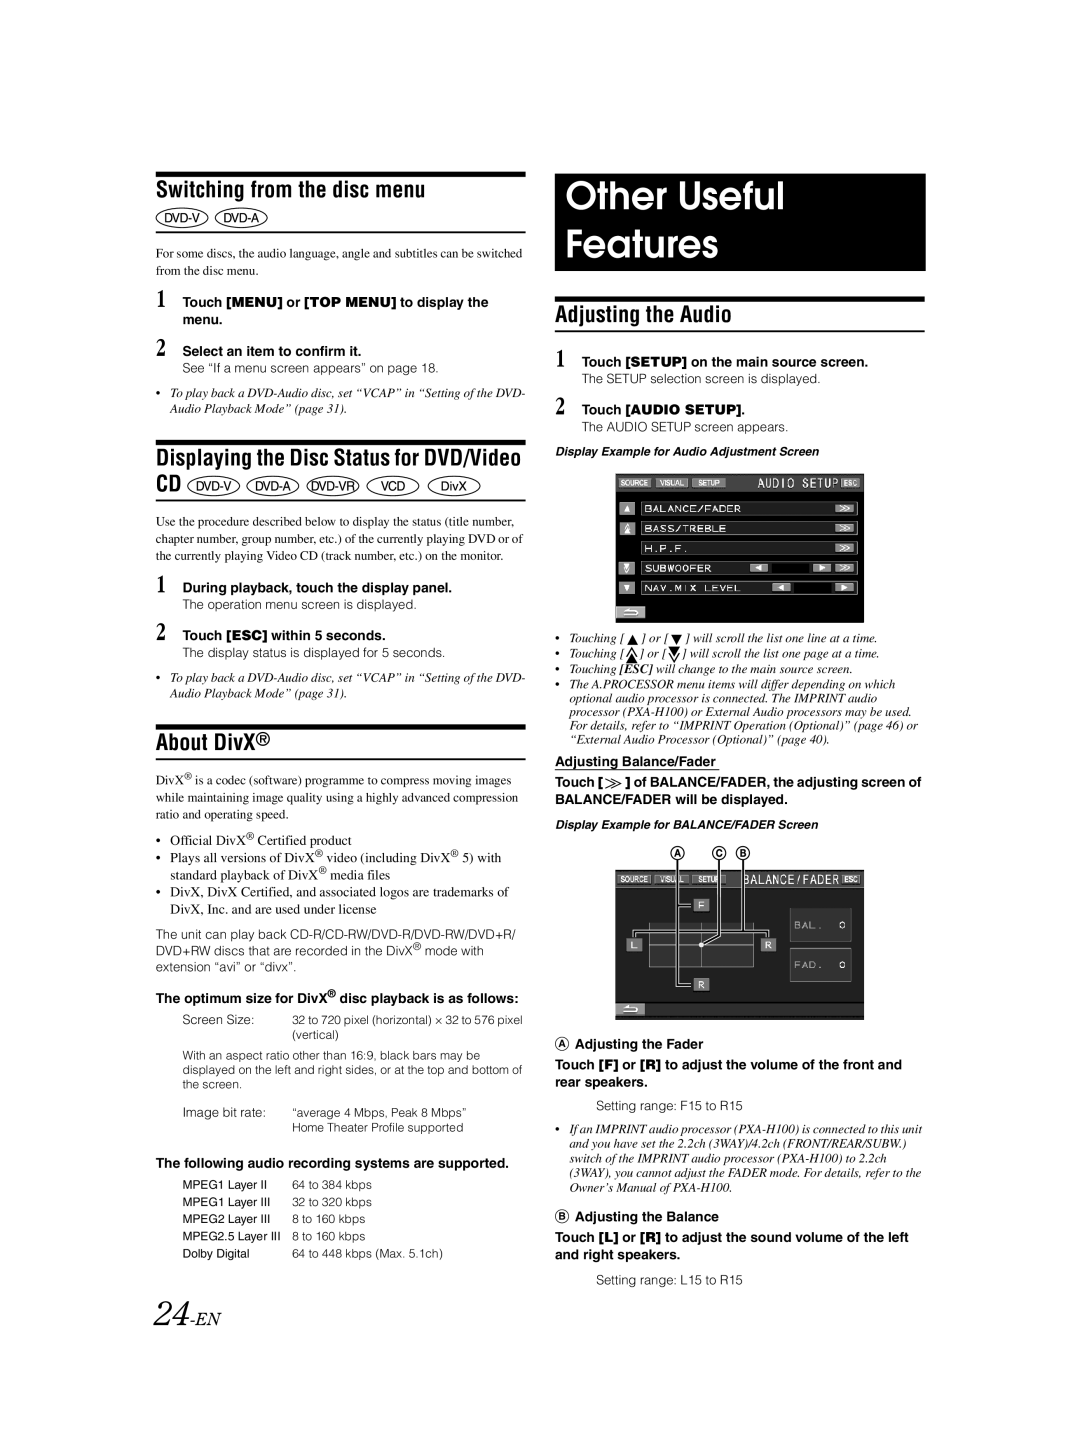
Adjusting the Audio
1 Touch [SETUP] on the main source screen.
The SETUP selection screen is displayed.
2 Touch [AUDIO SETUP].
The AUDIO SETUP screen appears.
Display Example for Audio Adjustment Screen
•Touching [ ![]() ] or [
] or [ ![]() ] will scroll the list one line at a time.
] will scroll the list one line at a time.
• Touching [![]() ] or [
] or [ ![]() ] will scroll the list one page at a time.
] will scroll the list one page at a time.
•Touching [ESC] will change to the main source screen.
•The A.PROCESSOR menu items will differ depending on which optional audio processor is connected. The IMPRINT audio processor
Adjusting Balance/Fader
Touch [ ![]() ] of BALANCE/FADER, the adjusting screen of BALANCE/FADER will be displayed.
] of BALANCE/FADER, the adjusting screen of BALANCE/FADER will be displayed.
Display Example for BALANCE/FADER Screen
AAdjusting the Fader
Touch [F] or [R] to adjust the volume of the front and rear speakers.
Setting range: F15 to R15
•If an IMPRINT audio processor
BAdjusting the Balance
Touch [L] or [R] to adjust the sound volume of the left and right speakers.
Setting range: L15 to R15
