Manual Recording
1.Turn on the VCR and peripheral devices.
2. Load a tape with an erase prevention tab intact.
Steps 3 to 7 for activating Super Resolution recording mode. | |
3. Press MENU button. | <MAIN MENU> |
• <MAIN MENU> appears. | DISPLAY |
TIMER PROGRAM | |
RECORDING SET UP
REAR TERMINAL
4. Turn JOG to select RECORDING SET
UP and turn SHUTTLE to the right.
• <RECORDING SET UP> menu
appears.
5. Turn JOG to select SUPER RESOLUTION and turn SHUTTLE to the right.
6. Turn JOG to select ON and turn SHUTTLE to the right.
• The Super Resolution indicator (![]() ) illuminates on the fluorescent display.
) illuminates on the fluorescent display.
7.Press MENU button.
•The day and present time display appears on screen.
8.Press REC/PLAY MODE button to
select the desired recording mode.
![]() Refer to Recording/playback time on the next column for the actual recording/playback time.
Refer to Recording/playback time on the next column for the actual recording/playback time.
9.Press REC button to begin recording.
10.Press STOP button to stop recording.
Note
•If the tape you insert in your VCR has the erase prevention tab removed, your VCR will automatically eject it if you attempt to record on it.
•The REC button will not function unless a tape is in stop or pause mode.
•A tape recorded by this VCR may not be played back
correctly by another VCR.
Info.
•Press the PAUSE button to momentarily stop recording. Press it again to resume recording. To protect the tape, the pause mode is automatically cancelled after about 5 minutes.
•Page 32 for the VCR’s function when the tape reaches its end during recording.
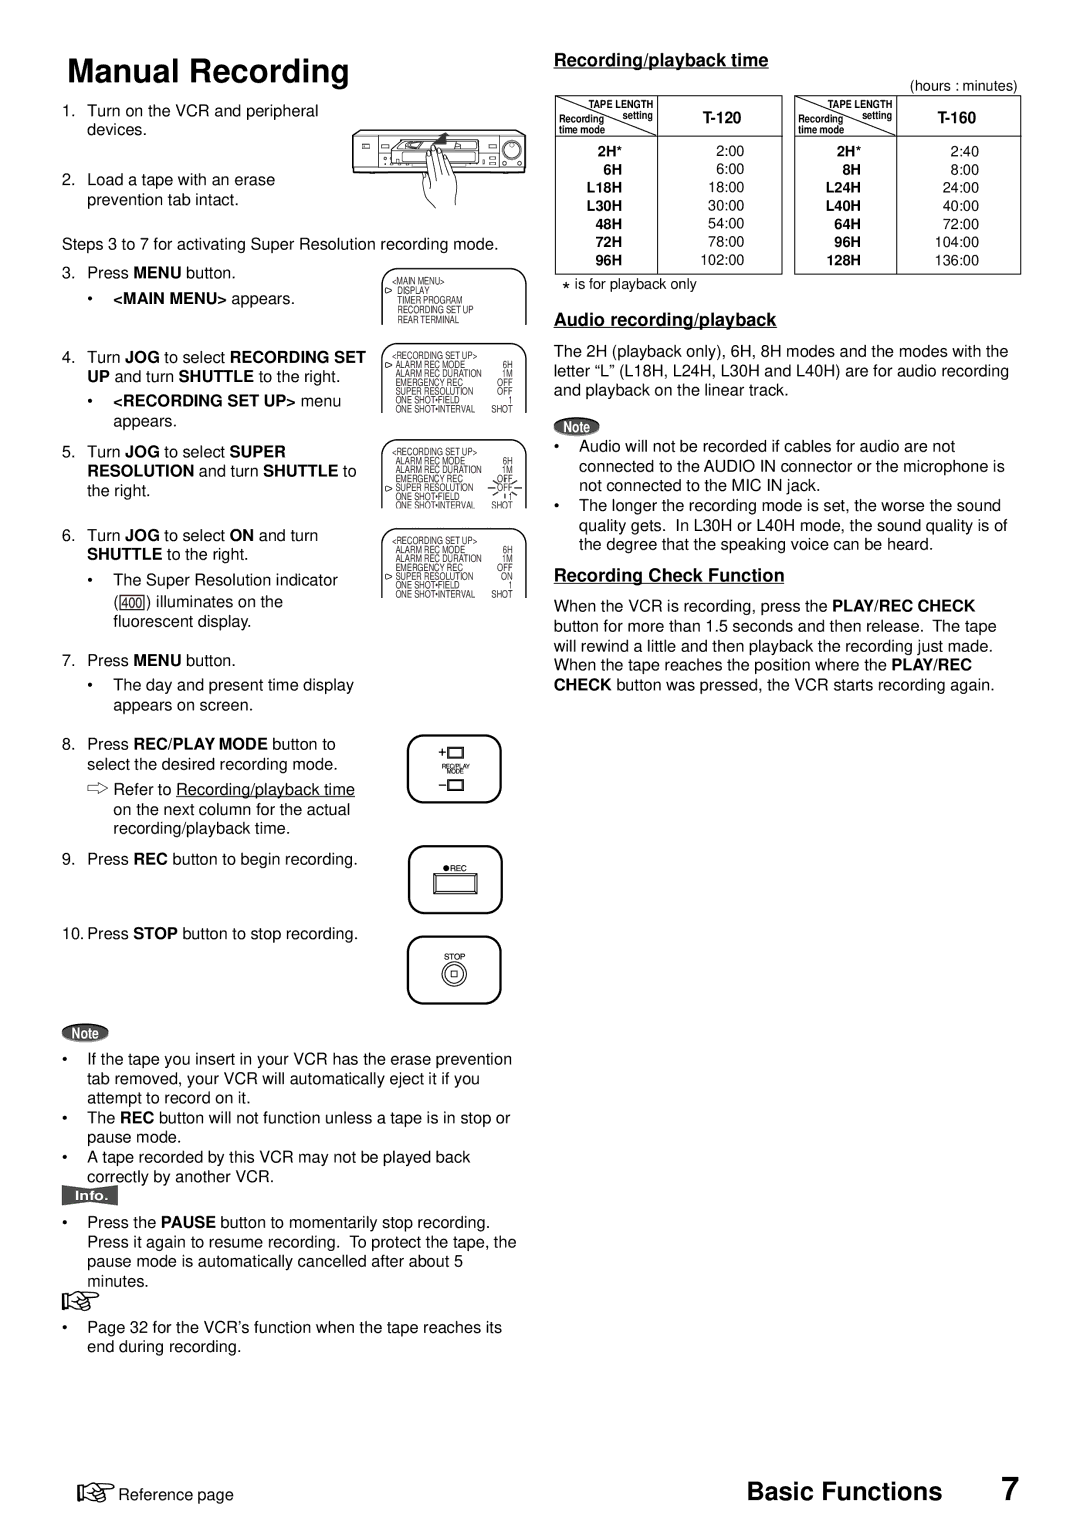
Recording/playback time
|
|
| (hours : minutes) |
TAPE LENGTH | TAPE LENGTH |
| |
Recording setting | Recording setting | ||
time mode |
| time mode |
|
2H* | 2:00 | 2H* | 2:40 |
6H | 6:00 | 8H | 8:00 |
L18H | 18:00 | L24H | 24:00 |
L30H | 30:00 | L40H | 40:00 |
48H | 54:00 | 64H | 72:00 |
72H | 78:00 | 96H | 104:00 |
96H | 102:00 | 128H | 136:00 |
*is for playback only
Audio recording/playback
The 2H (playback only), 6H, 8H modes and the modes with the letter “L” (L18H, L24H, L30H and L40H) are for audio recording and playback on the linear track.
Note
•Audio will not be recorded if cables for audio are not connected to the AUDIO IN connector or the microphone is not connected to the MIC IN jack.
•The longer the recording mode is set, the worse the sound quality gets. In L30H or L40H mode, the sound quality is of the degree that the speaking voice can be heard.
Recording Check Function
When the VCR is recording, press the PLAY/REC CHECK button for more than 1.5 seconds and then release. The tape will rewind a little and then playback the recording just made. When the tape reaches the position where the PLAY/REC CHECK button was pressed, the VCR starts recording again.
![]() Reference page
Reference page
Basic Functions | 7 |