Step 2
Elevation/Azimuth
Strut Assembly
Step 3
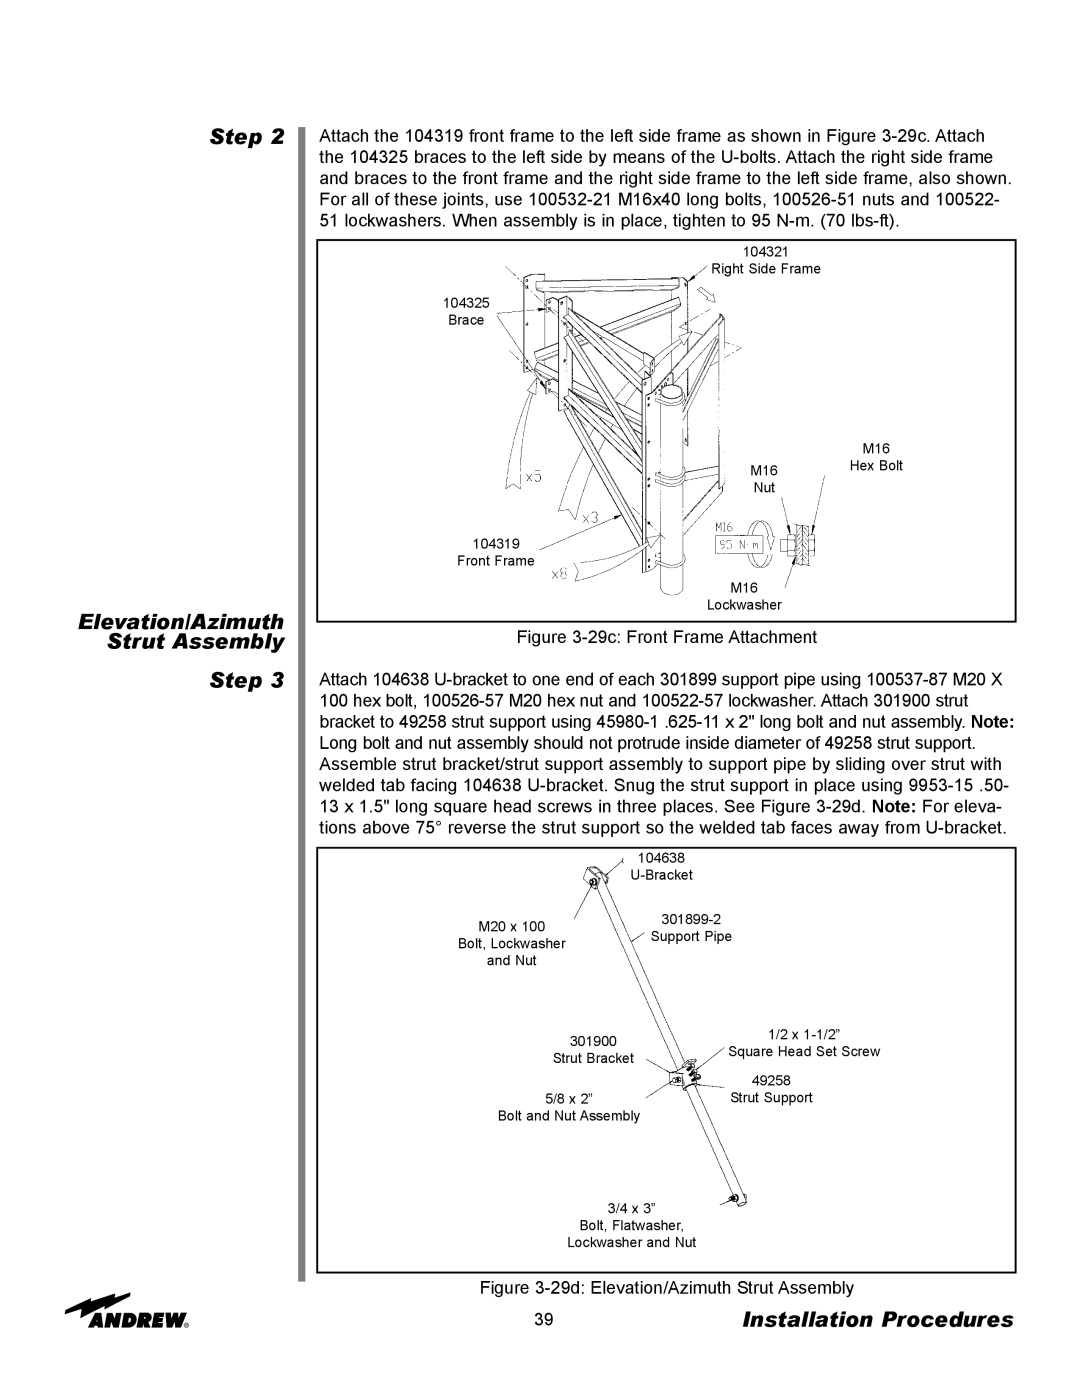
Attach the 104319 front frame to the left side frame as shown in Figure
104321
Right Side Frame
104325
Brace
M16
M16 Hex Bolt
Nut
104319
Front Frame
M16
Lockwasher
Figure 3-29c: Front Frame Attachment
Attach 104638 U-bracket to one end of each 301899 support pipe using 100537-87 M20 X 100 hex bolt, 100526-57 M20 hex nut and 100522-57 lockwasher. Attach 301900 strut bracket to 49258 strut support using 45980-1 .625-11 x 2" long bolt and nut assembly. Note: Long bolt and nut assembly should not protrude inside diameter of 49258 strut support. Assemble strut bracket/strut support assembly to support pipe by sliding over strut with welded tab facing 104638 U-bracket. Snug the strut support in place using 9953-15 .50- 13 x 1.5" long square head screws in three places. See Figure 3-29d. Note: For eleva- tions above 75° reverse the strut support so the welded tab faces away from U-bracket.
104638
|
|
|
|
|
|
| ||
M20 x 100 |
| |||||||
|
| Support Pipe |
|
| ||||
Bolt, Lockwasher |
|
|
|
| ||||
|
|
|
|
|
| |||
and Nut |
|
|
|
|
|
| ||
|
|
|
|
|
|
|
| |
|
|
|
|
|
|
| 1/2 x | |
|
| 301900 |
|
|
| |||
|
|
|
| Square Head Set Screw | ||||
|
| Strut Bracket |
|
| ||||
|
|
|
|
|
|
| ||
|
|
|
|
|
|
| ||
|
|
|
| 49258 |
| |||
|
|
|
|
| Strut Support |
| ||
|
| 5/8 x 2” |
| |||||
| Bolt and Nut Assembly |
|
|
|
|
| ||
3/4 x 3”
Bolt, Flatwasher,
Lockwasher and Nut
Figure 3-29d: Elevation/Azimuth Strut Assembly
39 | Installation Procedures |
