Manuals
/
Andrew
/
Home Audio
/
Stereo System
Andrew
3.7-Meter Earth Station Antenna
manual
Pure Noise Signal on Spectrum Analyzer
Models:
3.7-Meter Earth Station Antenna
1
72
86
86
Download
86 pages
40.98 Kb
69
70
71
72
73
74
75
76
Install
Maintenance
Assembly Without a Crane Step
25a Jack Unscrew Procedure
Subreflector Adjustment Step
34a Mounting Ring Placement
Safety
Customer Service Center
Protective Boot Attachment
Page 72
Image 72
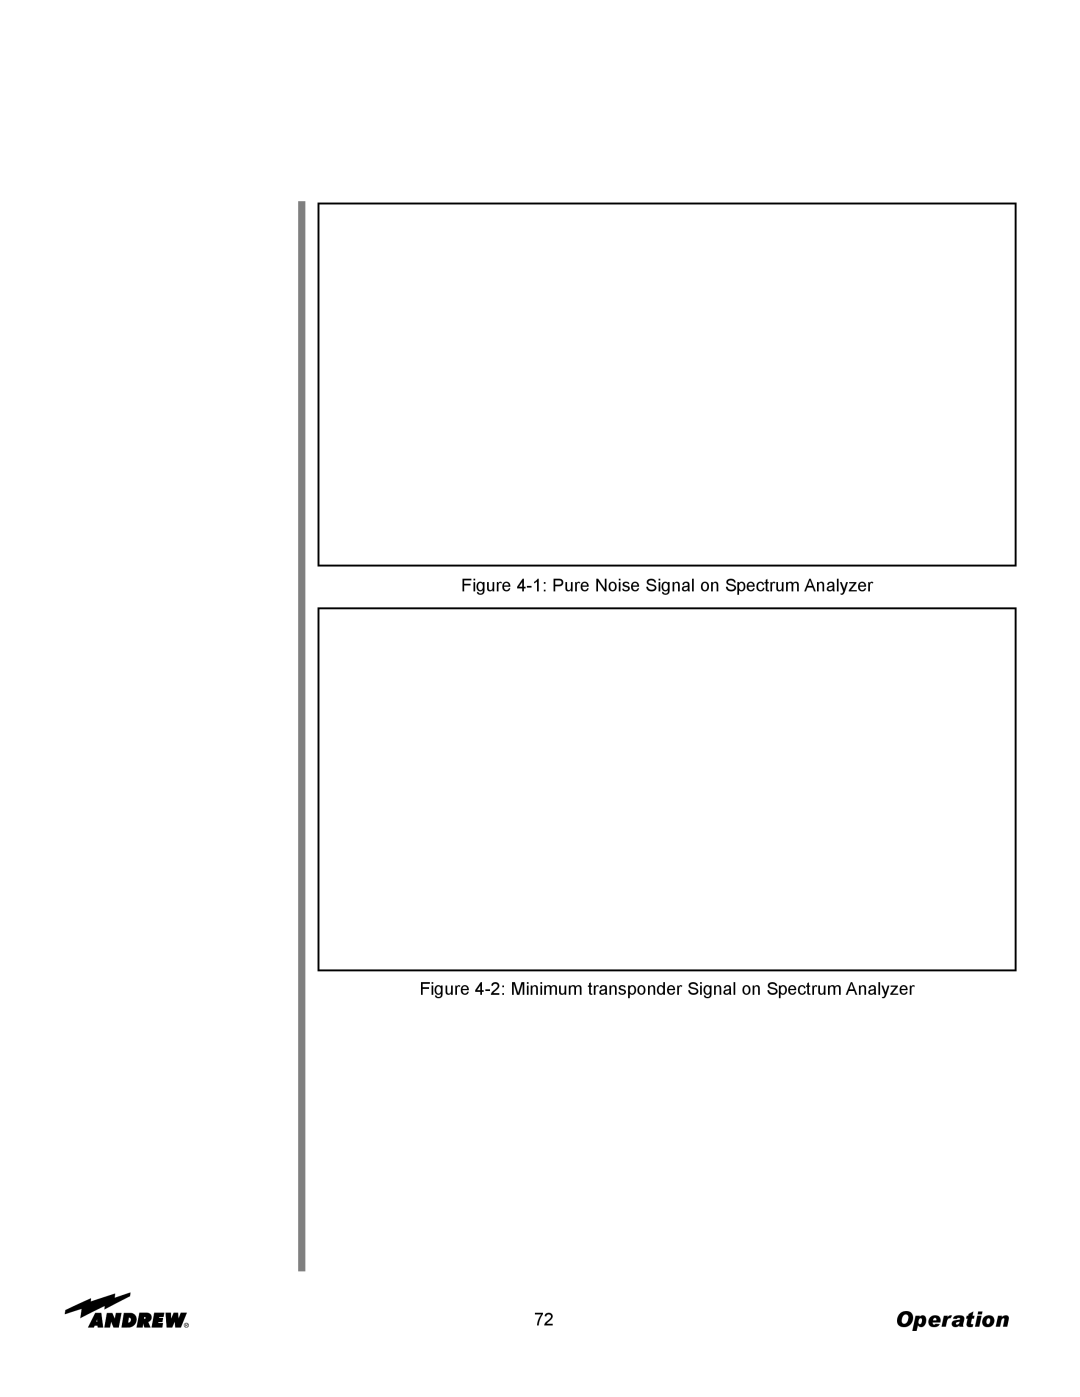
Figure
4-1:
Pure Noise Signal on Spectrum Analyzer
Figure
4-2:
Minimum transponder Signal on Spectrum Analyzer
72
Operation
Page 71
Page 73
Page 72
Image 72
Page 71
Page 73
Contents
Meter ESA
Table of Contents
Meter Earth Station Antenna
Introduction
Customer Service Center
Proprietary Data Information and Assistance Technical
Overview Content
How to Use This Manual
Overview
Getting Started
Recommended Tools
Getting Started
Returning Equipment Step
Getting Started
For Mpjk Types Only Main Reflector Assembly
Enclosure Assembly Reflector-To- Mount Assembly
Subreflector Feed System
Installation Procedures
Overview Foundation Preparation
Tensioning Step
1b A-325 Tensioning For bolts over four diameters
Mount Unpacking Assembly Using a Crane
Step
4b Ground Mount Assembly Base Hardware
Assembly Without a Crane Step
Ground Mount Assembly Alignment with Anchor Bolts
6a Manual Lift
8a Ground Mount Assembly Base Hardware
Motorizable Pedestal Ground Mount Assembly Step
8b Ground Mount Assembly Tiller Arm Hardware
8d Ground Mount Assembly Tiller Arm Hardware
Manual Pedestal Ground Mount Assembly Step
10 Waxing Bolts
Step
13 Elevation and Azimuth Struts
Step
17a Azimuth Strut Assembly Front
17b Azimuth Strut Assembly Rear
20 Bracket-Support Plates Top View
21a Elevation Strut Bracket
Manual Actuator Assembly Step
22a Manual Actuator Assembly
23 Azimuth Pivot Bracket Assembly
25a Jack Unscrew Procedure
26 Protective Boot Attachment
28a Elevation Jack
Step
Embedded Pipe Ground Mount Assembly Step
29b Left Side Frame Attachment
Step Elevation/Azimuth Strut Assembly
29d Elevation/Azimuth Strut Assembly
29f Elevation Axis Weldment Attachment
29g Azimuth Strut/Pointer Attachment
29i Fine Azimuth Adjustment Attachment
Reflector Unpacking Step
30a Domestic Pack
30b Export Pack
Step Assembly
31 Reflector Seam Alignment
32 Seam Bolt Insertions
Very Important
33c Alignment Bolt Insertions
34a Mounting Ring Placement
35a Mounting and Center Rings -35b Mounting and Center Rings
Alignment Test Step
38a Enclosure Final Assembly
Enclosure Pedestal Mount Only Step
39a Enclosure Hardware
Step
Reflector-to-Mount Assembly Using a Crane Step
43 Safety Rope Tag Lines
44b Crane Lift
Without a Crane Step
46 Reflector to Mount
48 Enclosure Bracket Alignment
Step
50a Reflector to Mount
Reflector-to-Mount Assembly Embedded Pipe Ground Mount Step
52a Subreflector Strut Assembly
Subreflector Step
53a Subreflector Assembly
53c Subreflector Assembly
54a Subreflector Attachment
Subreflector Struts Embedded Pipe Ground Mount Assembly Step
Subreflector Adjustment Step
Step
Step Feed System
Overview Acquiring a Satellite Step
Operation
Pure Noise Signal on Spectrum Analyzer
Step
Polarization at 45 degrees from Optimum Setting
Maximizing Odd Transponders
Operation
Subreflector Adjustment
Preventive Maintenance
Overview General Cleaning Electrical Parts
Preventive Maintenance
Antenna
Preventive Maintenance
Drive System Voltage Current Checks Step
Step Pedestal Mount Bearing Pad Adjustment
Preventive Maintenance
Jackscrews/Motors Gear Motor/Housing Fill Drain Requirements
Service Lube Quantity Andrew
Top
Page
Image
Contents