Installing Ultra ATA Drives
Your Macintosh can accommodate two internal
The drive that came with your Macintosh is designated the “master drive” (sometimes called “drive 0”). The ATA drive you add as a second drive is called the “slave drive” or “drive 1.”
1Configure your drive as a slave drive by setting the appropriate jumpers. Contact your drive manufacturer or consult the manufacturer’s Web site to determine the correct settings.
Note: Your Macintosh doesn’t work with Ultra ATA devices set for cable select mode.
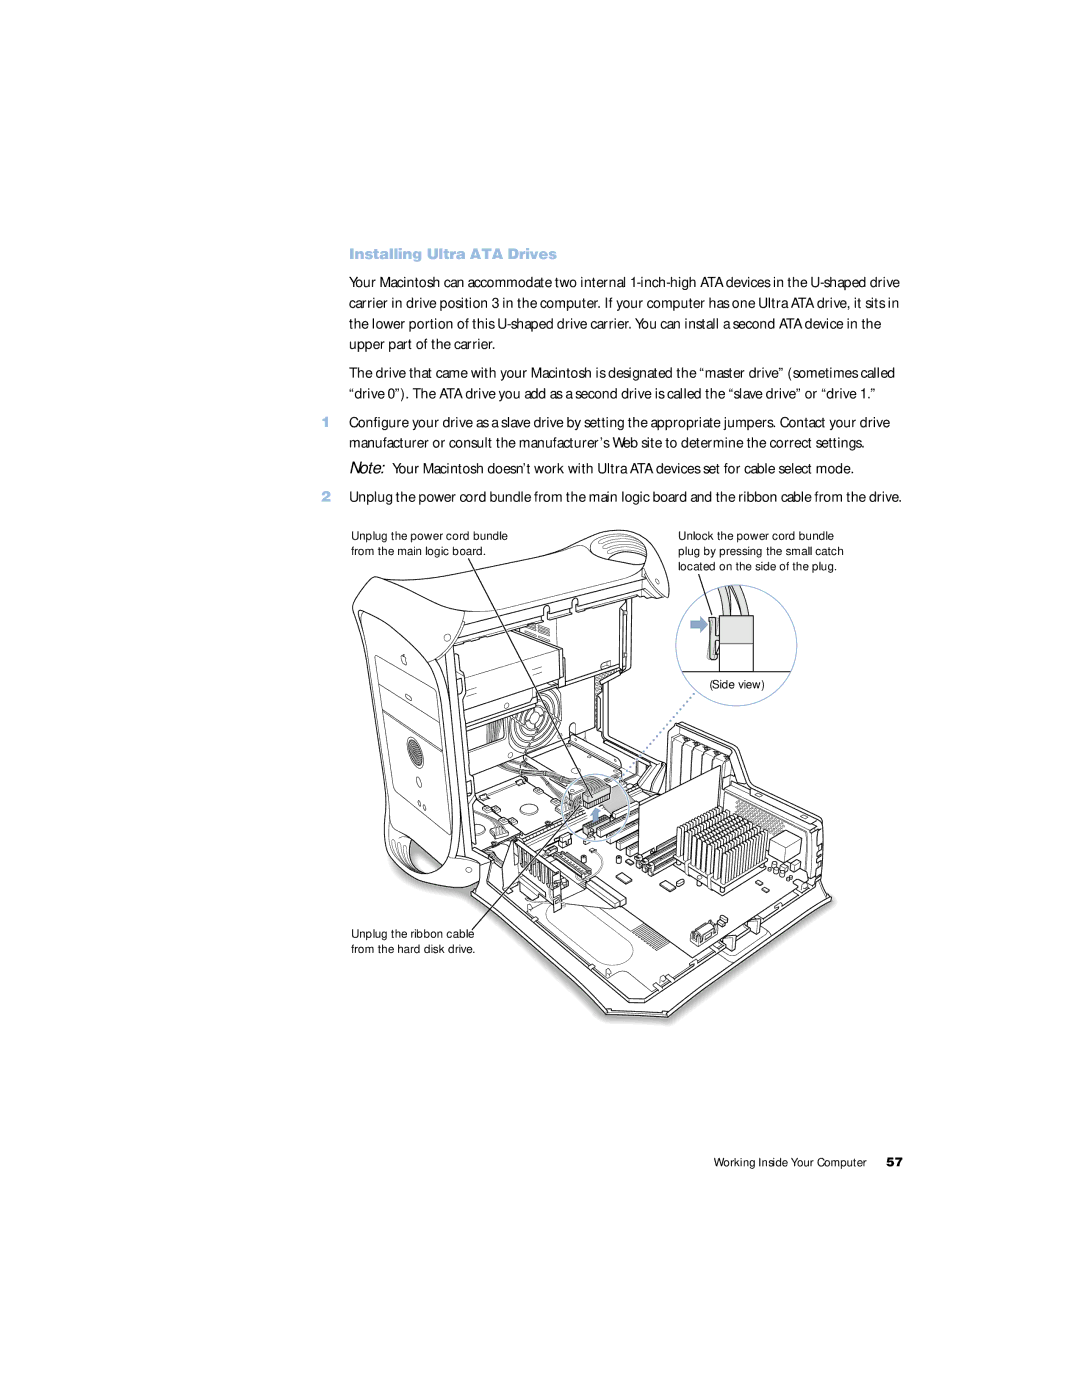
2Unplug the power cord bundle from the main logic board and the ribbon cable from the drive.
Unplug the power cord bundle from the main logic board.
Unlock the power cord bundle plug by pressing the small catch located on the side of the plug.
(Side view)
Unplug the ribbon cable from the hard disk drive.
Working Inside Your Computer | 57 |