Chapter 2 | Installation |
Rack Mounting
P110 switches slot into a standard
1.Snap open the ends of the front panel to reveal the fixing holes.
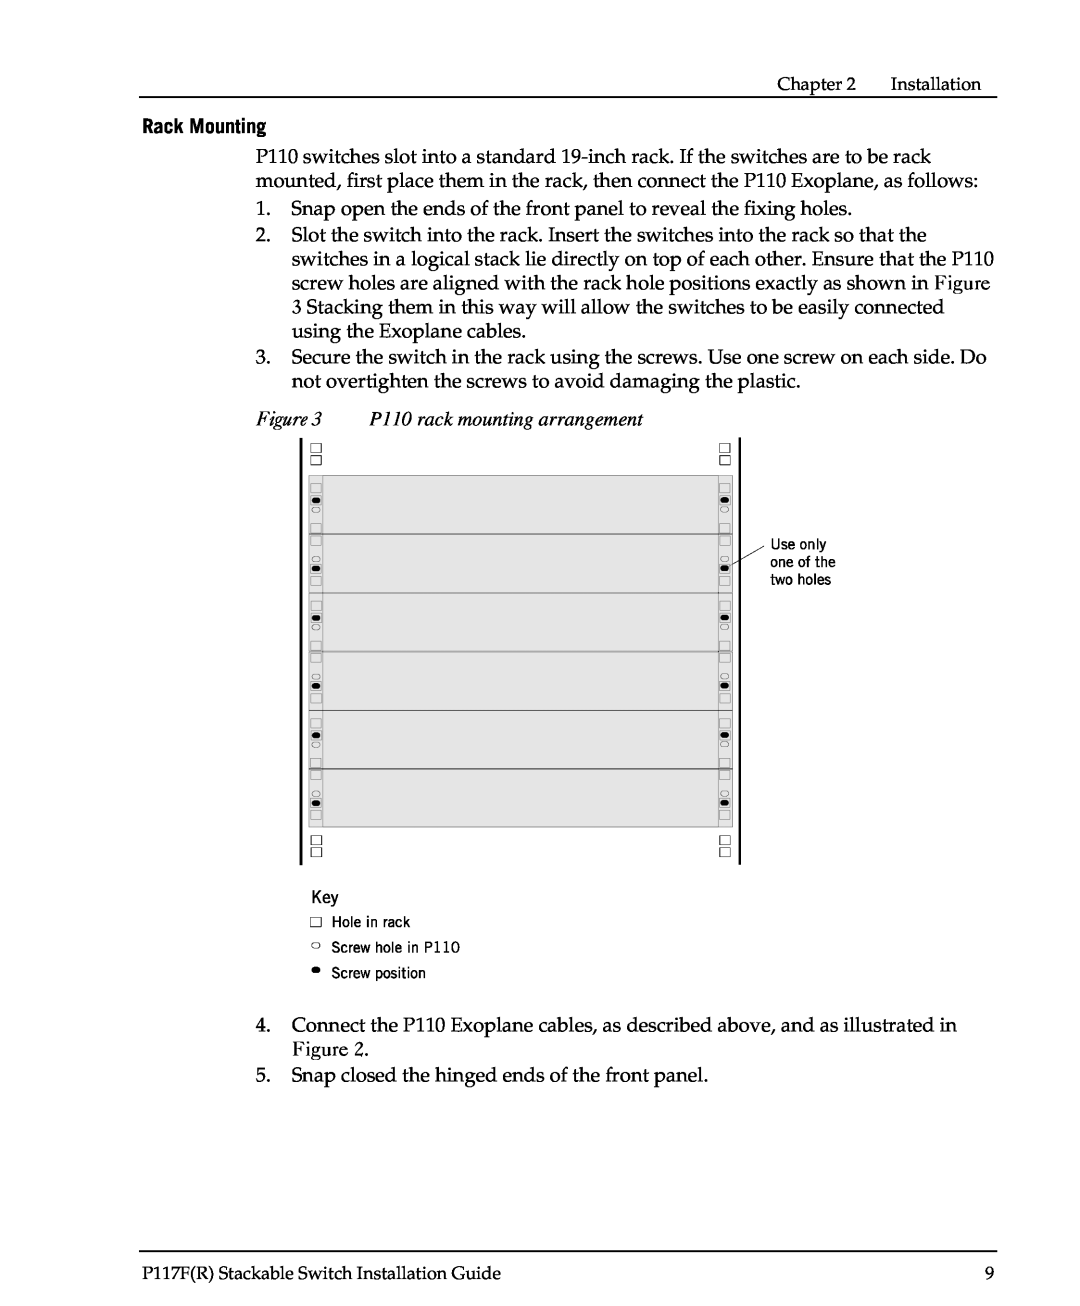
2.Slot the switch into the rack. Insert the switches into the rack so that the switches in a logical stack lie directly on top of each other. Ensure that the P110 screw holes are aligned with the rack hole positions exactly as shown in Figure 3 Stacking them in this way will allow the switches to be easily connected using the Exoplane cables.
3.Secure the switch in the rack using the screws. Use one screw on each side. Do not overtighten the screws to avoid damaging the plastic.
Figure 3 P110 rack mounting arrangement
4.Connect the P110 Exoplane cables, as described above, and as illustrated in Figure 2.
5.Snap closed the hinged ends of the front panel.
P117F(R) Stackable Switch Installation Guide | 9 |