Print Head Replacement
NEVER REMOVE THE PRINT HEAD FROM THE PRINTER EXCEPT FOR
REPLACEMENT.
TURN OFF THE POWER TO THE PRINTER BEFORE STARTING ANY
ELECTRONIC COMPONENT REPLACEMENT.
NOTE: The
1)Review the Printhead Handling Procedure Sheet packaged with each print head to determine if any procedures have changed before beginning this procedure.
2)Remove the media and ink from the machine for easy print head removal.
3)Unplug the cables that connect to the print head. Unplug the cable by firmly, but gently pulling it out.
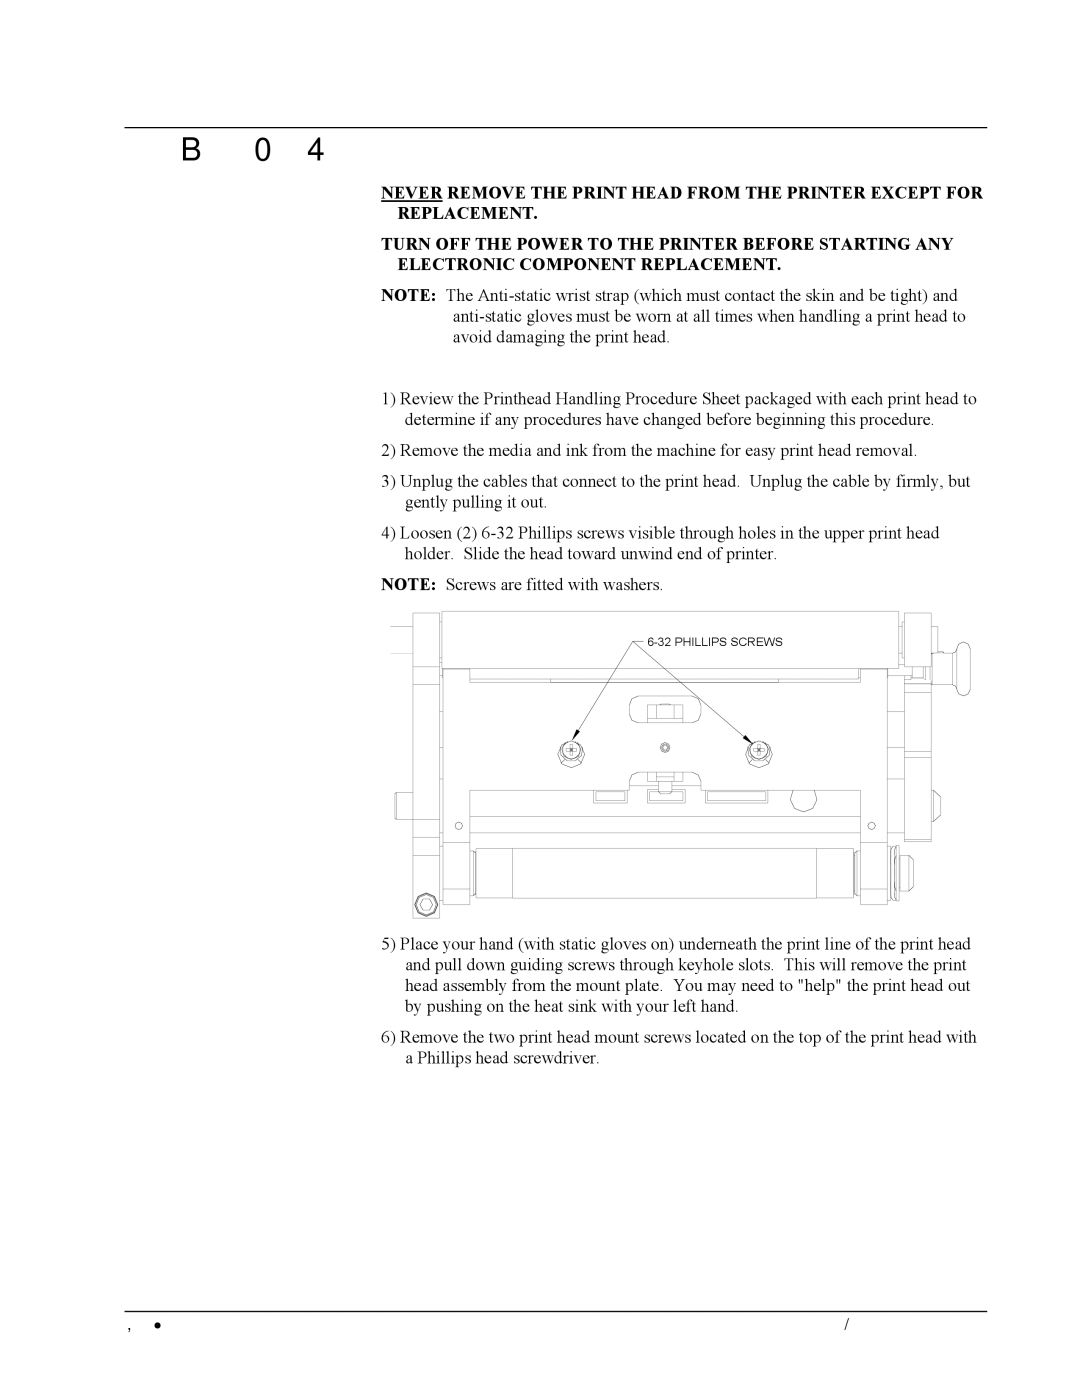
4)Loosen (2)
NOTE: Screws are fitted with washers.
5)Place your hand (with static gloves on) underneath the print line of the print head and pull down guiding screws through keyhole slots. This will remove the print head assembly from the mount plate. You may need to "help" the print head out by pushing on the heat sink with your left hand.
6)Remove the two print head mount screws located on the top of the print head with a Phillips head screwdriver.
36 • Maintenance | User Manual Model 676 LOKPRINT® |
