Preparing for Operation | |
|
|
2 Preparing for Operation
2.1 Connecting the Probe
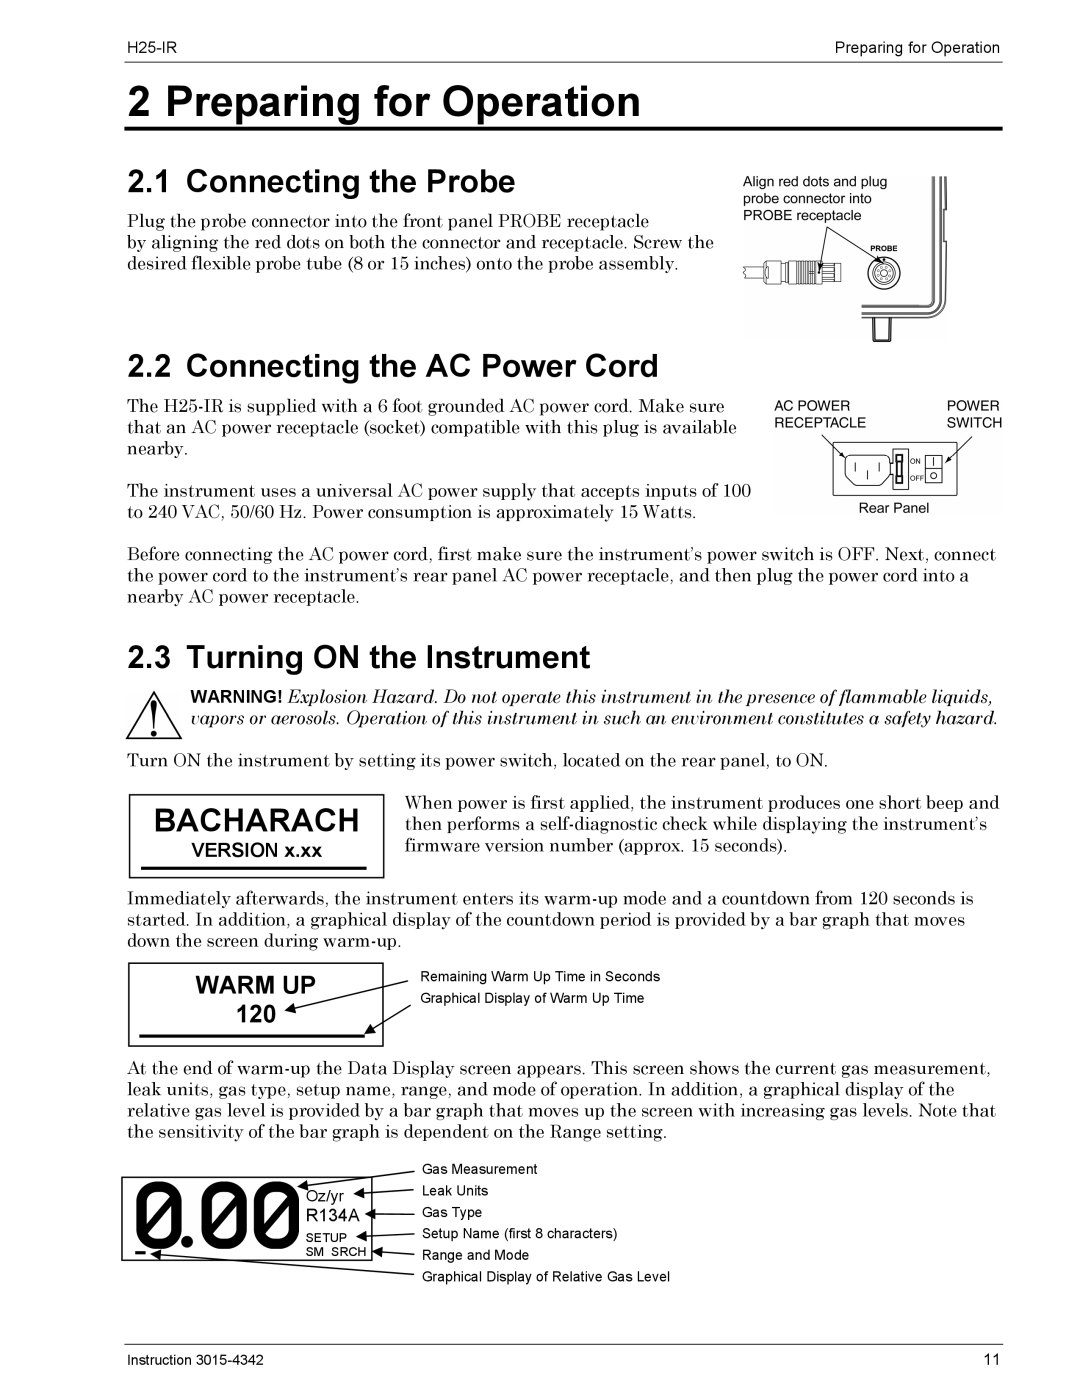
Plug the probe connector into the front panel PROBE receptacle
by aligning the red dots on both the connector and receptacle. Screw the desired flexible probe tube (8 or 15 inches) onto the probe assembly.
2.2 Connecting the AC Power Cord
The
The instrument uses a universal AC power supply that accepts inputs of 100 to 240 VAC, 50/60 Hz. Power consumption is approximately 15 Watts.
Before connecting the AC power cord, first make sure the instrument’s power switch is OFF. Next, connect the power cord to the instrument’s rear panel AC power receptacle, and then plug the power cord into a nearby AC power receptacle.
2.3 Turning ON the Instrument
WARNING! Explosion Hazard. Do not operate this instrument in the presence of flammable liquids, vapors or aerosols. Operation of this instrument in such an environment constitutes a safety hazard.
Turn ON the instrument by setting its power switch, located on the rear panel, to ON.
BACHARACH
VERSION x.xx
When power is first applied, the instrument produces one short beep and then performs a
Immediately afterwards, the instrument enters its
WARM UP |
120 |
Remaining Warm Up Time in Seconds Graphical Display of Warm Up Time
At the end of
Oz/yr ![]()
R134A 
SETUP ![]() SM SRCH
SM SRCH ![]()
Gas Measurement Leak Units
Gas Type
Setup Name (first 8 characters) Range and Mode
Graphical Display of Relative Gas Level
Instruction | 11 |
