Using the Bitronics Software (continued)
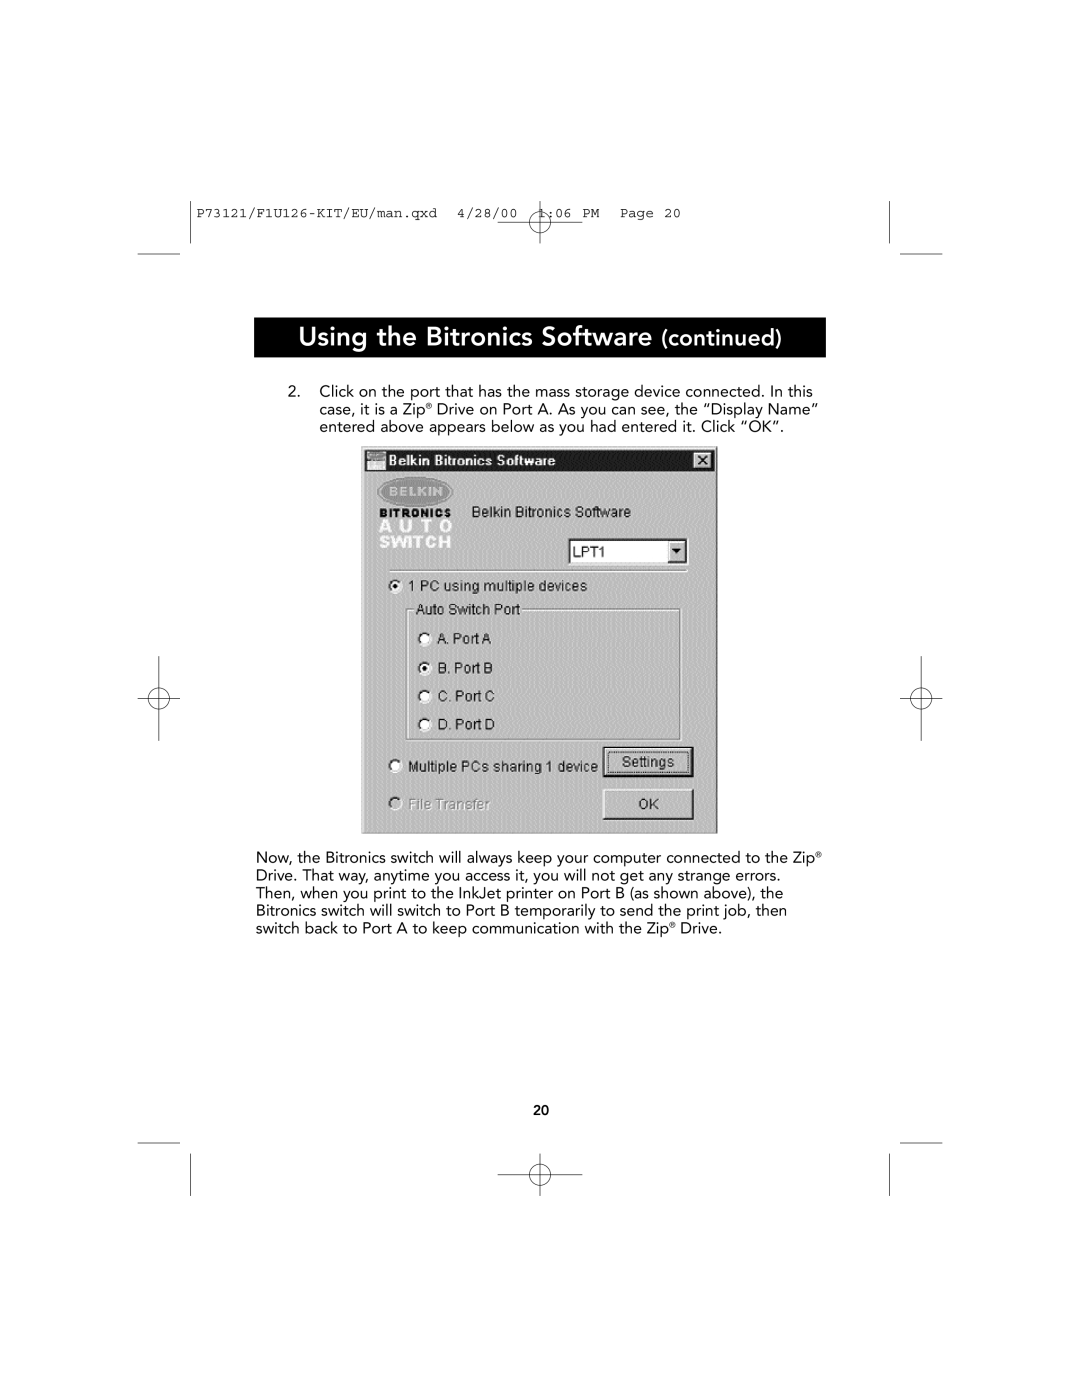
2.Click on the port that has the mass storage device connected. In this case, it is a Zip® Drive on Port A. As you can see, the “Display Name” entered above appears below as you had entered it. Click “OK”.
Now, the Bitronics switch will always keep your computer connected to the Zip® Drive. That way, anytime you access it, you will not get any strange errors. Then, when you print to the InkJet printer on Port B (as shown above), the Bitronics switch will switch to Port B temporarily to send the print job, then switch back to Port A to keep communication with the Zip® Drive.
20