Windows® 95/98/NT (vervolg)
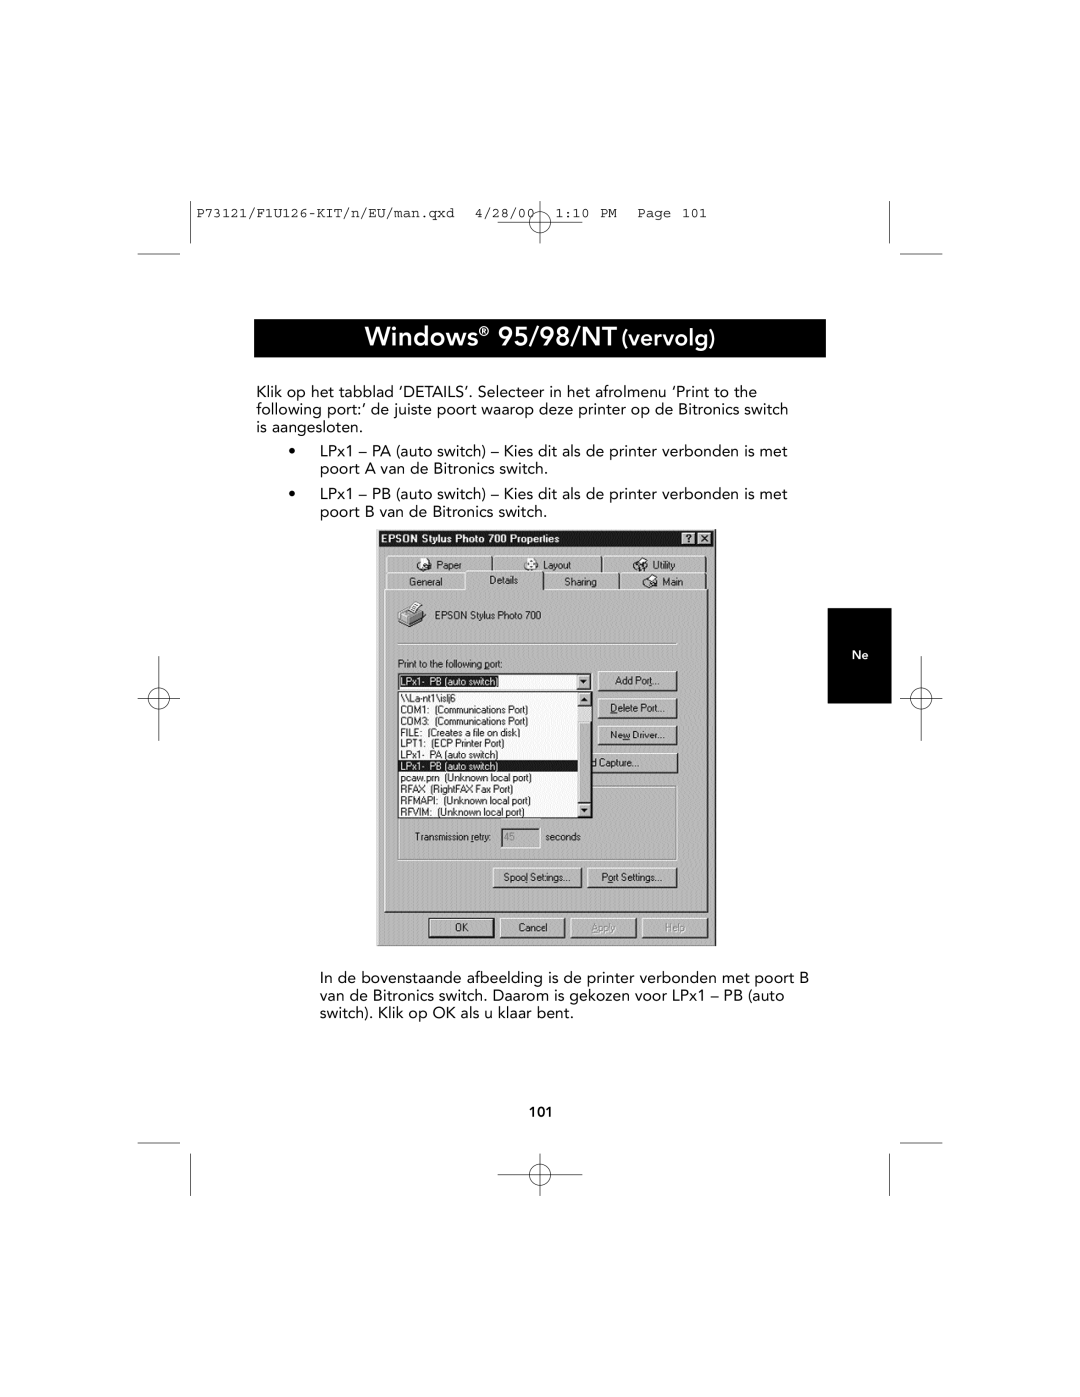
Klik op het tabblad ‘DETAILS’. Selecteer in het afrolmenu ‘Print to the following port:’ de juiste poort waarop deze printer op de Bitronics switch is aangesloten.
•LPx1 – PA (auto switch) – Kies dit als de printer verbonden is met poort A van de Bitronics switch.
•LPx1 – PB (auto switch) – Kies dit als de printer verbonden is met poort B van de Bitronics switch.
Ne
In de bovenstaande afbeelding is de printer verbonden met poort B van de Bitronics switch. Daarom is gekozen voor LPx1 – PB (auto switch). Klik op OK als u klaar bent.
101
