Hardware Installation
Make sure all computers, devices, printers and other components are powered off.
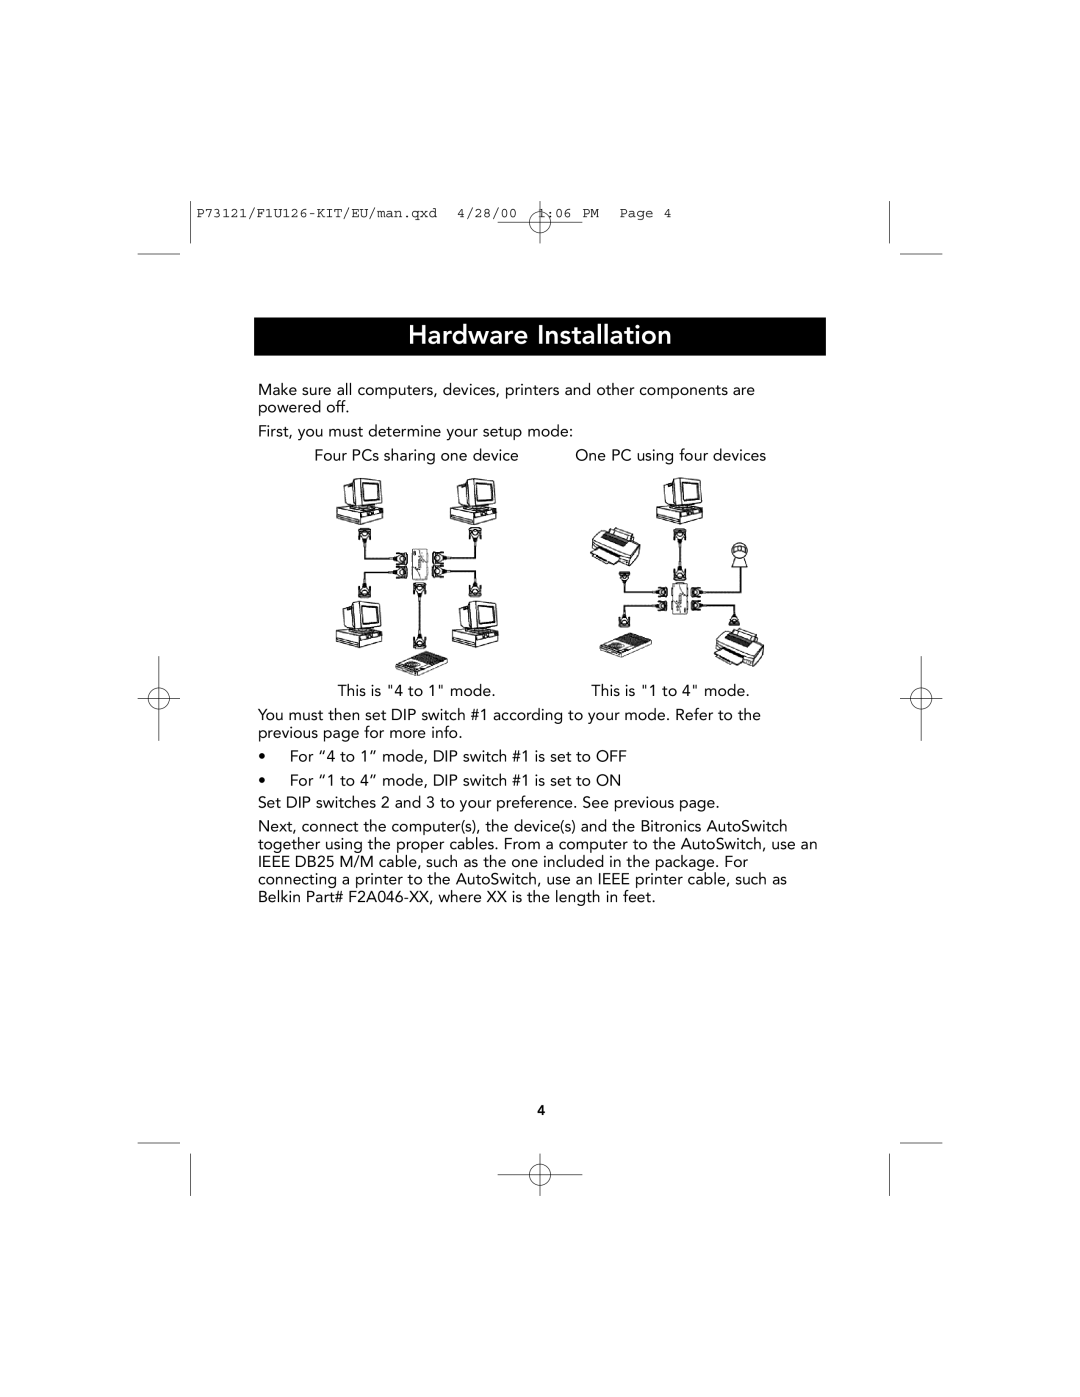
First, you must determine your setup mode:
Four PCs sharing one device | One PC using four devices |
|
|
This is "4 to 1" mode. | This is "1 to 4" mode. |
You must then set DIP switch #1 according to your mode. Refer to the previous page for more info.
•For “4 to 1” mode, DIP switch #1 is set to OFF
•For “1 to 4” mode, DIP switch #1 is set to ON
Set DIP switches 2 and 3 to your preference. See previous page.
Next, connect the computer(s), the device(s) and the Bitronics AutoSwitch together using the proper cables. From a computer to the AutoSwitch, use an IEEE DB25 M/M cable, such as the one included in the package. For connecting a printer to the AutoSwitch, use an IEEE printer cable, such as Belkin Part#
4