![]() BM 2610021316
BM 2610021316
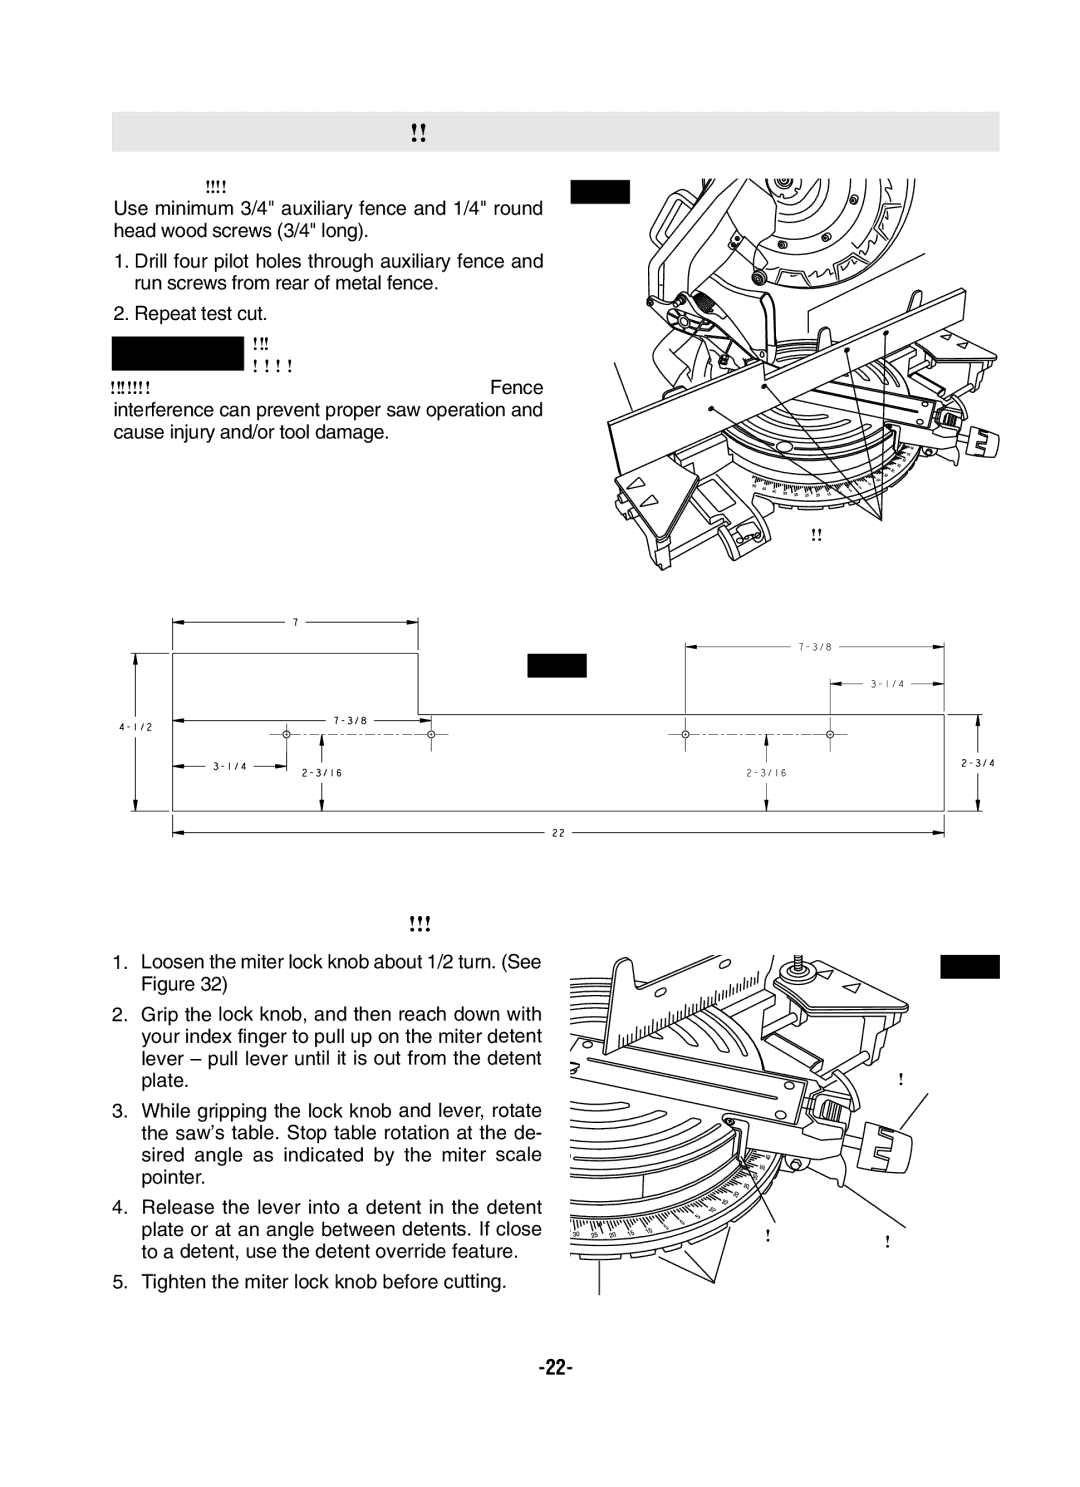
Basic Saw Operations
fasten from back of fence:
Use minimum 3/4" auxiliary fence and 1/4" round head wood screws (3/4" long).
1.Drill four pilot holes through auxiliary fence and run screws from rear of metal fence.
2.Repeat test cut.
WARNING Check for interference between
!auxiliary fence and saw head componenents by performing a dry run. Fence interference can prevent proper saw operation and cause injury and/or tool damage.
FIG. 30
Auxiliary![]()
![]() fence
fence ![]()
Blade
Slot
|
|
|
| flat Head Machine |
|
|
|
| Screws |
|
| 7" |
|
|
|
|
| ||
|
|
| FIG. 31 | |
|
|
|
| |
|
|
| ||
|
|
|
| |
| ||||
|
|
| ||
|
|
| 22" |
|
Using Miter Detent System
1.Loosen the miter lock knob about 1/2 turn. (See Figure 32)
2.Grip the lock knob, and then reach down with your index finger to pull up on the miter detent lever – pull lever until it is out from the detent plate.
3.While gripping the lock knob and lever, rotate the saw’s table. Stop table rotation at the de- sired angle as indicated by the miter scale pointer.
4.Release the lever into a detent in the detent plate or at an angle between detents. If close to a detent, use the detent override feature.
5.Tighten the miter lock knob before cutting.
Detent
plate
FIG. 32
 Miter lock Knob
Miter Scale | Miter | |
Detent lever | ||
pointer | ||
|