![]() BM 2610021316
BM 2610021316
2.Remove the blade wrench and raise the lower guard to its highest point, exposing the forward cover plate screw. (see Figure 3)
FIG. 3 | lower Guard |
forward
Cover plate
Screw
Cover plate
Guard link
3.Loosen the forward cover plate screw with the
4mm portion of the blade wrench approximately four rotations. This will allow the cover plate to rotate 30° upward and expose the arbor shaft and bolt. The guard will hold itself in place while blade changes are made. (see Figure 4)
FIG. 4 | lower Guard |
| |
| Cover plate |
| forward |
| Cover plate |
| Screw |
BladeBolt/
Outer Washer
Removing Blade
1.Press and hold the arbor lock (red button on op- posite side of upper guard – item 35, page 9).
Rotate the blade slowly while pressing the arbor lock until it fully seats into its lock position.
2.Using the 6/4mm hex key, loosen the blade bolt by firmly turning it clockwise. NOTE: This bolt has
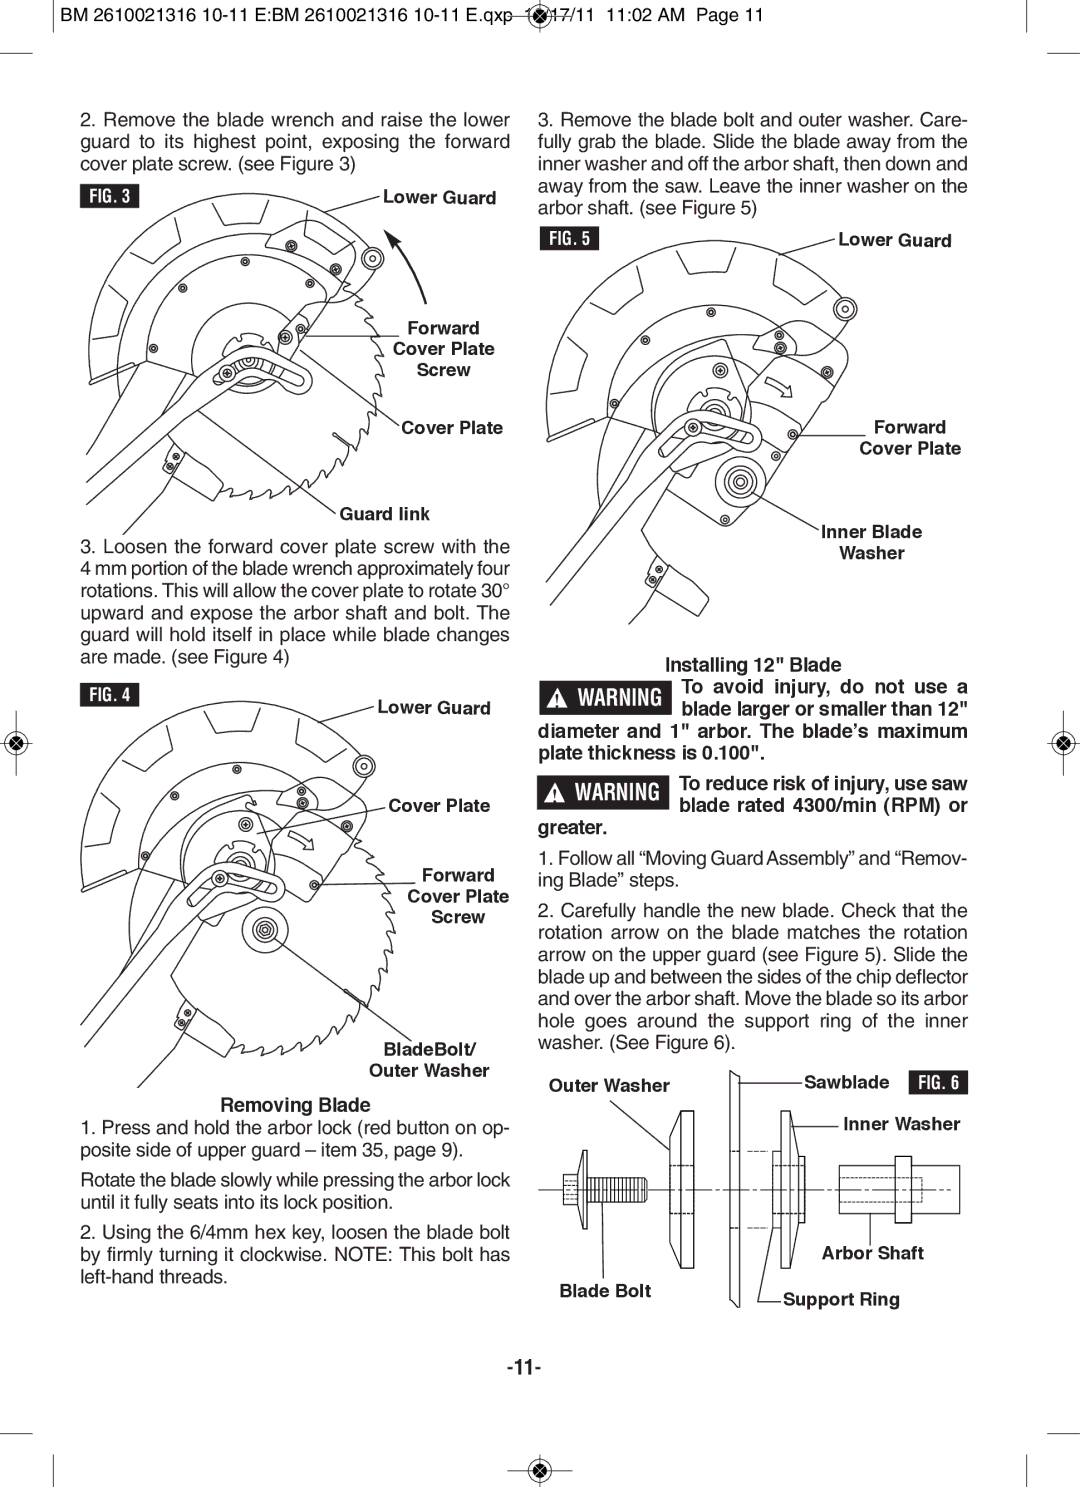
3.Remove the blade bolt and outer washer. Care- fully grab the blade. Slide the blade away from the inner washer and off the arbor shaft, then down and away from the saw. Leave the inner washer on the arbor shaft. (see Figure 5)
FIG. 5 | lower Guard |
forward
Cover plate
Inner Blade
Washer
Installing 12" Blade
!WARNING To avoid injury, do not use a blade larger or smaller than 12"
diameter and 1" arbor. The blade’s maximum plate thickness is 0.100".
! WARNING | To reduce risk of injury, use saw | |
| blade rated 4300/min (RpM) or | |
greater. | ||
|
1.Follow all “Moving Guard Assembly” and “Remov- ing Blade” steps.
2.Carefully handle the new blade. Check that the rotation arrow on the blade matches the rotation arrow on the upper guard (see Figure 5). Slide the blade up and between the sides of the chip deflector and over the arbor shaft. Move the blade so its arbor hole goes around the support ring of the inner washer. (See Figure 6).
Outer Washer |
| Sawblade | FIG. 6 |
|
Inner Washer
| Arbor Shaft |
Blade Bolt | Support Ring |
|