S e t t i n g | u p | t h e | P r o j e c t o r | |||||||||||
|
|
|
|
|
|
|
|
|
|
|
|
|
|
|
|
|
|
|
|
|
|
|
|
|
|
|
|
|
|
|
|
|
|
|
|
|
|
|
|
|
|
|
|
|
|
|
|
|
|
|
|
|
|
|
|
|
|
|
|
|
|
|
|
|
|
|
|
|
|
|
|
|
|
|
|
|
|
|
|
|
|
|
|
|
|
|
|
|
|
|
|
|
|
|
|
|
|
|
|
|
|
|
|
|
|
|
|
|
|
|
|
|
|
|
|
|
|
|
|
|
|
|
|
|
|
|
|
|
|
|
|
|
|
|
|
|
|
|
|
|
|
|
|
|
|
|
|
|
|
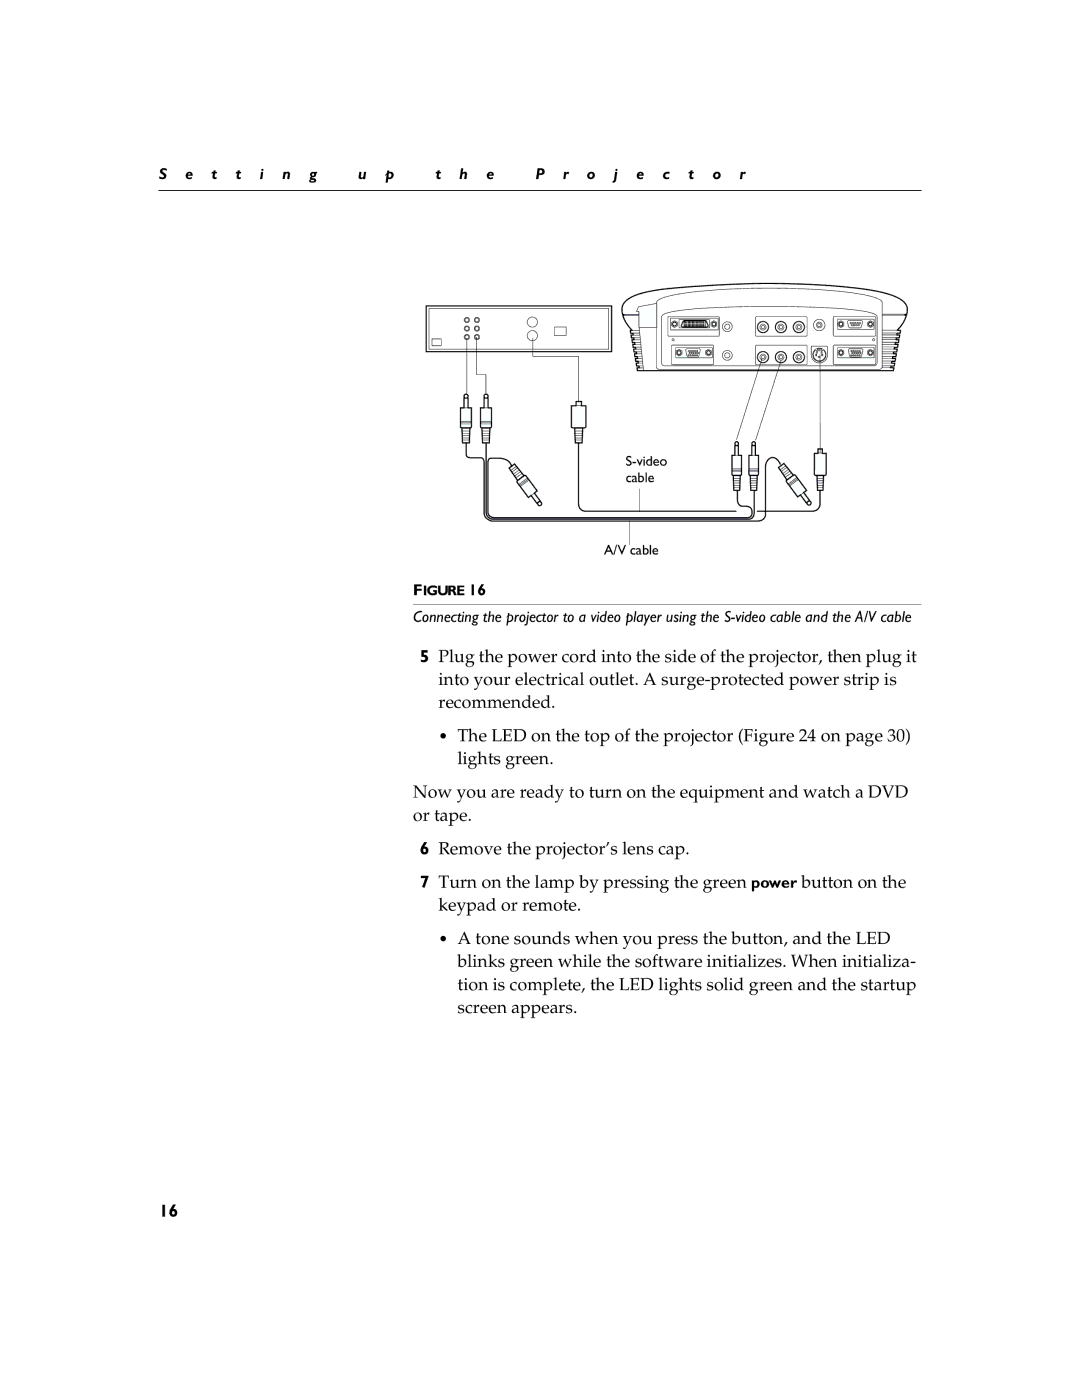
S-video cable
A/V cable
FIGURE 16
Connecting the projector to a video player using the
5Plug the power cord into the side of the projector, then plug it into your electrical outlet. A
•The LED on the top of the projector (Figure 24 on page 30) lights green.
Now you are ready to turn on the equipment and watch a DVD or tape.
6Remove the projector’s lens cap.
7Turn on the lamp by pressing the green power button on the keypad or remote.
•A tone sounds when you press the button, and the LED blinks green while the software initializes. When initializa- tion is complete, the LED lights solid green and the startup screen appears.
16
