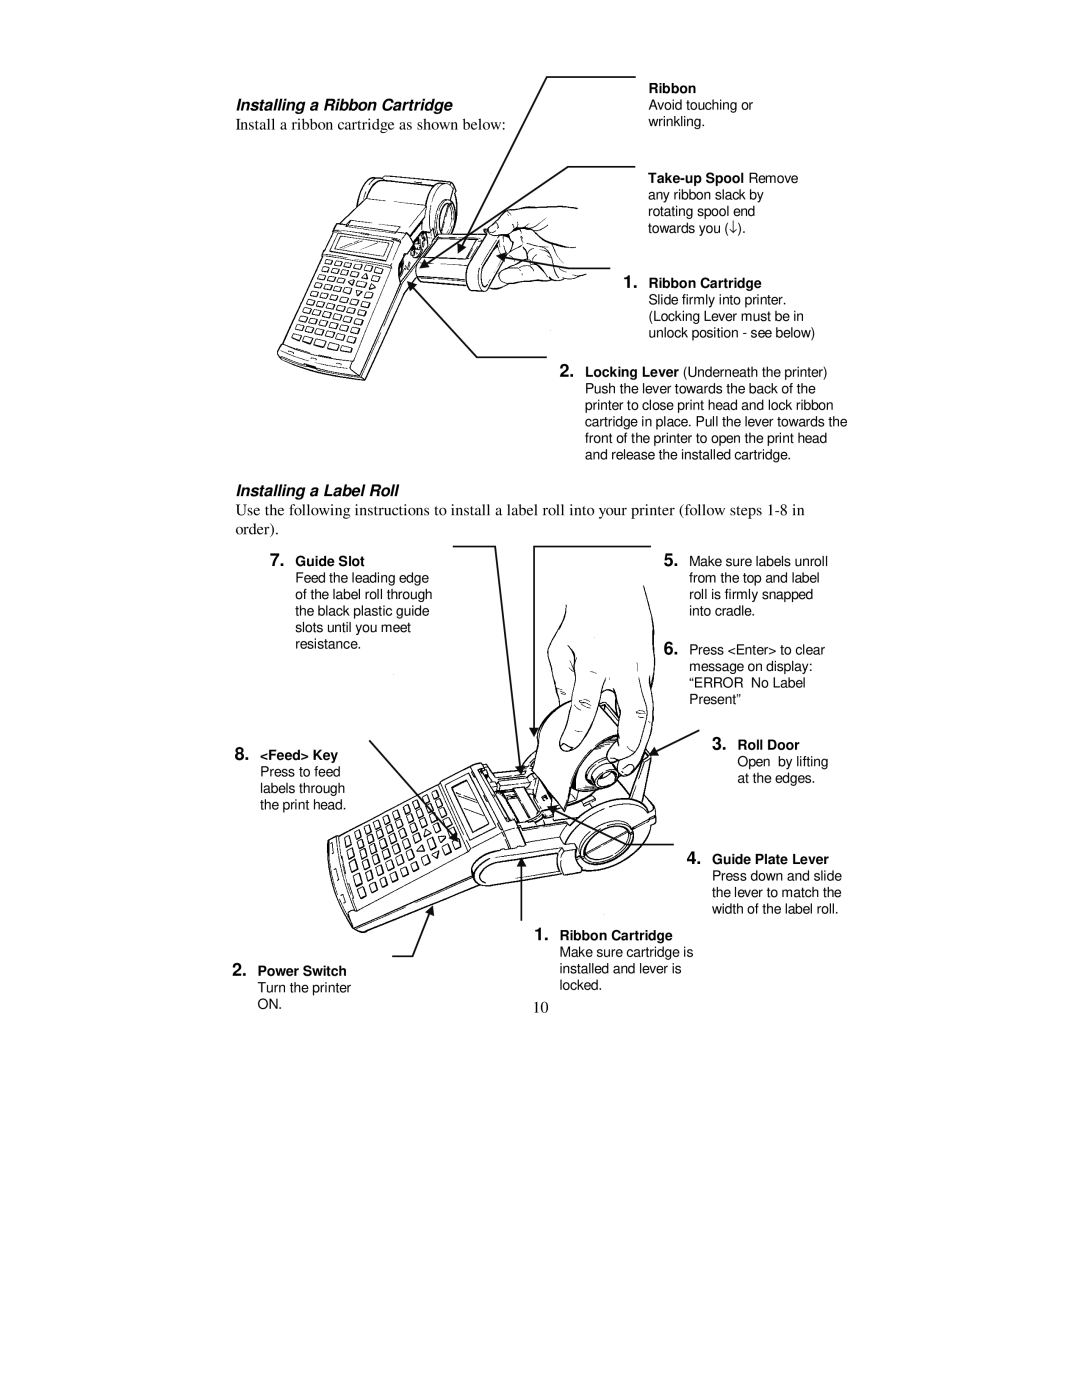
Installing a Ribbon Cartridge
Install a ribbon cartridge as shown below:
Ribbon
Avoid touching or wrinkling.
1.Ribbon Cartridge Slide firmly into printer. (Locking Lever must be in unlock position - see below)
2.Locking Lever (Underneath the printer) Push the lever towards the back of the printer to close print head and lock ribbon cartridge in place. Pull the lever towards the front of the printer to open the print head and release the installed cartridge.
Installing a Label Roll
Use the following instructions to install a label roll into your printer (follow steps
7.Guide Slot
Feed the leading edge of the label roll through the black plastic guide slots until you meet resistance.
8.<Feed> Key Press to feed labels through the print head.
2.Power Switch Turn the printer ON.
5.Make sure labels unroll from the top and label roll is firmly snapped into cradle.
6.Press <Enter> to clear message on display: “ERROR No Label Present”
3. Roll Door Open by lifting at the edges.
4. Guide Plate Lever Press down and slide the lever to match the width of the label roll.
1.Ribbon Cartridge Make sure cartridge is installed and lever is locked.
10