3. Installation
3-8. Installation of the folding group assembly
Before installation
¡Apply air pressure.
¡Turn on power switch q to return the machine to the home position.
¡Turn valve switch w to OFF (lower) side and
o
i
t w
r
!0
![]() @1
@1
e
y
u !4
!3
!2
!1
q
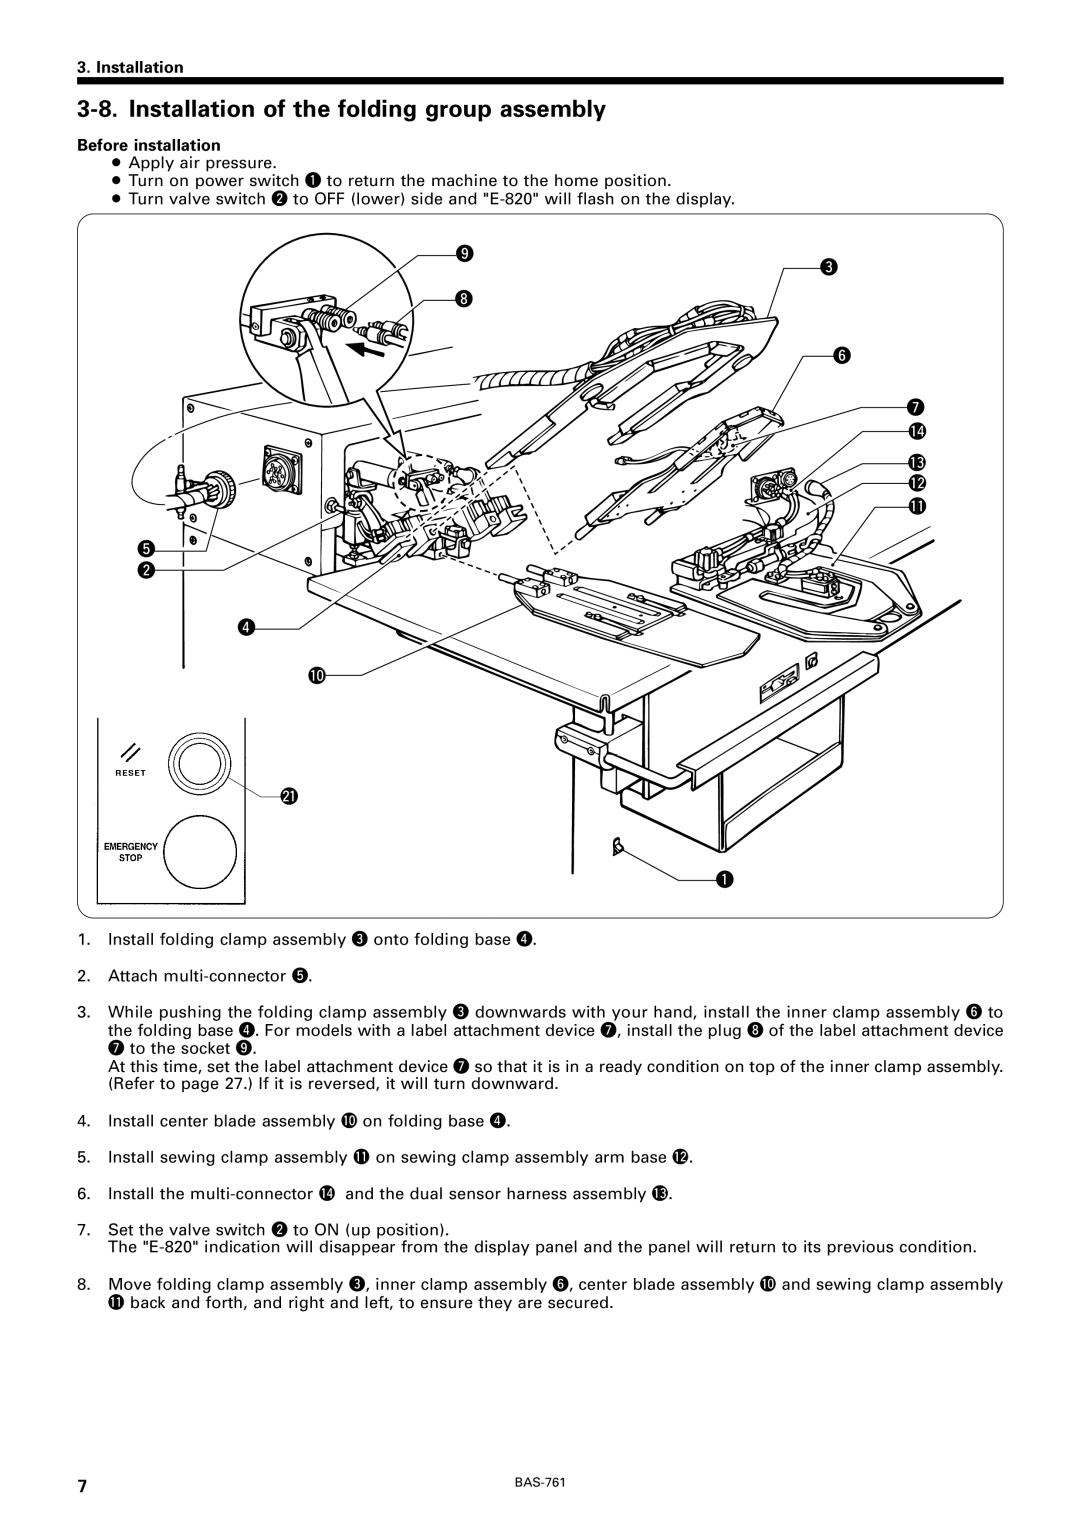
1.Install folding clamp assembly e onto folding base r.
2.Attach
3.While pushing the folding clamp assembly e downwards with your hand, install the inner clamp assembly y to the folding base r. For models with a label attachment device u, install the plug i of the label attachment device u to the socket o.
At this time, set the label attachment device u so that it is in a ready condition on top of the inner clamp assembly. (Refer to page 27.) If it is reversed, it will turn downward.
4.Install center blade assembly !0on folding base r.
5.Install sewing clamp assembly !1on sewing clamp assembly arm base !2.
6.Install the
7.Set the valve switch w to ON (up position).
The
8.Move folding clamp assembly e, inner clamp assembly y, center blade assembly !0and sewing clamp assembly !1back and forth, and right and left, to ensure they are secured.
7 |