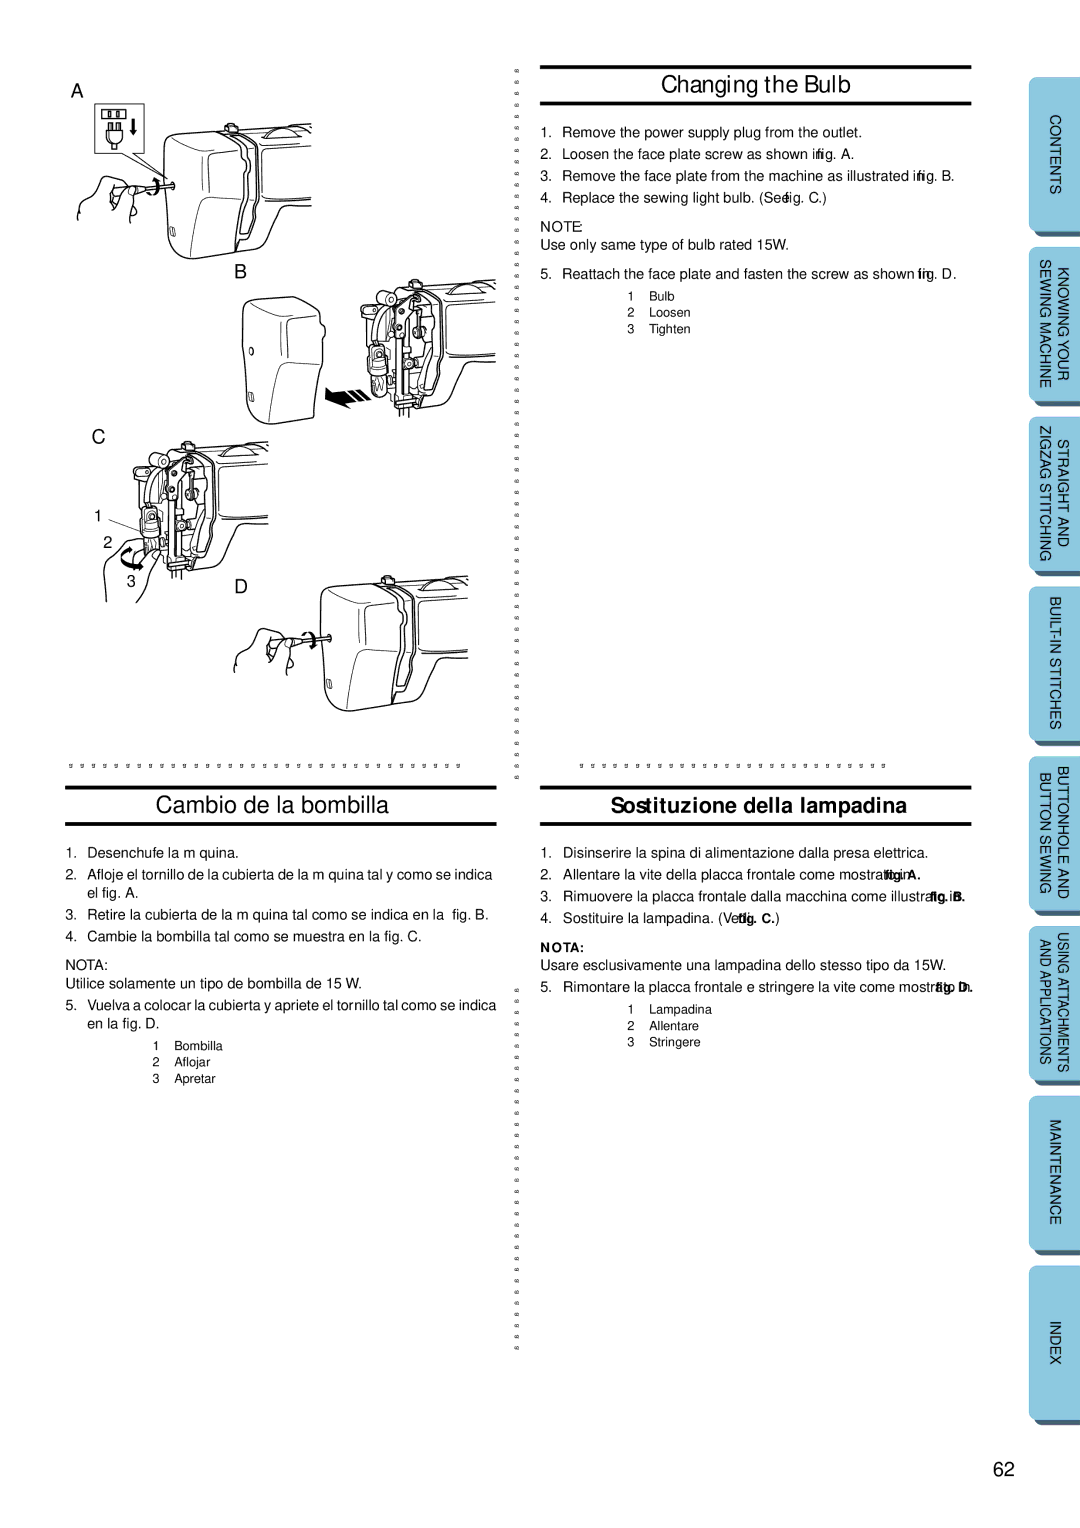
A
B
C
1
2
3 D
Cambio de la bombilla
1.Desenchufe la máquina.
2.Afloje el tornillo de la cubierta de la máquina tal y como se indica el fig. A.
3.Retire la cubierta de la máquina tal como se indica en la fig. B.
4.Cambie la bombilla tal como se muestra en la fig. C.
NOTA:
Utilice solamente un tipo de bombilla de 15 W.
5.Vuelva a colocar la cubierta y apriete el tornillo tal como se indica en la fig. D.
1Bombilla
2 Aflojar
3 Apretar
Changing the Bulb
1.Remove the power supply plug from the outlet.
2.Loosen the face plate screw as shown in fig. A.
3.Remove the face plate from the machine as illustrated in fig. B.
4.Replace the sewing light bulb. (See fig. C.)
NOTE:
Use only same type of bulb rated 15W.
5. Reattach the face plate and fasten the screw as shown in fig. D.
1Bulb
2 Loosen
3 Tighten
Sostituzione della lampadina
1.Disinserire la spina di alimentazione dalla presa elettrica.
2.Allentare la vite della placca frontale come mostrato in fig. A.
3.Rimuovere la placca frontale dalla macchina come illustrato in fig. B.
4.Sostituire la lampadina. (Vedi fig. C.)
NOTA:
Usare esclusivamente una lampadina dello stesso tipo da 15W.
5. Rimontare la placca frontale e stringere la vite come mostrato in fig. D.
1Lampadina
2 Allentare
3 Stringere
CONTENTS | |
SEWING MACHINE | KNOWING YOUR |
ZIGZAG STITCHING | STRAIGHT AND |
BUTTON SEWING | BUTTONHOLE AND |
AND APPLICATIONS | USING ATTACHMENTS |
MAINTENANCE | |
INDEX
62