Blind Hem Stitching
XL5030 | XL5020 | XL5010 | Pattern | Stitch Length | Stitch Width | |||
7 | 7 | – | Blind Hem Stitch |
|
|
| Fixed 5 | |
|
|
| ||||||
|
|
|
|
|
|
|
|
|
10 | – | 7 | Stretch Blind Stitch |
|
| Fixed 3.5 | ||
|
| |||||||
|
|
|
|
|
|
|
|
|
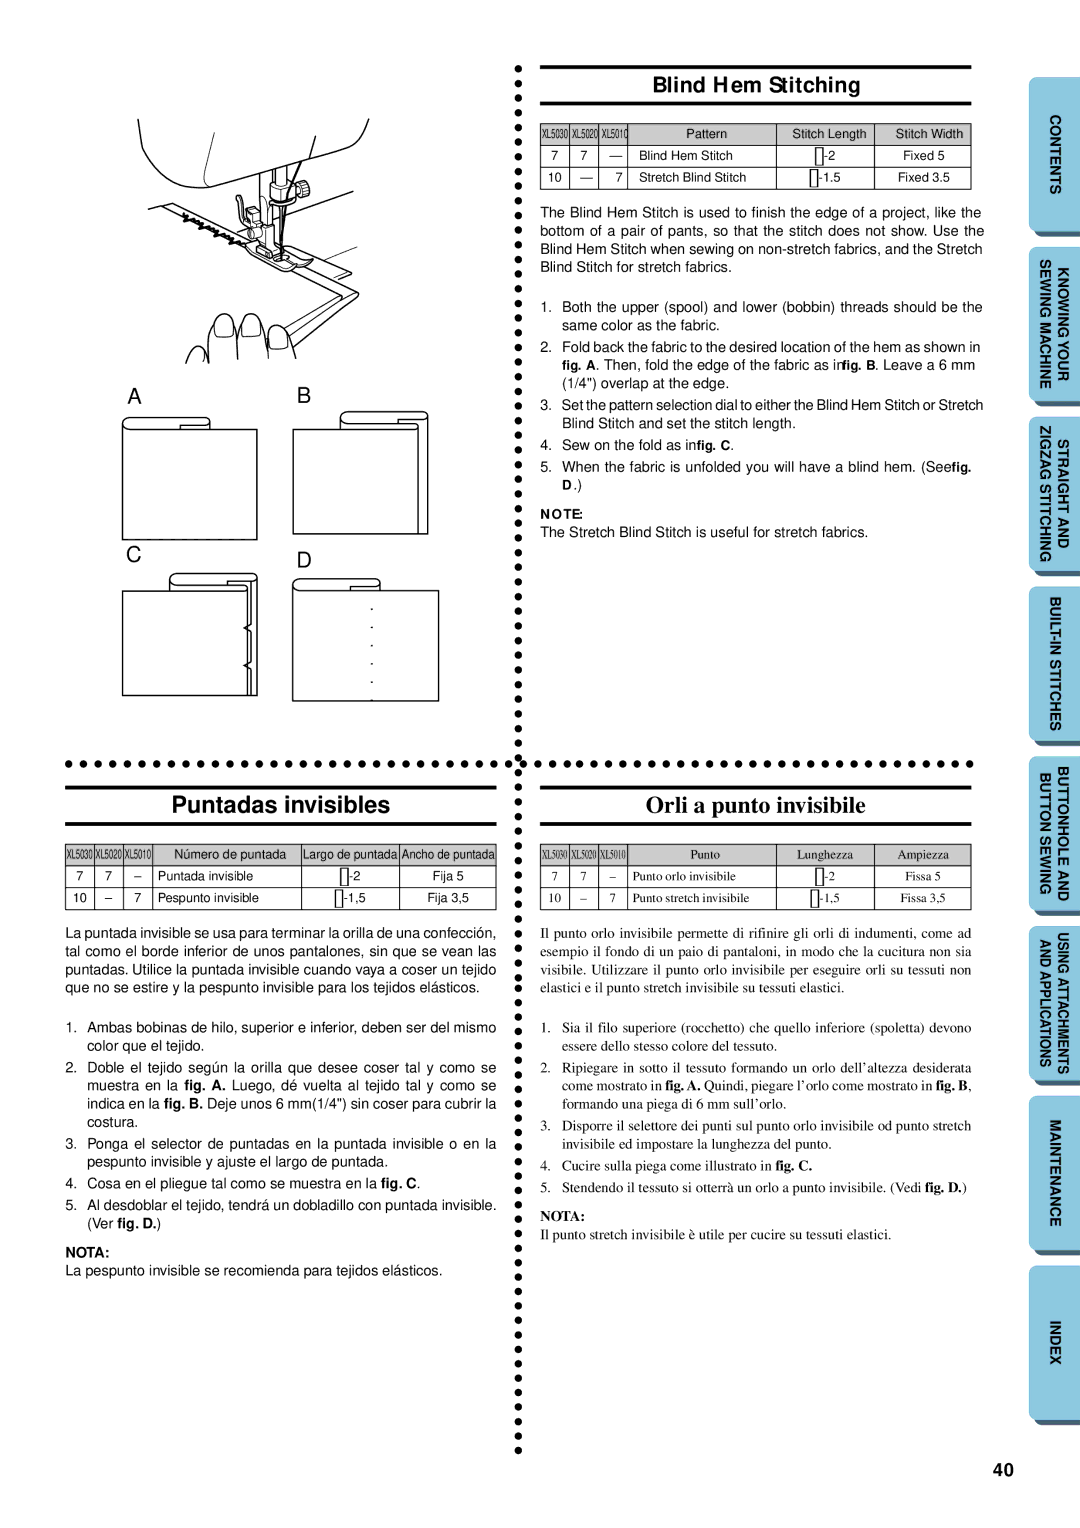
The Blind Hem Stitch is used to finish the edge of a project, like the bottom of a pair of pants, so that the stitch does not show. Use the Blind Hem Stitch when sewing on
|
| 1. | Both the upper (spool) and lower (bobbin) threads should be the | |
|
|
| same color as the fabric. | |
|
| 2. | Fold back the fabric to the desired location of the hem as shown in | |
|
|
| fig. A. Then, fold the edge of the fabric as in fig. B. Leave a 6 mm | |
A | B |
| (1/4") overlap at the edge. | |
3. | Set the pattern selection dial to either the Blind Hem Stitch or Stretch | |||
|
|
Blind Stitch and set the stitch length.
4.Sew on the fold as in fig. C.
5.When the fabric is unfolded you will have a blind hem. (See fig. D.)
NOTE:
The Stretch Blind Stitch is useful for stretch fabrics.
CD
CONTENTS | |
SEWING MACHINE | KNOWING YOUR |
ZIGZAG STITCHING | STRAIGHT AND |
Puntadas invisibles
XL5030 | XL5020 | XL5010 | Número de puntada | Largo de puntada | Ancho de puntada | |||
7 | 7 | – | Puntada invisible |
|
|
| Fija 5 | |
|
|
| ||||||
|
|
|
|
|
|
|
|
|
10 | – | 7 | Pespunto invisible |
|
| Fija 3,5 | ||
|
| |||||||
|
|
|
|
|
|
|
|
|
La puntada invisible se usa para terminar la orilla de una confección, tal como el borde inferior de unos pantalones, sin que se vean las puntadas. Utilice la puntada invisible cuando vaya a coser un tejido que no se estire y la pespunto invisible para los tejidos elásticos.
1.Ambas bobinas de hilo, superior e inferior, deben ser del mismo color que el tejido.
2.Doble el tejido según la orilla que desee coser tal y como se muestra en la fig. A. Luego, dé vuelta al tejido tal y como se indica en la fig. B. Deje unos 6 mm(1/4") sin coser para cubrir la costura.
3.Ponga el selector de puntadas en la puntada invisible o en la pespunto invisible y ajuste el largo de puntada.
4.Cosa en el pliegue tal como se muestra en la fig. C.
5.Al desdoblar el tejido, tendrá un dobladillo con puntada invisible. (Ver fig. D.)
NOTA:
La pespunto invisible se recomienda para tejidos elásticos.
Orli a punto invisibile
XL5030 | XL5020 | XL5010 | Punto | Lunghezza | Ampiezza | |||
7 | 7 | – | Punto orlo invisibile |
|
|
| Fissa 5 | |
|
|
| ||||||
|
|
|
|
|
|
|
|
|
10 | – | 7 | Punto stretch invisibile |
|
| Fissa 3,5 | ||
|
| |||||||
|
|
|
|
|
|
|
|
|
Il punto orlo invisibile permette di rifinire gli orli di indumenti, come ad esempio il fondo di un paio di pantaloni, in modo che la cucitura non sia visibile. Utilizzare il punto orlo invisibile per eseguire orli su tessuti non elastici e il punto stretch invisibile su tessuti elastici.
1.Sia il filo superiore (rocchetto) che quello inferiore (spoletta) devono essere dello stesso colore del tessuto.
2.Ripiegare in sotto il tessuto formando un orlo dell’altezza desiderata come mostrato in fig. A. Quindi, piegare l’orlo come mostrato in fig. B, formando una piega di 6 mm sull’orlo.
3.Disporre il selettore dei punti sul punto orlo invisibile od punto stretch invisibile ed impostare la lunghezza del punto.
4.Cucire sulla piega come illustrato in fig. C.
5.Stendendo il tessuto si otterrà un orlo a punto invisibile. (Vedi fig. D.)
NOTA:
Il punto stretch invisibile è utile per cucire su tessuti elastici.
BUTTON SEWING | BUTTONHOLE AND |
AND APPLICATIONS | USING ATTACHMENTS |
MAINTENANCE | |
INDEX
40