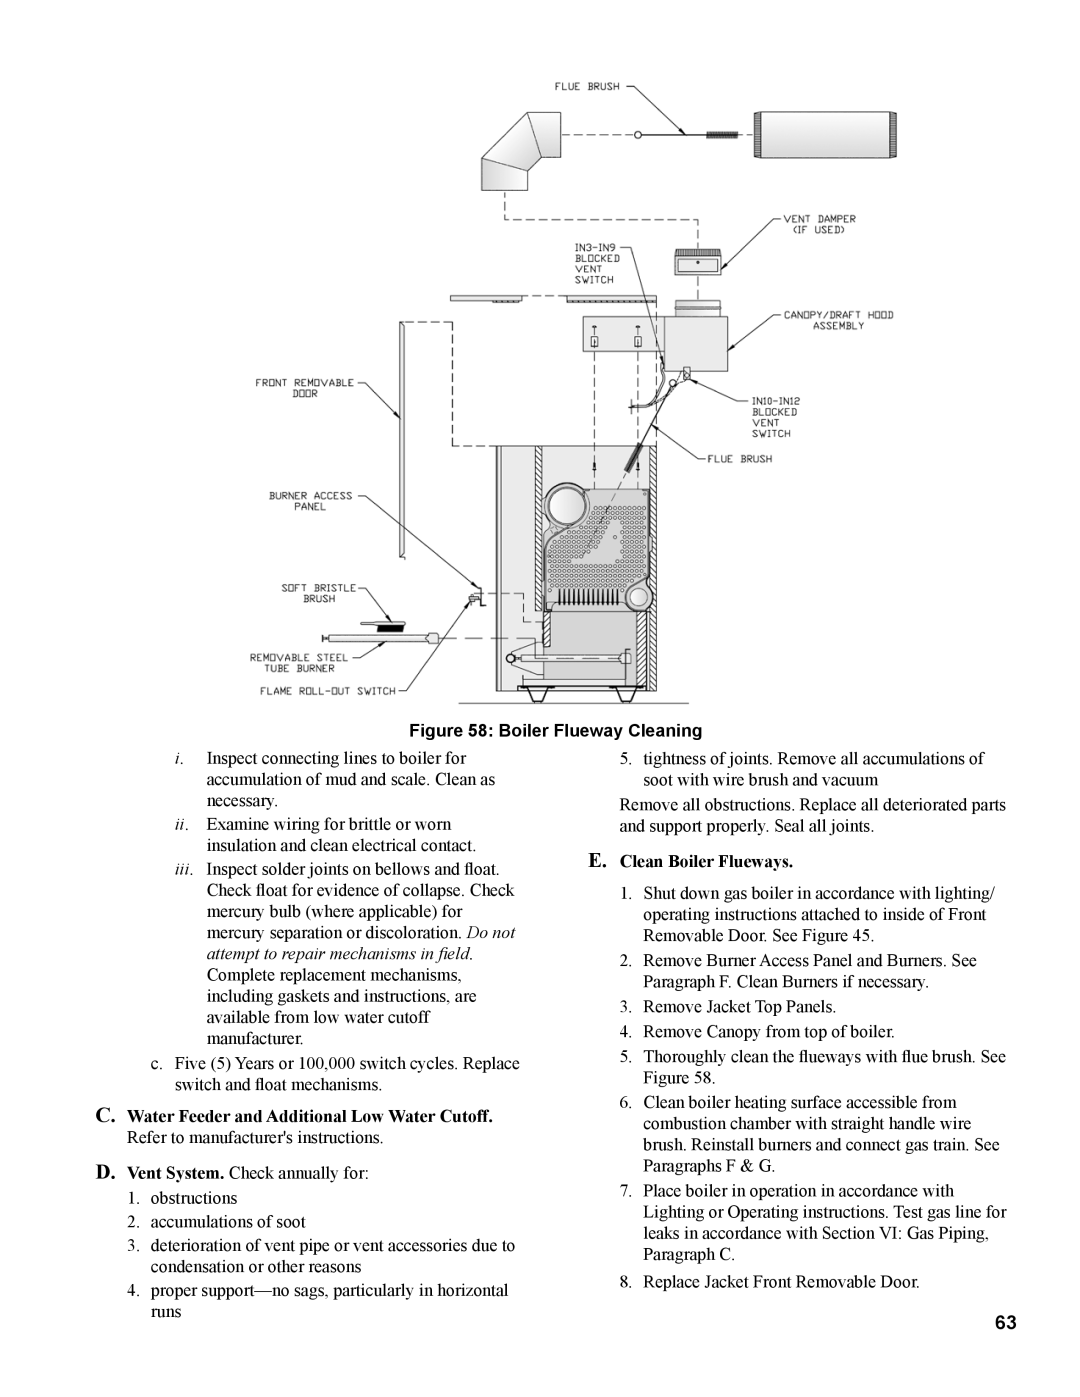
Figure 58: Boiler Flueway Cleaning
i. Inspect connecting lines to boiler for accumulation of mud and scale. Clean as necessary.
ii. Examine wiring for brittle or worn insulation and clean electrical contact.
iii. Inspect solder joints on bellows and float. Check float for evidence of collapse. Check mercury bulb (where applicable) for mercury separation or discoloration. Do not attempt to repair mechanisms in field. Complete replacement mechanisms, including gaskets and instructions, are available from low water cutoff manufacturer.
c.Five (5) Years or 100,000 switch cycles. Replace switch and float mechanisms.
C.Water Feeder and Additional Low Water Cutoff. Refer to manufacturer's instructions.
D.Vent System. Check annually for:
1.obstructions
2.accumulations of soot
3.deterioration of vent pipe or vent accessories due to condensation or other reasons
4.proper
5.tightness of joints. Remove all accumulations of soot with wire brush and vacuum
Remove all obstructions. Replace all deteriorated parts and support properly. Seal all joints.
E.Clean Boiler Flueways.
1.Shut down gas boiler in accordance with lighting/ operating instructions attached to inside of Front Removable Door. See Figure 45.
2.Remove Burner Access Panel and Burners. See Paragraph F. Clean Burners if necessary.
3.Remove Jacket Top Panels.
4.Remove Canopy from top of boiler.
5.Thoroughly clean the flueways with flue brush. See
Figure 58.
6.Clean boiler heating surface accessible from combustion chamber with straight handle wire brush. Reinstall burners and connect gas train. See Paragraphs F & G.
7.Place boiler in operation in accordance with Lighting or Operating instructions. Test gas line for leaks in accordance with Section VI: Gas Piping, Paragraph C.
8.Replace Jacket Front Removable Door.
63
