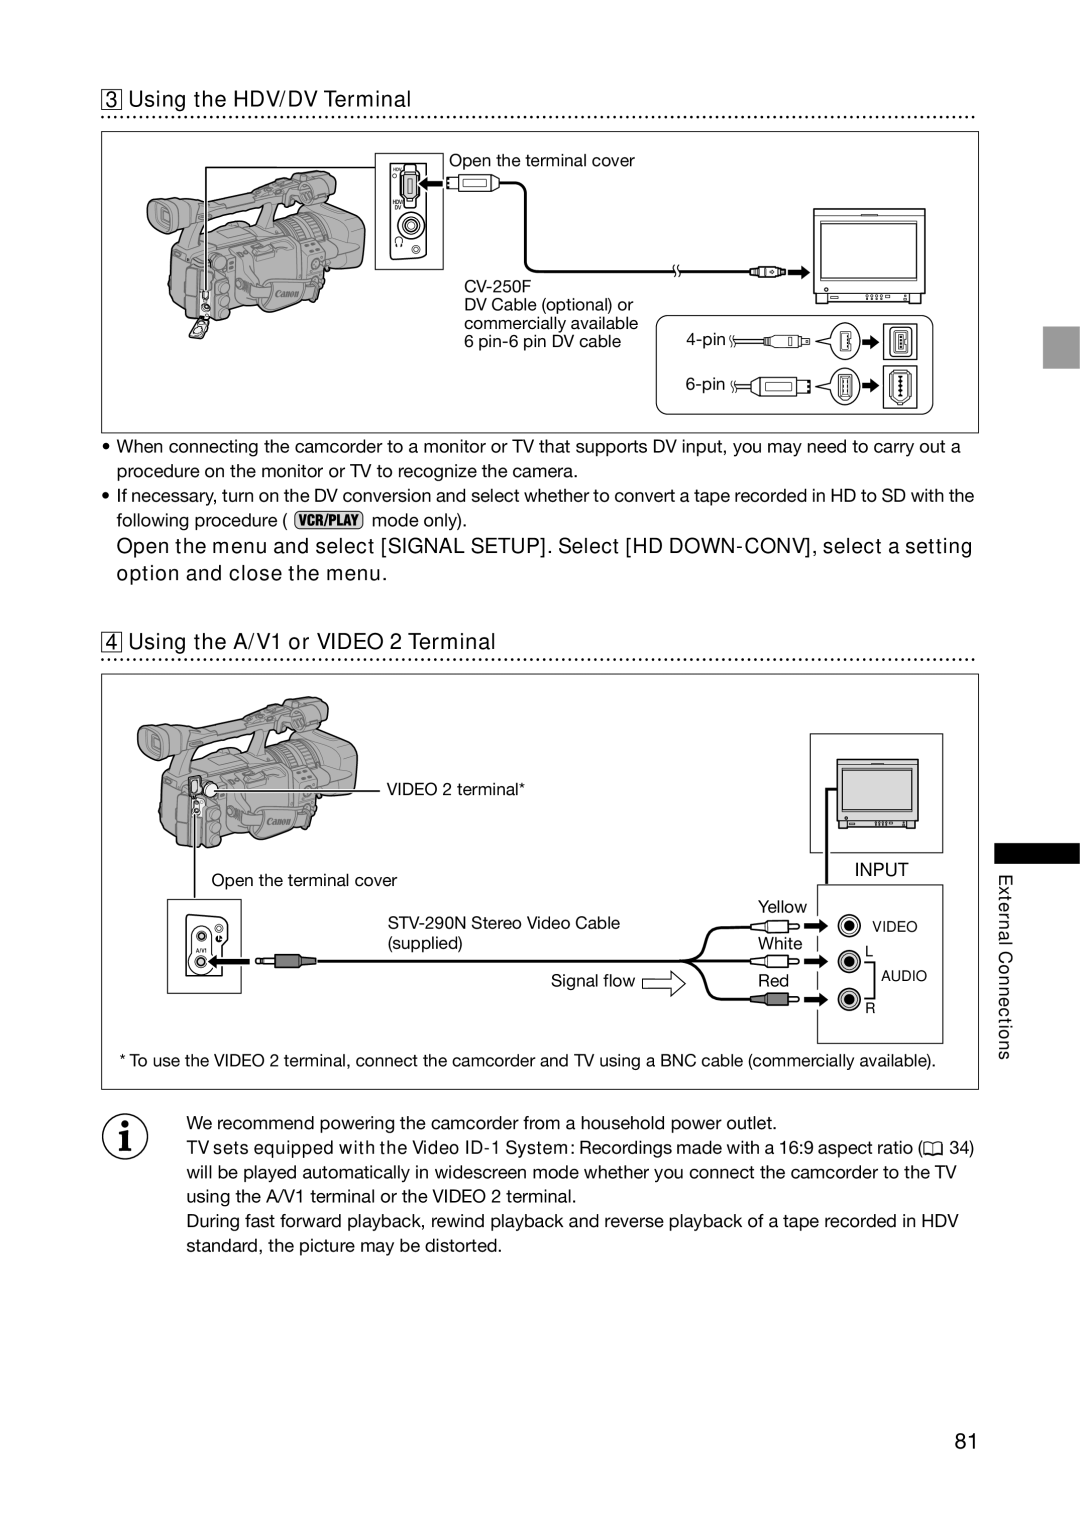
3 Using the HDV/DV Terminal
Open the terminal cover
DV Cable (optional) or commercially available 6
![]()
![]()
![]()
![]()
![]()
![]()
![]()
![]()
![]()
![]()
![]()
![]()
•When connecting the camcorder to a monitor or TV that supports DV input, you may need to carry out a procedure on the monitor or TV to recognize the camera.
•If necessary, turn on the DV conversion and select whether to convert a tape recorded in HD to SD with the
following procedure ( ![]() mode only).
mode only).
Open the menu and select [SIGNAL SETUP]. Select [HD
4 Using the A/V1 or VIDEO 2 Terminal
VIDEO 2 terminal* |
|
Open the terminal cover |
|
Yellow | |
| |
(supplied) | White |
Signal flow | Red |
INPUT |
VIDEO
L
AUDIO
![]() R
R
External Connections
*To use the VIDEO 2 terminal, connect the camcorder and TV using a BNC cable (commercially available).
We recommend powering the camcorder from a household power outlet.
TV sets equipped with the Video ![]() 34) will be played automatically in widescreen mode whether you connect the camcorder to the TV using the A/V1 terminal or the VIDEO 2 terminal.
34) will be played automatically in widescreen mode whether you connect the camcorder to the TV using the A/V1 terminal or the VIDEO 2 terminal.
During fast forward playback, rewind playback and reverse playback of a tape recorded in HDV standard, the picture may be distorted.
81