EXISTING DUCT SYSTEM — If the unit is connected to existing ductwork, consider the following:
•Verify that the existing ducts have the proper capacity to handle the unit airflow. If the ductwork is too small, larger ductwork should be installed.
•Check existing ductwork for leaks and repair as necessary.
NOTE: Local codes may require ventilation air to enter the space for proper indoor air quality.
Step 6 — Install Condensate Piping Drain
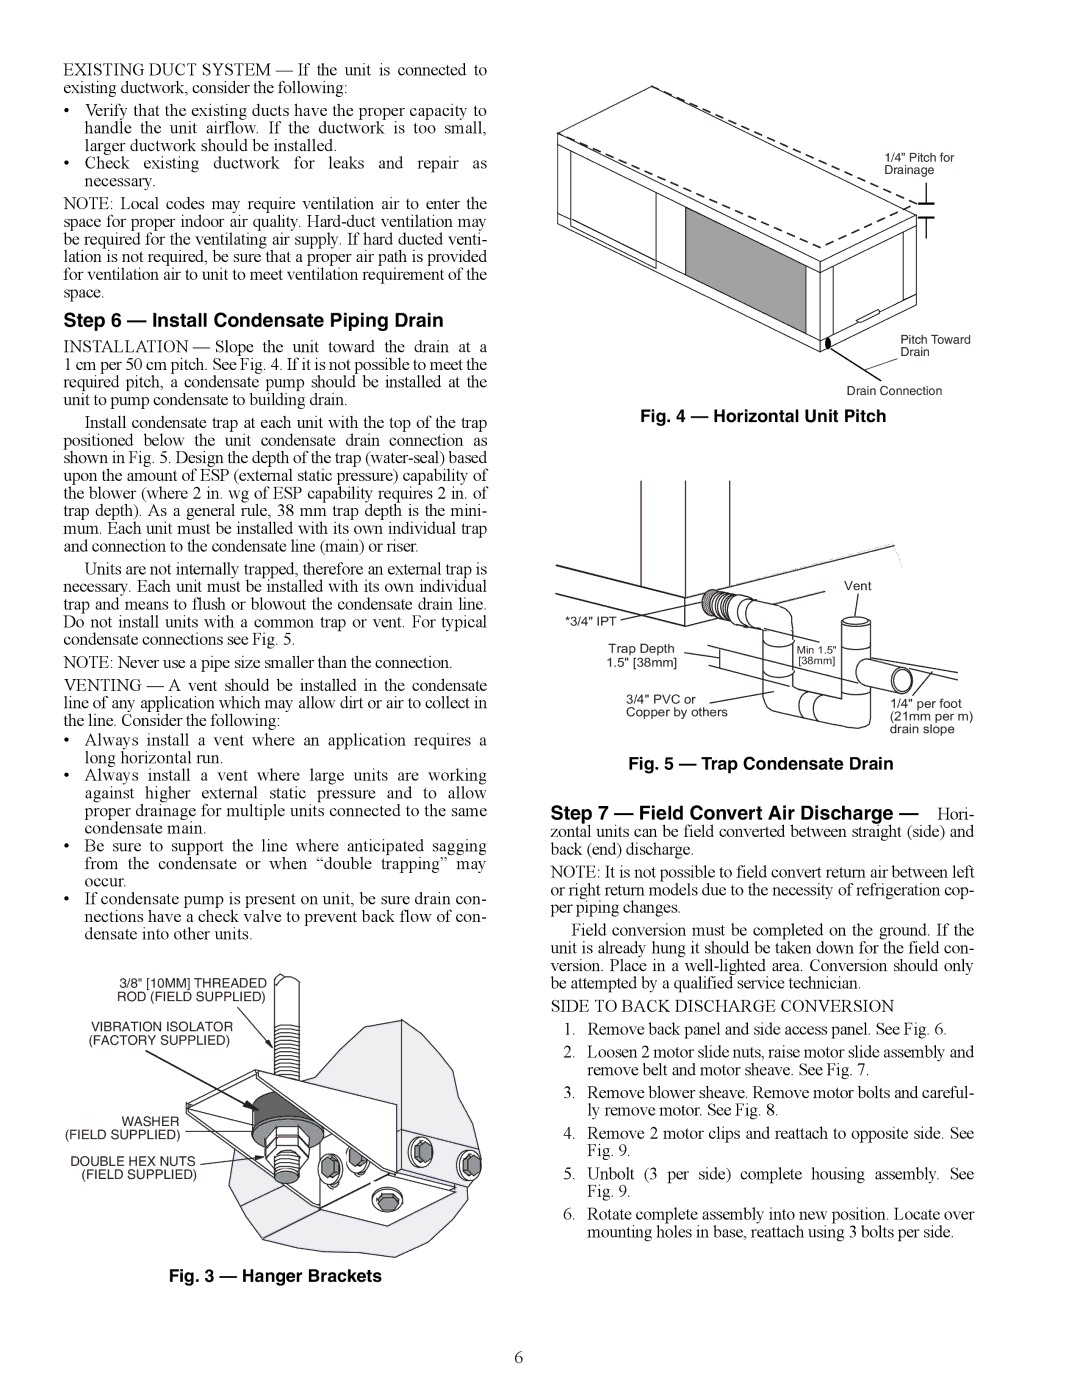
INSTALLATION — Slope the unit toward the drain at a 1 cm per 50 cm pitch. See Fig. 4. If it is not possible to meet the required pitch, a condensate pump should be installed at the unit to pump condensate to building drain.
Install condensate trap at each unit with the top of the trap positioned below the unit condensate drain connection as shown in Fig. 5. Design the depth of the trap
Units are not internally trapped, therefore an external trap is necessary. Each unit must be installed with its own individual trap and means to flush or blowout the condensate drain line. Do not install units with a common trap or vent. For typical condensate connections see Fig. 5.
NOTE: Never use a pipe size smaller than the connection.
VENTING — A vent should be installed in the condensate line of any application which may allow dirt or air to collect in the line. Consider the following:
•Always install a vent where an application requires a long horizontal run.
•Always install a vent where large units are working against higher external static pressure and to allow proper drainage for multiple units connected to the same condensate main.
•Be sure to support the line where anticipated sagging from the condensate or when “double trapping” may occur.
•If condensate pump is present on unit, be sure drain con- nections have a check valve to prevent back flow of con- densate into other units.
3/8" [10MM] THREADED ![]()
ROD (FIELD SUPPLIED)
VIBRATION ISOLATOR (FACTORY SUPPLIED)
WASHER![]() (FIELD SUPPLIED)
(FIELD SUPPLIED) ![]()
![]()
![]()
DOUBLE HEX NUTS ![]()
(FIELD SUPPLIED)
Fig. 3 — Hanger Brackets
1/4” Pitch for Drainage
Pitch Toward
Drain
Drain Connection | |
|
Fig. 4 — Horizontal Unit Pitch
| Vent | |
*3/4" IPT |
| |
Trap Depth | Min 1.5" | |
1.5" [38mm] | [38mm] | |
3/4" PVC or | 1/4" per foot | |
Copper by others | ||
(21mm per m) | ||
drain slope |
Fig. 5 — Trap Condensate Drain
Step 7 — Field Convert Air Discharge — Hori- zontal units can be field converted between straight (side) and back (end) discharge.
NOTE: It is not possible to field convert return air between left or right return models due to the necessity of refrigeration cop- per piping changes.
Field conversion must be completed on the ground. If the unit is already hung it should be taken down for the field con- version. Place in a
SIDE TO BACK DISCHARGE CONVERSION
1.Remove back panel and side access panel. See Fig. 6.
2.Loosen 2 motor slide nuts, raise motor slide assembly and remove belt and motor sheave. See Fig. 7.
3.Remove blower sheave. Remove motor bolts and careful- ly remove motor. See Fig. 8.
4.Remove 2 motor clips and reattach to opposite side. See Fig. 9.
5.Unbolt (3 per side) complete housing assembly. See Fig. 9.
6.Rotate complete assembly into new position. Locate over mounting holes in base, reattach using 3 bolts per side.
6
