®3
Prepare for W-84 Wall Control installation - Continued
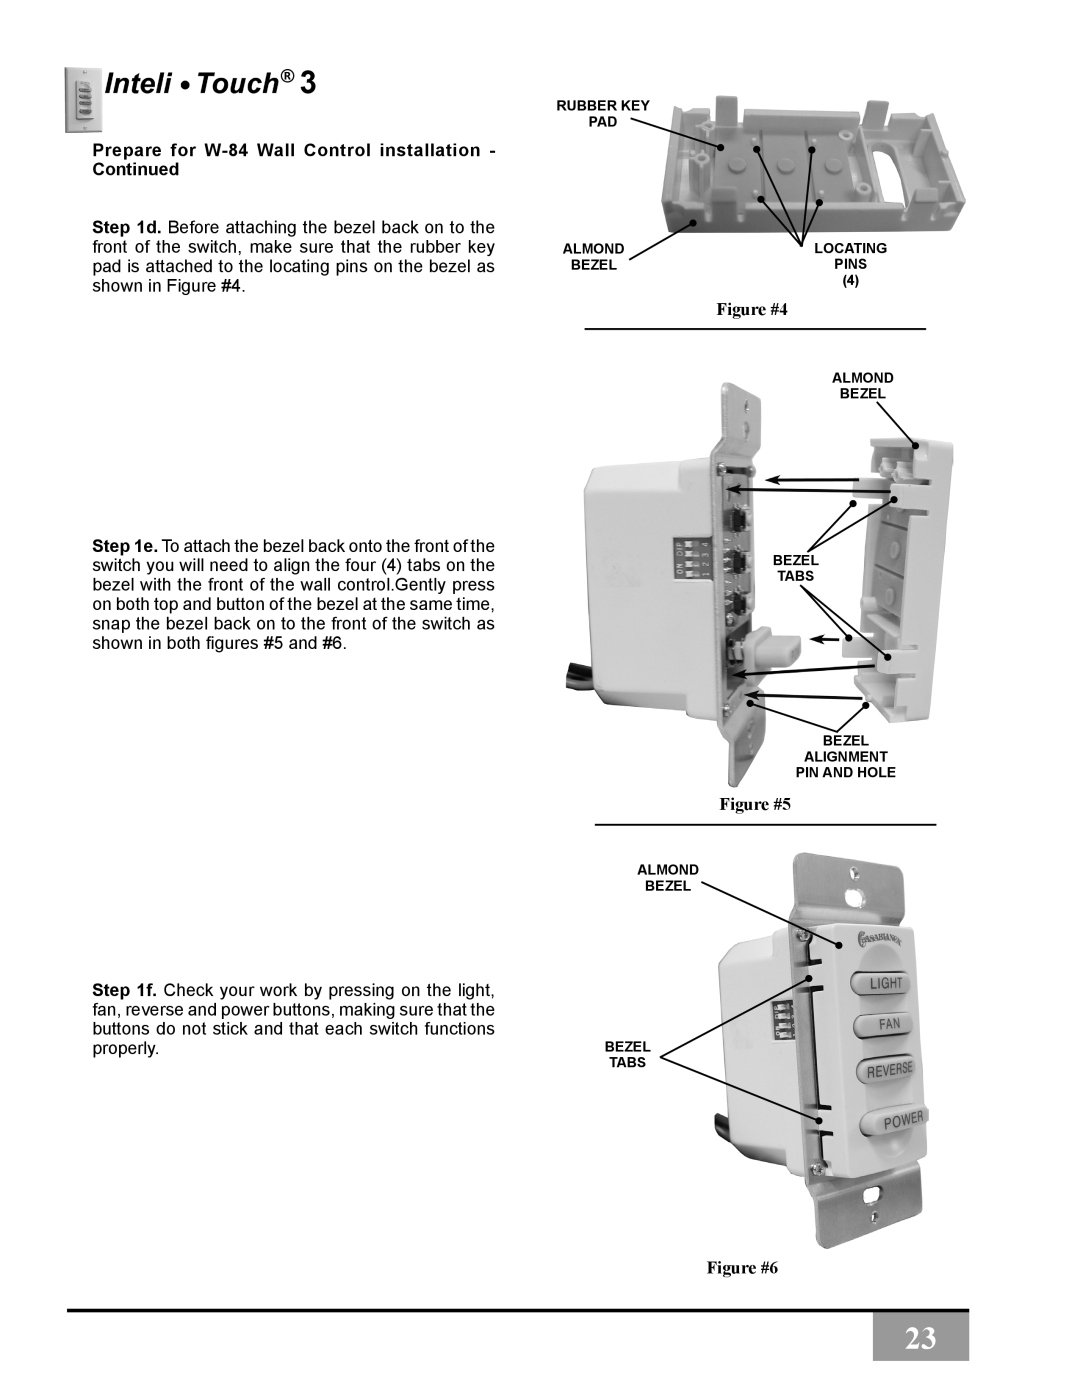
Step 1d. Before attaching the bezel back on to the front of the switch, make sure that the rubber key pad is attached to the locating pins on the bezel as shown in Figure #4.
Step 1e. To attach the bezel back onto the front of the switch you will need to align the four (4) tabs on the bezel with the front of the wall control.Gently press on both top and button of the bezel at the same time, snap the bezel back on to the front of the switch as shown in both figures #5 and #6.
Step 1f. Check your work by pressing on the light, fan, reverse and power buttons, making sure that the buttons do not stick and that each switch functions properly.
RUBBER KEY
PAD
ALMOND | LOCATING |
BEZEL | PINS |
| (4) |
Figure #4
ALMOND
BEZEL
BEZEL
TABS
BEZEL
ALIGNMENT
PIN AND HOLE
Figure #5
ALMOND
BEZEL
BEZEL
TABS
Figure #6
23