Holliston™![]()
Switch Housing and Light Kit
Adaptor Installation: - Continued ( LIGHT KIT)
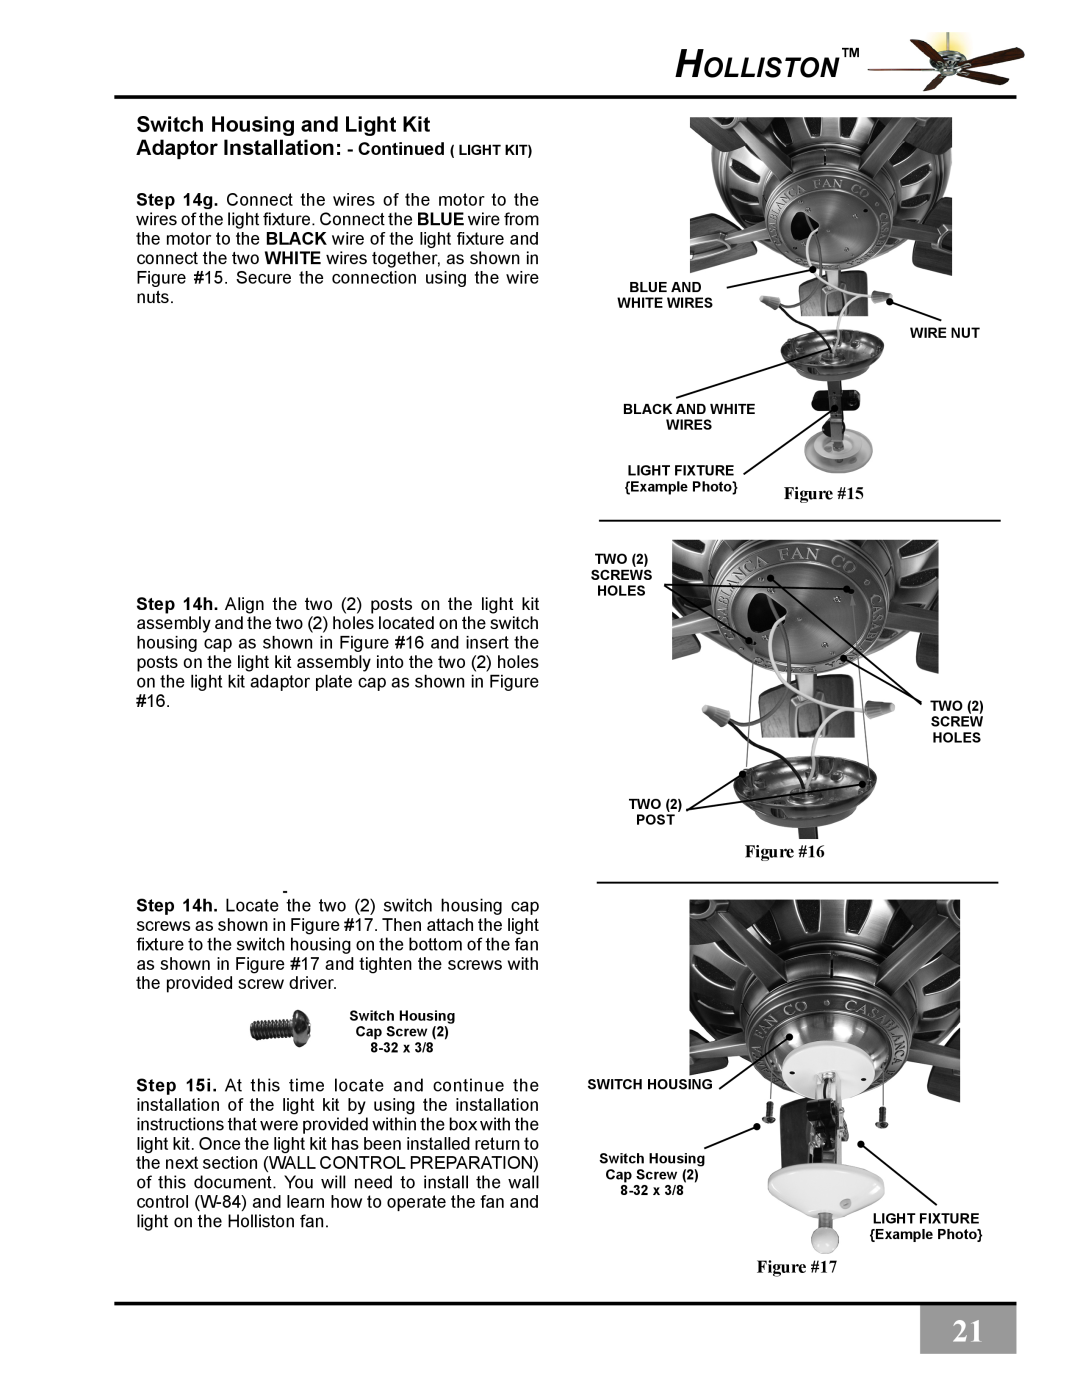
Step 14g. Connect the wires of the motor to the wires of the light fixture. Connect the BLUE wire from the motor to the BLACK wire of the light fixture and connect the two WHITE wires together, as shown in Figure #15. Secure the connection using the wire nuts.
Step 14h. Align the two (2) posts on the light kit assembly and the two (2) holes located on the switch housing cap as shown in Figure #16 and insert the posts on the light kit assembly into the two (2) holes on the light kit adaptor plate cap as shown in Figure #16.
Step 14h. Locate the two (2) switch housing cap screws as shown in Figure #17. Then attach the light fixture to the switch housing on the bottom of the fan as shown in Figure #17 and tighten the screws with the provided screw driver.
Switch Housing
Cap Screw (2)
Step 15i. At this time locate and continue the installation of the light kit by using the installation instructions that were provided within the box with the light kit. Once the light kit has been installed return to the next section (WALL CONTROL PREPARATION) of this document. You will need to install the wall control
BLUE AND
WHITE WIRES
WIRE NUT
BLACK AND WHITE |
|
WIRES |
|
LIGHT FIXTURE |
|
{Example Photo} | Figure #15 |
TWO (2)
SCREWS
HOLES
TWO (2)
SCREW
HOLES
TWO (2) ![]()
POST
Figure #16
SWITCH HOUSING
Switch Housing
Cap Screw (2)
LIGHT FIXTURE
{Example Photo}
Figure #17
21
