INSTALLING THE
AUTO START
FEATURE
IMPORTANT: Always
refer to the wiring diagrams that came with your unit before making electrical con- nections. The diagrams show the most accurate electrical component information.
![]() WARNING: Electric shock hazard
WARNING: Electric shock hazard
This equipment is powered by high voltage. Always disconnect and lock out the main power source before opening the unit or the electrical enclosure to modify factory settings. Failure to disconnect and lock out the main power source can result in severe personal injury.
If you have a
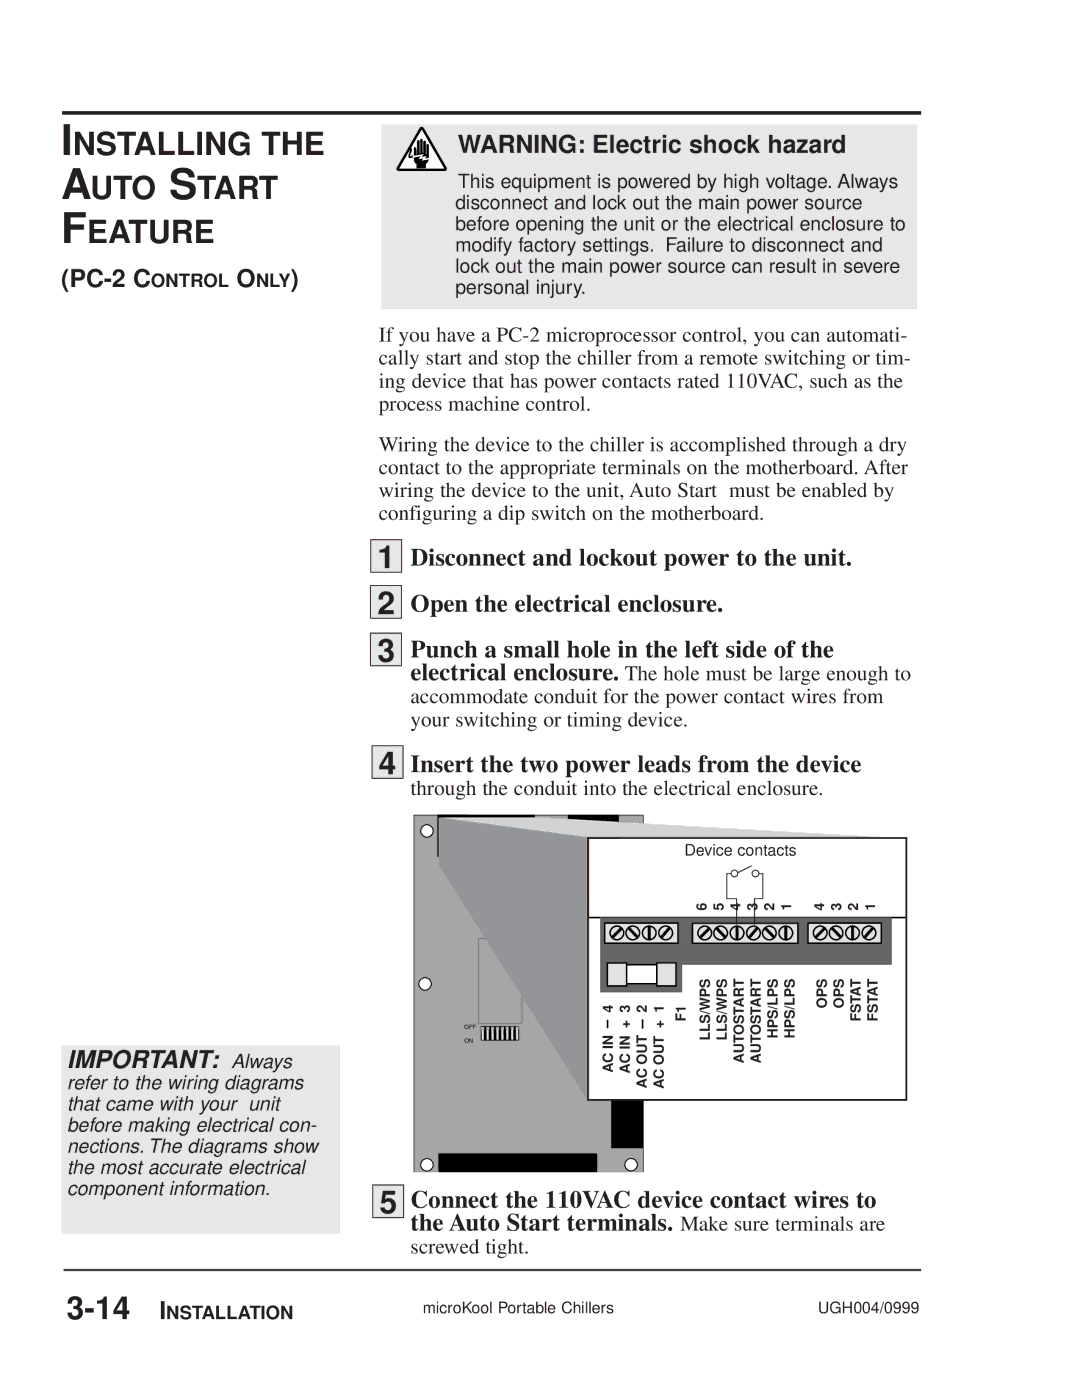
Wiring the device to the chiller is accomplished through a dry contact to the appropriate terminals on the motherboard. After wiring the device to the unit, Auto Start must be enabled by configuring a dip switch on the motherboard.
1
2
3 Punch a small hole in the left side of the electrical enclosure. The hole must be large enough to accommodate conduit for the power contact wires from your switching or timing device.
4 Insert the two power leads from the device
through the conduit into the electrical enclosure.
|
|
|
| Device contacts |
| |
|
|
|
|
| 6 5 4 3 2 1 | 4 3 2 1 |
AC IN 4 | AC IN + 3 | AC OUT 2 | AC OUT + 1 | F1 | LLS/WPS LLS/WPS AUTOSTART AUTOSTART HPS/LPS HPS/LPS | OPS OPS FSTAT FSTAT |
5 Connect the 110VAC device contact wires to the Auto Start terminals. Make sure terminals are
screwed tight.
INSTALLATION | microKool Portable Chillers | UGH004/0999 | |
|
|