|
|
® 3 | (For use on product with BOTH UP and DOWN LIGHTS ONLY) |
W-84 Wall control Preparation
WALL CONTROL AND Hardware (not to scale)
Switch Mounting
Screws (2)
Switch Bezels |
|
| Wall Plate Screws | (4) Wire Cap | |
White Wall | Almond Wall | (2) White |
| ||
Wall Control | (1) White | (2) Almond |
| ||
| (1) Almond | Plate (1) | Plate (1) |
|
|
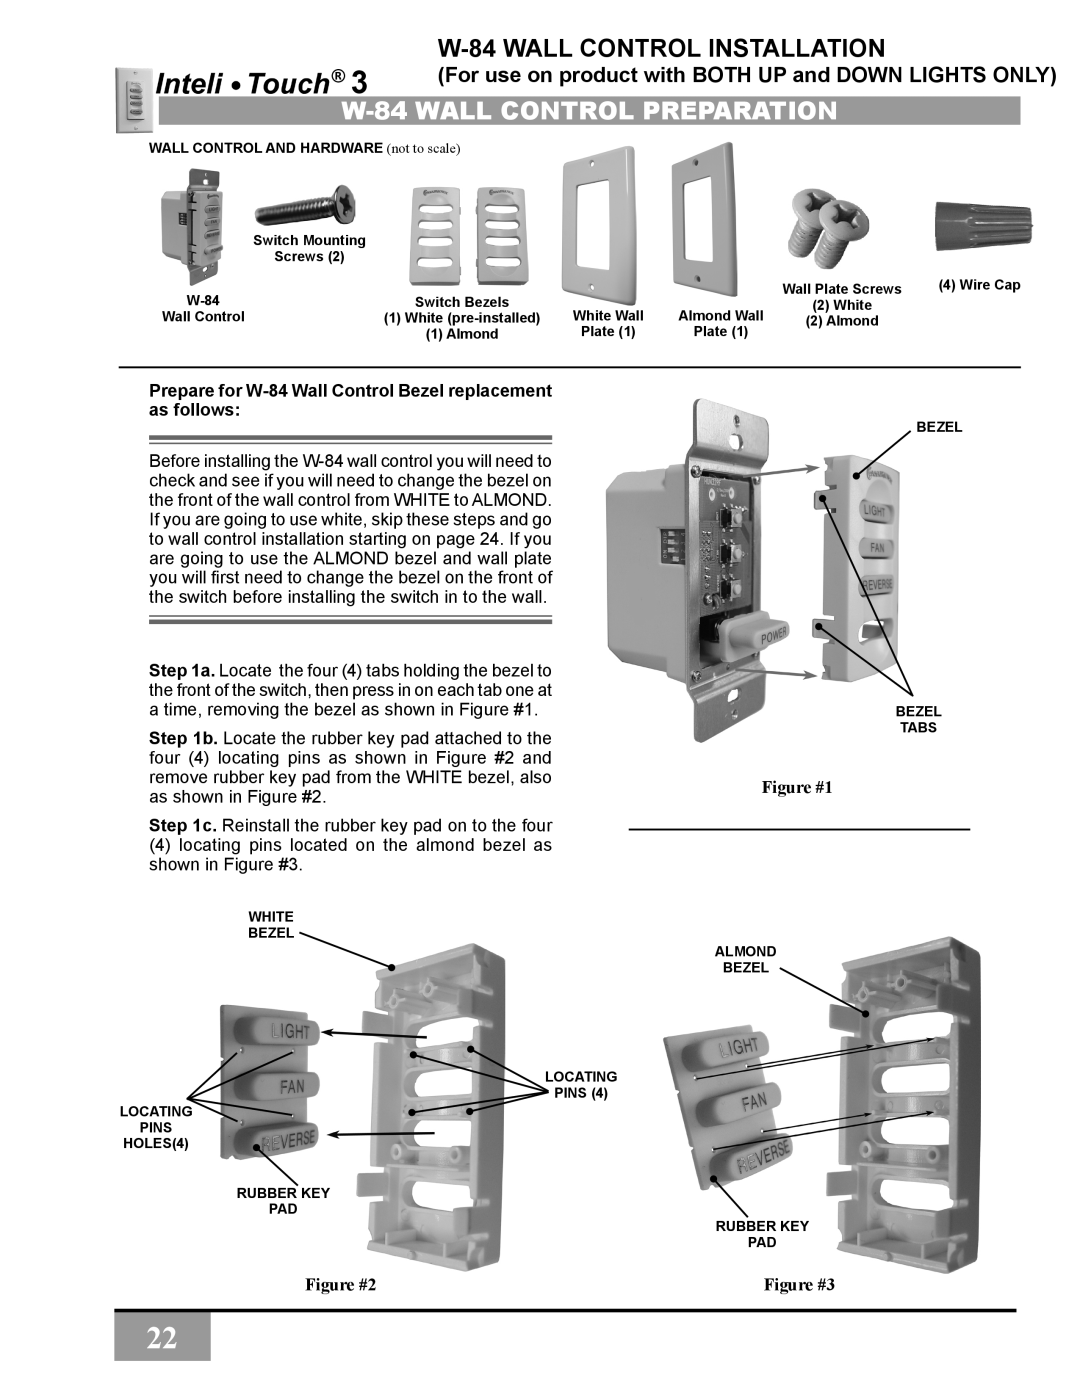
Prepare for W-84 Wall Control Bezel replacement as follows:
Before installing the
Step 1a. Locate the four (4) tabs holding the bezel to the front of the switch, then press in on each tab one at a time, removing the bezel as shown in Figure #1.
Step 1b. Locate the rubber key pad attached to the four (4) locating pins as shown in Figure #2 and remove rubber key pad from the WHITE bezel, also as shown in Figure #2.
Step 1c. Reinstall the rubber key pad on to the four
(4)locating pins located on the almond bezel as shown in Figure #3.
WHITE
BEZEL
LOCATING
PINS (4)
LOCATING PINS
HOLES(4)
RUBBER KEY
PAD
Figure #2
BEZEL
BEZEL
TABS
Figure #1
ALMOND
BEZEL
RUBBER KEY
PAD
Figure #3
22