Chapter 3 Installing the Router
Installing the Chassis
Wall-Mounting the Cisco 3620 Router
This section explains how to mount the Cisco 3620 router on a wall.
Tip When choosing a
The router is shipped with
Attaching Rubber Feet to the Router
Attach the rubber feet supplied in the accessory kit. Peel the rubber feet off the black adhesive strip and attach one rubber foot at each corner of the underside of the chassis.
Attaching Wall-Mount Brackets to the Router
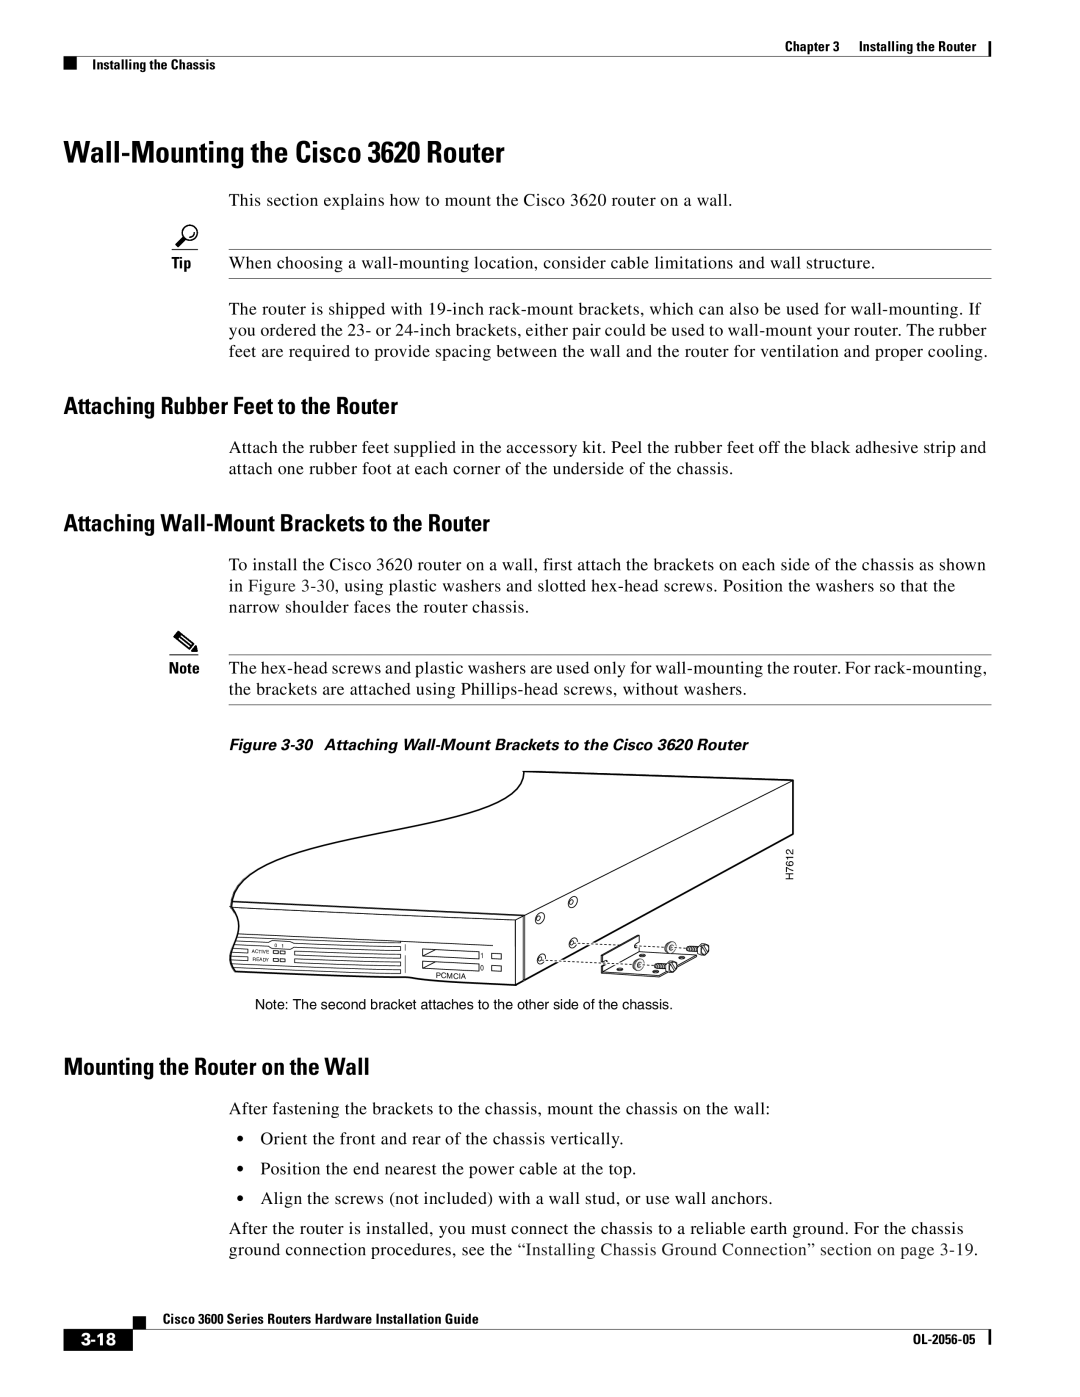
To install the Cisco 3620 router on a wall, first attach the brackets on each side of the chassis as shown in Figure
Note The
Figure 3-30 Attaching Wall-Mount Brackets to the Cisco 3620 Router
H7612
0 | 1 |
ACTIVE
READY
1 0
PCMCIA
Note: The second bracket attaches to the other side of the chassis.
Mounting the Router on the Wall
After fastening the brackets to the chassis, mount the chassis on the wall:
•Orient the front and rear of the chassis vertically.
•Position the end nearest the power cable at the top.
•Align the screws (not included) with a wall stud, or use wall anchors.
After the router is installed, you must connect the chassis to a reliable earth ground. For the chassis ground connection procedures, see the “Installing Chassis Ground Connection” section on page
Cisco 3600 Series Routers Hardware Installation Guide
|
| |
|