3.6 Using 58 mm Wide Paper Rolls
1Turn off the power of the printer.
2Open the printer cover.
3Take off two screws and remove printer cover.
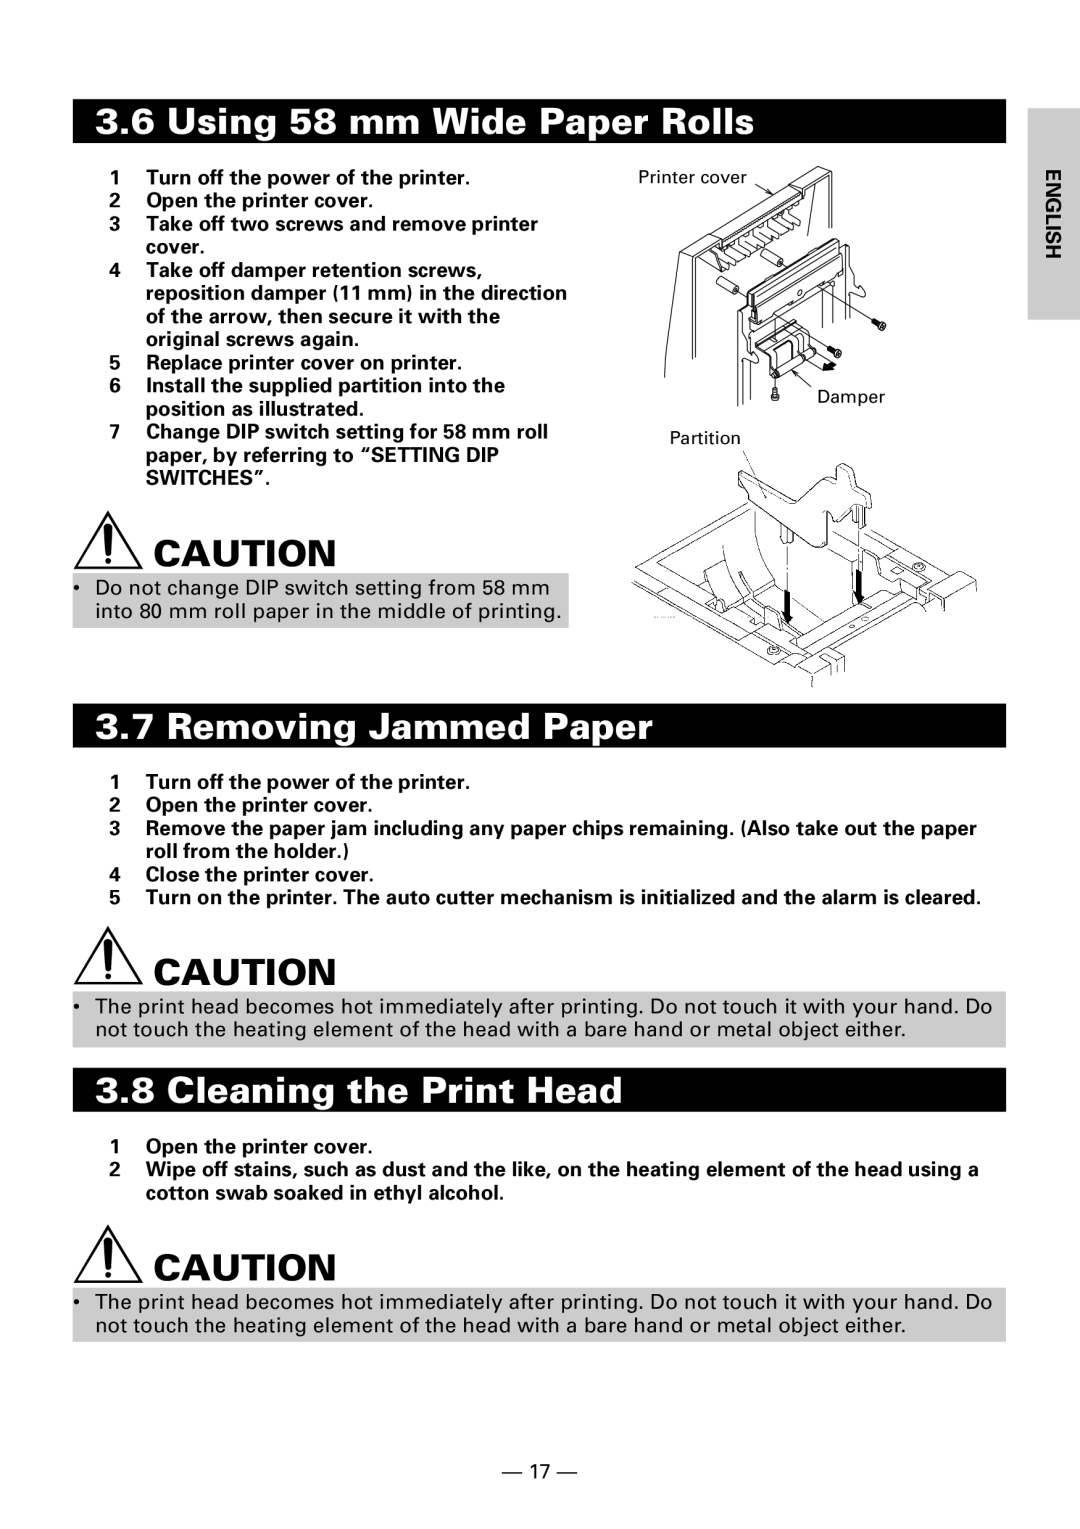
4Take off damper retention screws, reposition damper (11 mm) in the direction of the arrow, then secure it with the original screws again.
5Replace printer cover on printer.
6Install the supplied partition into the position as illustrated.
7Change DIP switch setting for 58 mm roll paper, by referring to “SETTING DIP SWITCHES”.
![]() CAUTION
CAUTION
•Do not change DIP switch setting from 58 mm into 80 mm roll paper in the middle of printing.
Printer cover
Damper
Partition
ENGLISH
3.7 Removing Jammed Paper
1Turn off the power of the printer.
2Open the printer cover.
3Remove the paper jam including any paper chips remaining. (Also take out the paper roll from the holder.)
4Close the printer cover.
5Turn on the printer. The auto cutter mechanism is initialized and the alarm is cleared.
![]() CAUTION
CAUTION
•The print head becomes hot immediately after printing. Do not touch it with your hand. Do not touch the heating element of the head with a bare hand or metal object either.
3.8 Cleaning the Print Head
1Open the printer cover.
2Wipe off stains, such as dust and the like, on the heating element of the head using a cotton swab soaked in ethyl alcohol.
![]() CAUTION
CAUTION
•The print head becomes hot immediately after printing. Do not touch it with your hand. Do not touch the heating element of the head with a bare hand or metal object either.
— 17 —