ENGLISH
3.4 Setting/Replacing Paper Rolls
1 | Turn on the printer. |
|
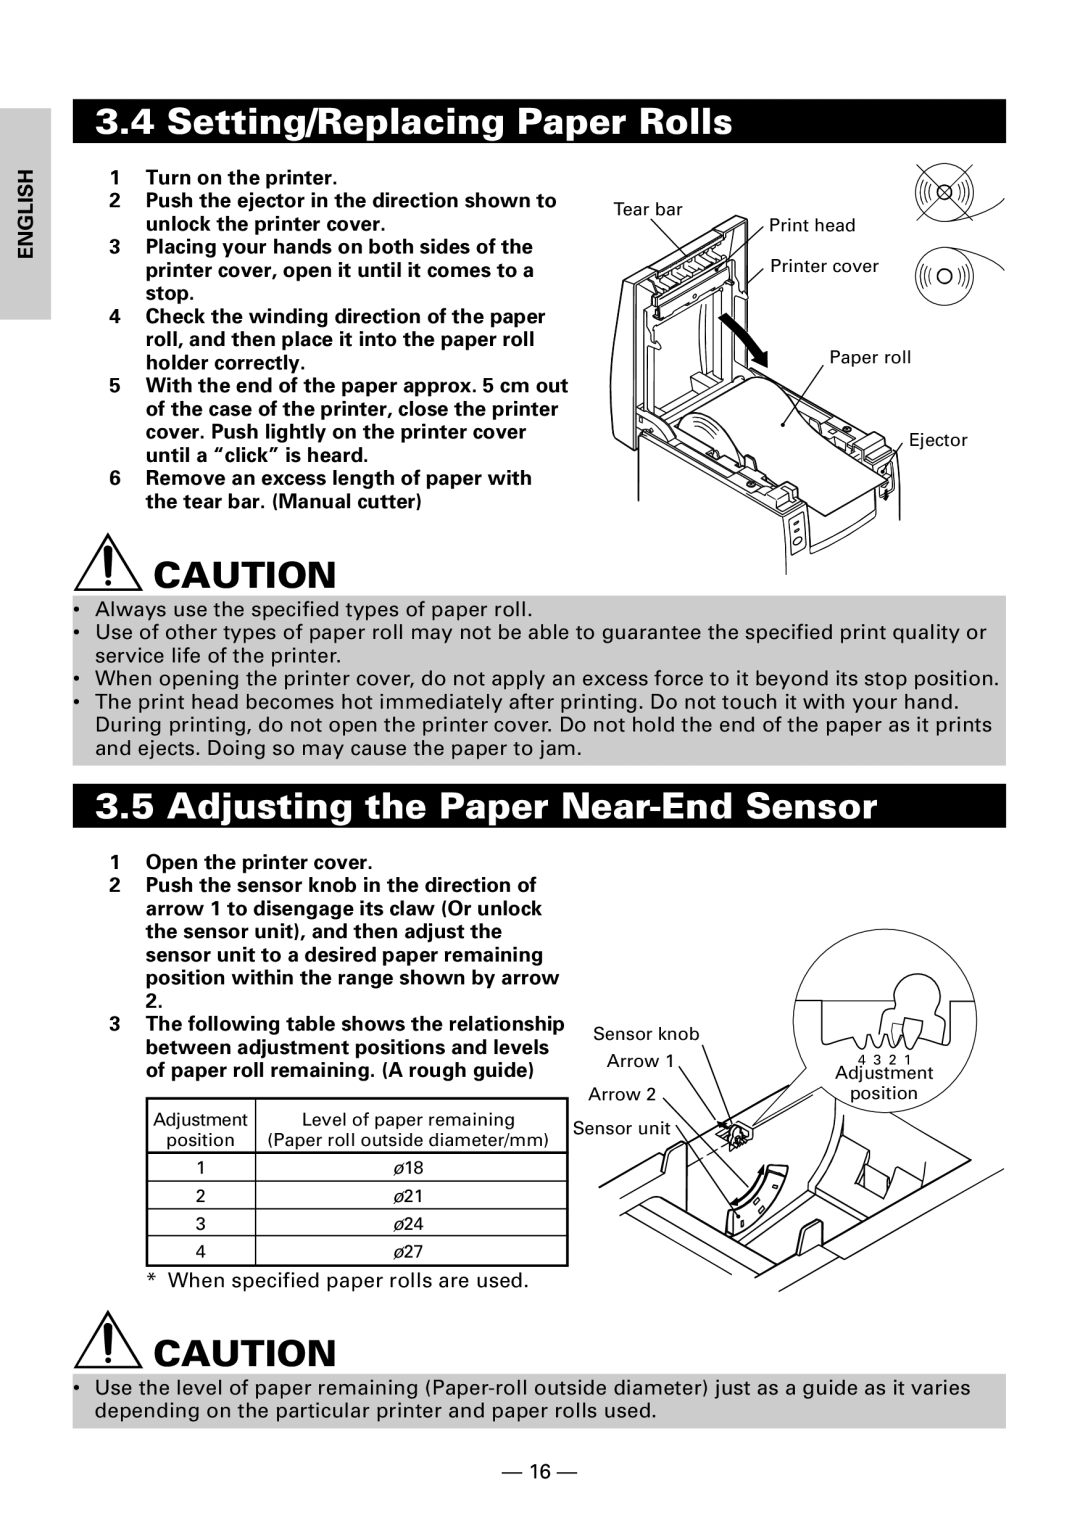
2 | Push the ejector in the direction shown to | Tear bar |
| unlock the printer cover. | |
|
| |
3 | Placing your hands on both sides of the |
|
| printer cover, open it until it comes to a |
|
| stop. |
|
4 | Check the winding direction of the paper |
|
| roll, and then place it into the paper roll |
|
| holder correctly. |
|
5 | With the end of the paper approx. 5 cm out |
|
| of the case of the printer, close the printer |
|
| cover. Push lightly on the printer cover |
|
| until a “click” is heard. |
|
6 | Remove an excess length of paper with |
|
| the tear bar. (Manual cutter) |
|
Print head
Printer cover
Paper roll
Ejector
![]() CAUTION
CAUTION
•Always use the specified types of paper roll.
•Use of other types of paper roll may not be able to guarantee the specified print quality or service life of the printer.
•When opening the printer cover, do not apply an excess force to it beyond its stop position.
•The print head becomes hot immediately after printing. Do not touch it with your hand. During printing, do not open the printer cover. Do not hold the end of the paper as it prints and ejects. Doing so may cause the paper to jam.
3.5 Adjusting the Paper Near-End Sensor
1Open the printer cover.
2Push the sensor knob in the direction of arrow 1 to disengage its claw (Or unlock the sensor unit), and then adjust the sensor unit to a desired paper remaining position within the range shown by arrow 2.
3The following table shows the relationship between adjustment positions and levels of paper roll remaining. (A rough guide)
Adjustment | Level of paper remaining |
position | (Paper roll outside diameter/mm) |
1 | ø18 |
2 | ø21 |
3 | ø24 |
4 | ø27 |
* When specified paper rolls are used.
Sensor knob Arrow 1
Arrow 2
Sensor unit
4 3 2 1
Adjustment
position
![]() CAUTION
CAUTION
•Use the level of paper remaining
— 16 —