Assembly (continued)
Assembling Table Extensions
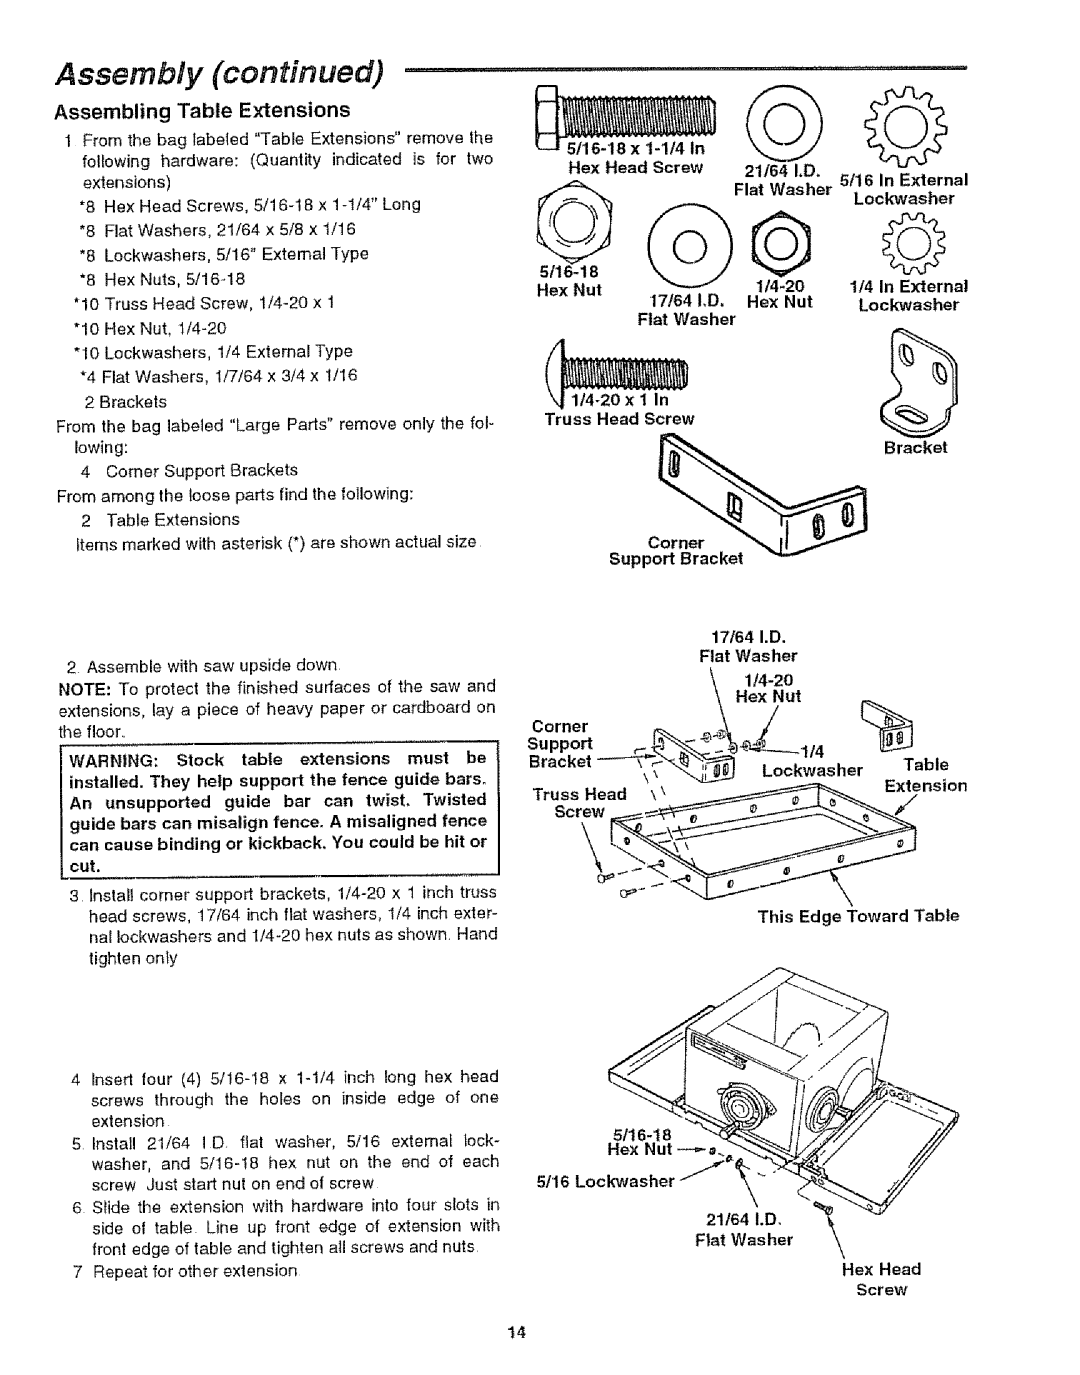
1 From the bag labeled "Table Extensions" remove the following hardware: (Quantity indicated is for two extensions)
*8 Hex Head Screws,
*8 Lockwashers. 5/16" External Type
*8 Hex Nuts,
"10 Truss Head Screw,
"10 Hex Nut,
"10 Lockwashers, 1/4 External Type
*4 Flat Washers, 1/7/64 x 3/4 x 1/16
2 Brackets
From the bag labeled "Large Parts" remove only the fol- lowing:
4 Comer Support Brackets
From among the loose parts find the following: 2 Table Extensions
items marked with asterisk (*) are shown actual size
2 Assemble with saw upside down
NOTE: To protect the finished surfaces of the saw and extensions, lay a piece of heavy paper or cardboard on the floor..
WARNING: Stock table extensions must be installed. They help support the fence guide bars.
An unsupported guide bar can twist. Twisted guide bars can misalign fence. A misaligned fence can cause binding or kickback. You could be hit or
cut,
3Install corner support brackets,
tighten onty
4insert four (4)
screws through the holes on inside edge of one extension
5Instal! 21/64 ID fiat washer, 5/16 external lock- washer, and
6Slide the extension with hardware into four slots in side of table Line up front edge of extension with front edge of table and tighten all screws and nuts
7Repeat for other extension
t4
|
| .... i | ,,, |
Hex Head Screw | 21_41,D. | O | |
0 |
| 5/16 In External | |
| Flat Washer | ||
|
| ||
|
| Lockwasher | |
| @Q | ||
© | |||
Hex Nut | 114 In External | ||
17/64 I,D. Hex Nut Lock'washer
Flat Washer
Truss Head Screw
Bracket
s°ppc
| 17/64 | I.D. |
| |
| Flat Washer |
| ||
| \ |
| ||
| \ | Hex Nut |
| |
Corner | _._\ | / |
| (_ |
support |
| Lockwasher | Table | |
Bracket | ||||
This Edge Toward Table
Hex Nut _
51'16Lock'washer
21/64 I.D.
Flat Washer
Hex Head
Screw
