Assembly (continued)
6 Lay a piece of flat straight wood and a square on saw table and rotate the spreader support until the bracket is aligned with square.
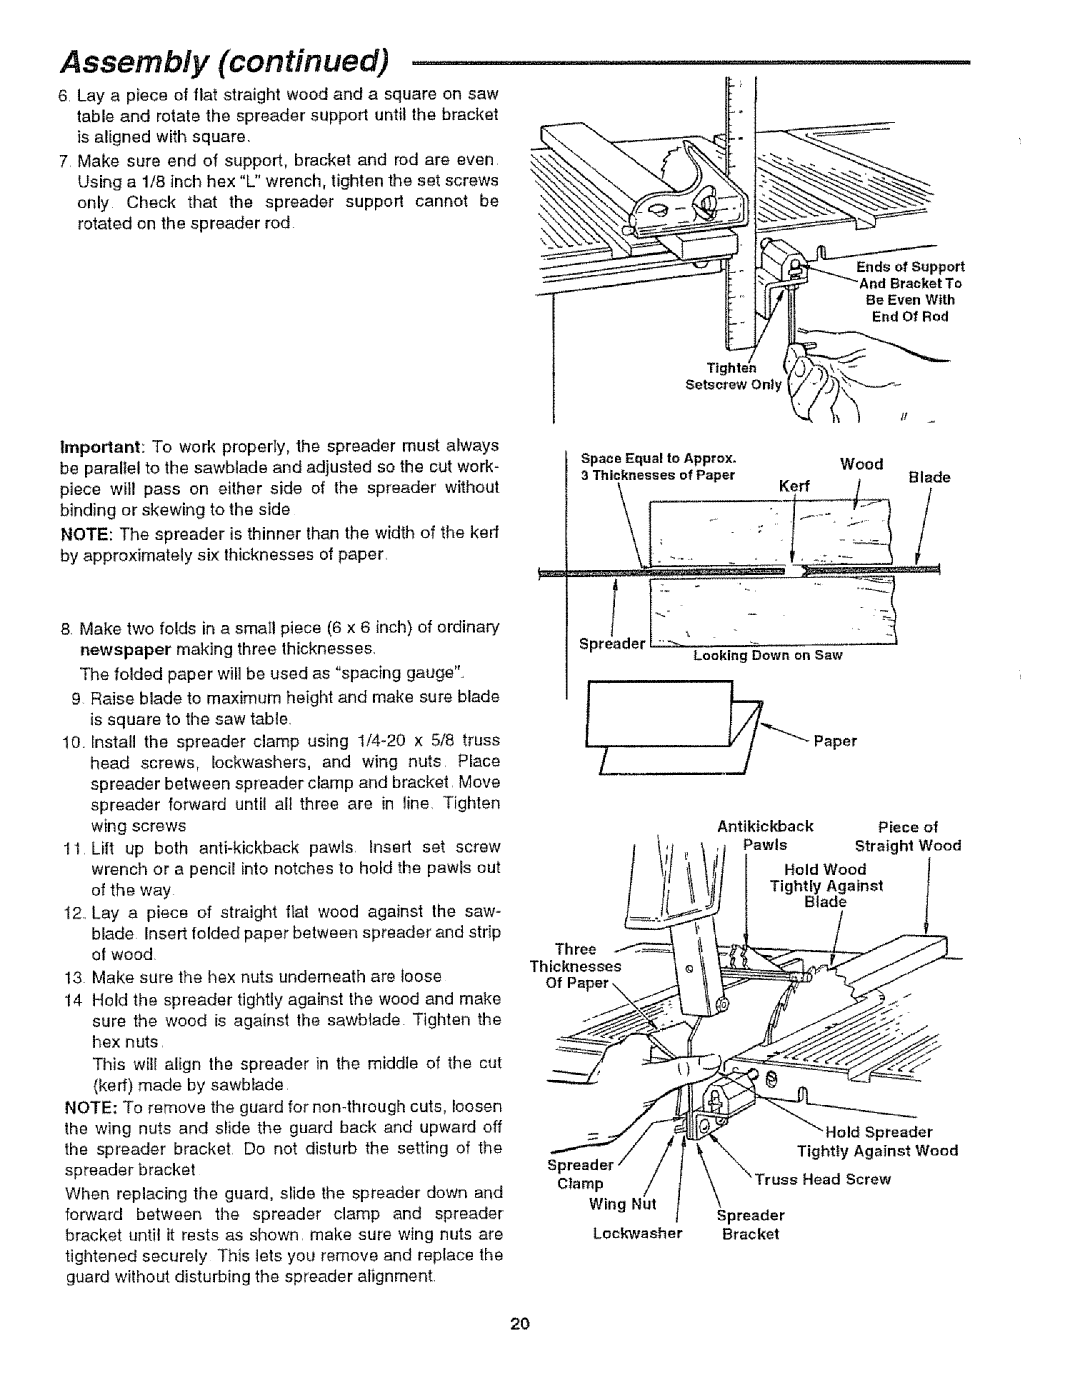
7 Make sure end of support, bracket and rod are even Using a 1/8 inch hex "L" wrench, tighten the set screws only Check that the spreader support cannot be rotated on the spreader rod
Important: To work properly, the spreader must always be parallel to the sawblade and adjusted so the cut work- piece will pass on either side of the spreader without binding or skewing to the side
NOTE: The spreader is thinner than the width of the kerr by approximately six thicknesses of paper
|
| _port |
|
|
| _'_AndBracket To | |
|
|
| Be Even With |
|
|
| End Of Rod |
| Tighte_ |
|
|
| Setscrew Only | t |
|
Space Equal | to Approx. | Wood | |
3 Thicknesses | of Paper | . | Blade |
8Make two folds in a smaII piece (6 x 6 inch) of ordinary newspaper making three thicknesses.
The folded paper will be used as "spacing gauge"..
9 Raise blade to maximum height and make sure blade is square to the saw table.
10.Install the spreader clamp using
spreader between spreader clamp and bracket. Move spreader forward until all three are in line. Tighten wing screws
11 Lilt up both
12.Lay a piece of straight flat wood against the saw- blade Insert folded paper between spreader and strip of wood.
13 Make sure the hex nuts underneath are loose
14 Hold the spreader tightly against the wood and make sure the wood is against the sawblade Tighten the hex nuts.
This will align the spreader in the middle of the cut (kerf) made by sawbtade
NOTE: To remove the guard for
When replacing the guard, slide the spreader down and forward between the spreader clamp and spreader bracket until it rests as shown, make sure wing nuts are tightened securely This lets yell remove and replace the guard without disturbing the spreader alignment.
Looking Down on Saw
/
l
Antikickback | Piece | of |
Pawls | Straight | Wood |
Hold | Wood |
|
Tightly | Against |
|
Blade
Three
Thicknesses
Of Paper \
Hold Spreader
Tightly Against Wood
ClampScrew
Wing Nut
Spreader
Lock'washer Bracket
2O