Adjustments (continued) ..........
Adjusting the Spring 1 Loosen the screws
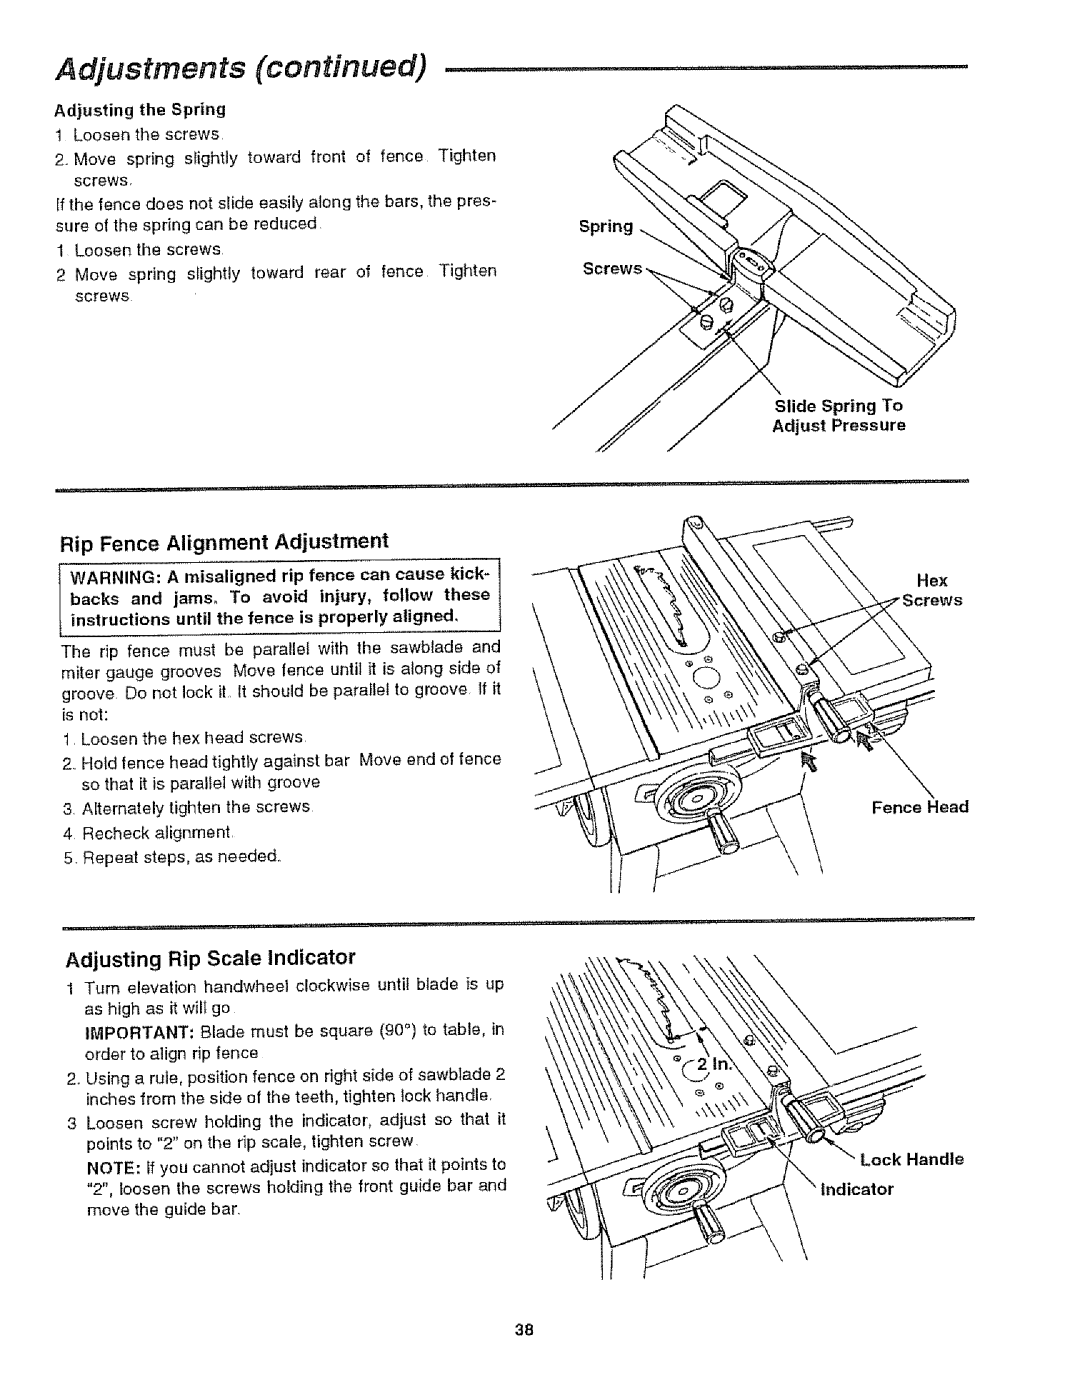
2.Move spring slightly toward front of fence Tighten screws
If the fence does not slide easily along the bars, the pres- |
| |||
sure of the spring can be reduced. | Spring | |||
1 | Loosen | the screws | ||
| ||||
2 | Move | spring slightly toward rear of fence Tighten | Screws | |
| screws |
|
| |
i | .... | , i, | i,,11,, | r,_tl | ,, | i,i1,1 | .... |
Rip Fence Alignment Adjustment
WARNING: A misaligned rip fence can cause kick- backs and jams_ To avoid injury, follow these instructions until the fence is properly aligned,
The rip fence must be parallel with the sawbtade and miter gauge grooves Move fence until it is along side of groove Do not lock it. It should be parallel to groove tf it is not:
1.Loosen the hex head screws
2.Hold fence head tightly against bar Move end of fence so that it is parallel with groove
3 Alternately tighten the screws
4 Recheck alignment_
5. Repeat steps, as needed.
Adjusting Rip Scale Indicator
1 Turn elevation handwheel clockwise until blade is up as high as it wilt go
IMPORTANT: Blade must be square (90°) to table, in order to align rip fence
2oUsing a rule, position fence on right side of sawbtade 2 \ inches from the side of the teeth, tighten lock handle
3 Loosen screw holding the indicator, adjust so that it points to "2" on the rip scale, tighten screw.
NOTE: If you cannot adjust indicator so that it points to "2", loosen the screws holding the front guide bar and move the guide bar.
Slide Spring To
Adjust Pressure
Fence Head
Lock Handle
38