Heeling Adjustment or Parallelism of Saw- blade to Miter Gauge Groove
While cutting, the materia_ must move in a straight line parallel to the sawblade Therefore, both the miter gauge groove and the rip fence must be parallel to the saw- blade
|
| must | parallel |
|
gauge groove. | Misatigned blades could bind on | |||
workpiece. Workpiece | could | suddenly | kickback. | |
I WARNING: The | blade | be |
| to the miter |
You could be cut or hit.
If the sawblade is not parallel to the miter gauge groove, the blade will bind at one end of the cut This is known as
"Heeling")
WARNING: To avoid injury from accidental start, make sure switch is "OFF" and plug is not con- nected to power source outlet.
To check for parallelism:
1,,Raise blade all the way up, raise blade guard
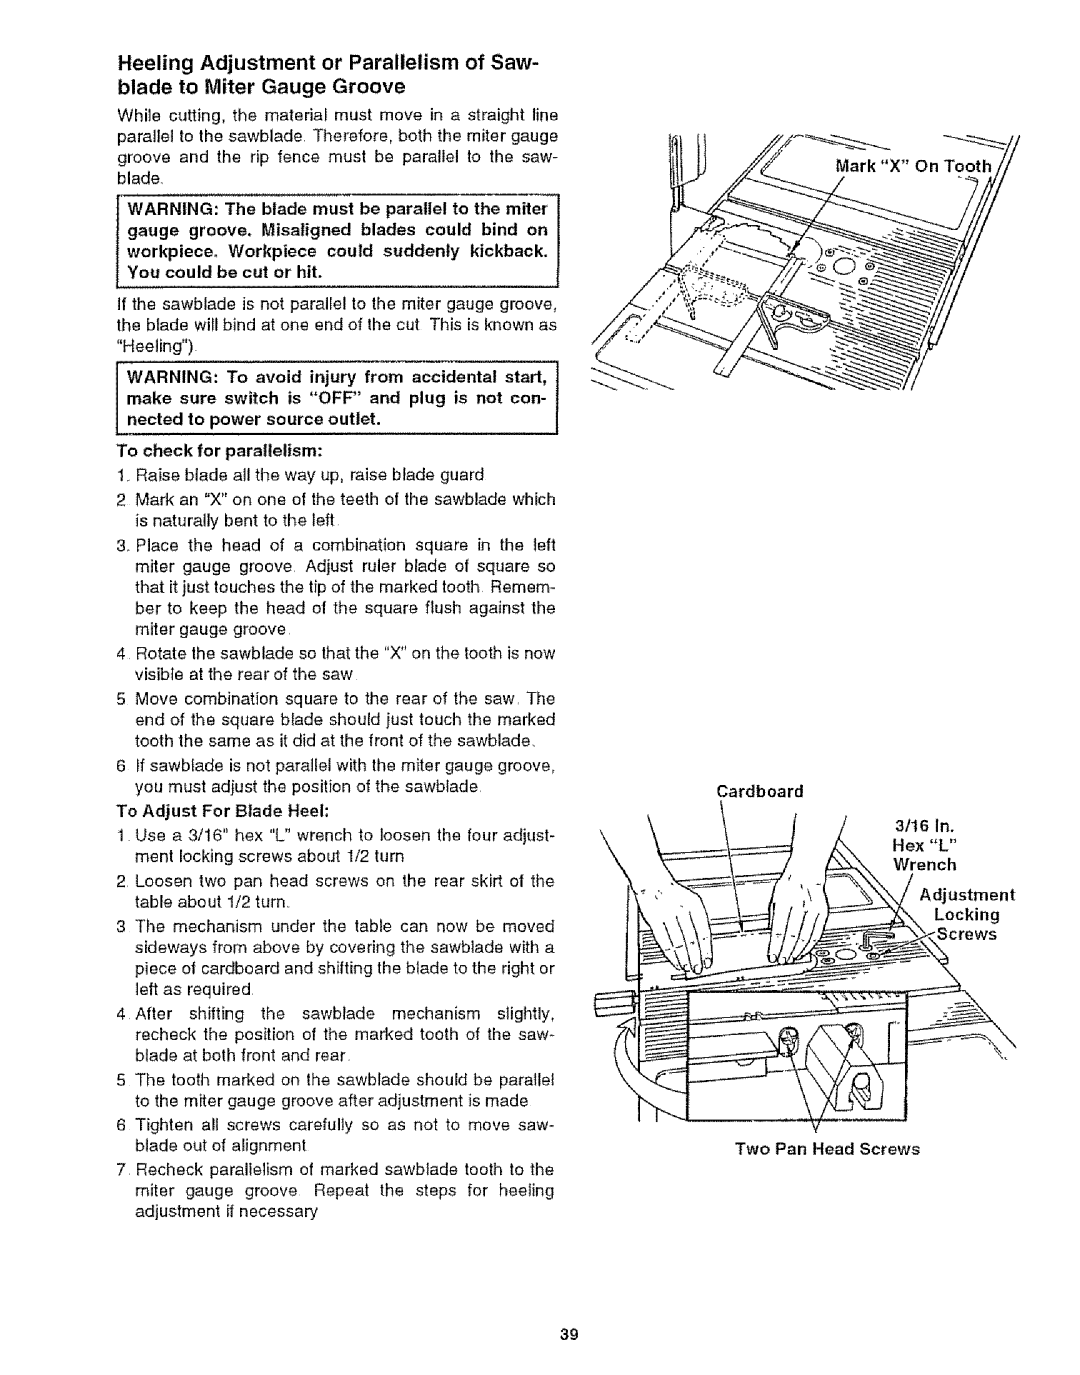
2Mark an "X" on one of the teeth of the sawblade which is naturally bent to the left
3Place the head of a combination square in the left miter gauge groove Adjust ruler blade of square so that it just touches the tip of the marked tooth Remem- ber to keep the head of the square flush against the miter gauge groove
4Rotate the sawblade so that the "X" on the tooth is now visible at the rear of the saw
5Move combination square to the rear of the SaWr The end of the square blade should just touch the marked tooth the same as it did at the front of the sawblade
6If sawblade is not parallel with the miter gauge groove,
| you must adjust the position | of the sawblade |
| Cardboard | ||||||||||
To Adjust | For | Blade Heel: |
|
|
|
| \ | 3t16 In. | ||||||
1 | Use a 3/16" | hex | "L" | wrench to loosen the four adjust- | ||||||||||
Hex "L" | ||||||||||||||
| ment | locking screws | about | 1/2 turn |
|
|
| |||||||
|
|
|
| Wrench | ||||||||||
2 | Loosen two pan head screws on the rear skirt | of the |
| Adjustment | ||||||||||
| table | about | 1/2 turn, |
|
|
|
|
|
| |||||
|
|
|
|
|
|
| Locking | |||||||
3 | The | mechanism | under the | table can now | be | moved |
| |||||||
| Screws | |||||||||||||
| sideways from above by covering the sawblade with a |
| ||||||||||||
|
|
| ||||||||||||
| piece of cardboard and shifting the blade to the right or |
|
| |||||||||||
| left as | required |
|
|
|
|
|
|
|
|
| |||
4After |
| shifting the sawblade mechanism slightly, |
|
| ||||||||||
| recheck the position of the marked tooth of the saw- |
|
| |||||||||||
| blade at both front | and rear |
|
|
|
|
|
| ||||||
5 | The | tooth marked |
| on the sawblade | should | be | parallel |
|
| |||||
| to the miter | gauge | groove after adjustment | is made |
|
| ||||||||
6 | Tighten | all | screws | carefully | so as | not to | move saw- |
| v | |||||
| blade out of alignment |
|
|
|
| Two | Pan Head Screws | |||||||
7 | Recheck parallelism of marked sawblade tooth | to the |
|
| ||||||||||
| miter gauge groove Repeat the steps for heeling |
|
| |||||||||||
| adjustment | if necessary |
|
|
|
|
|
| ||||||
39
