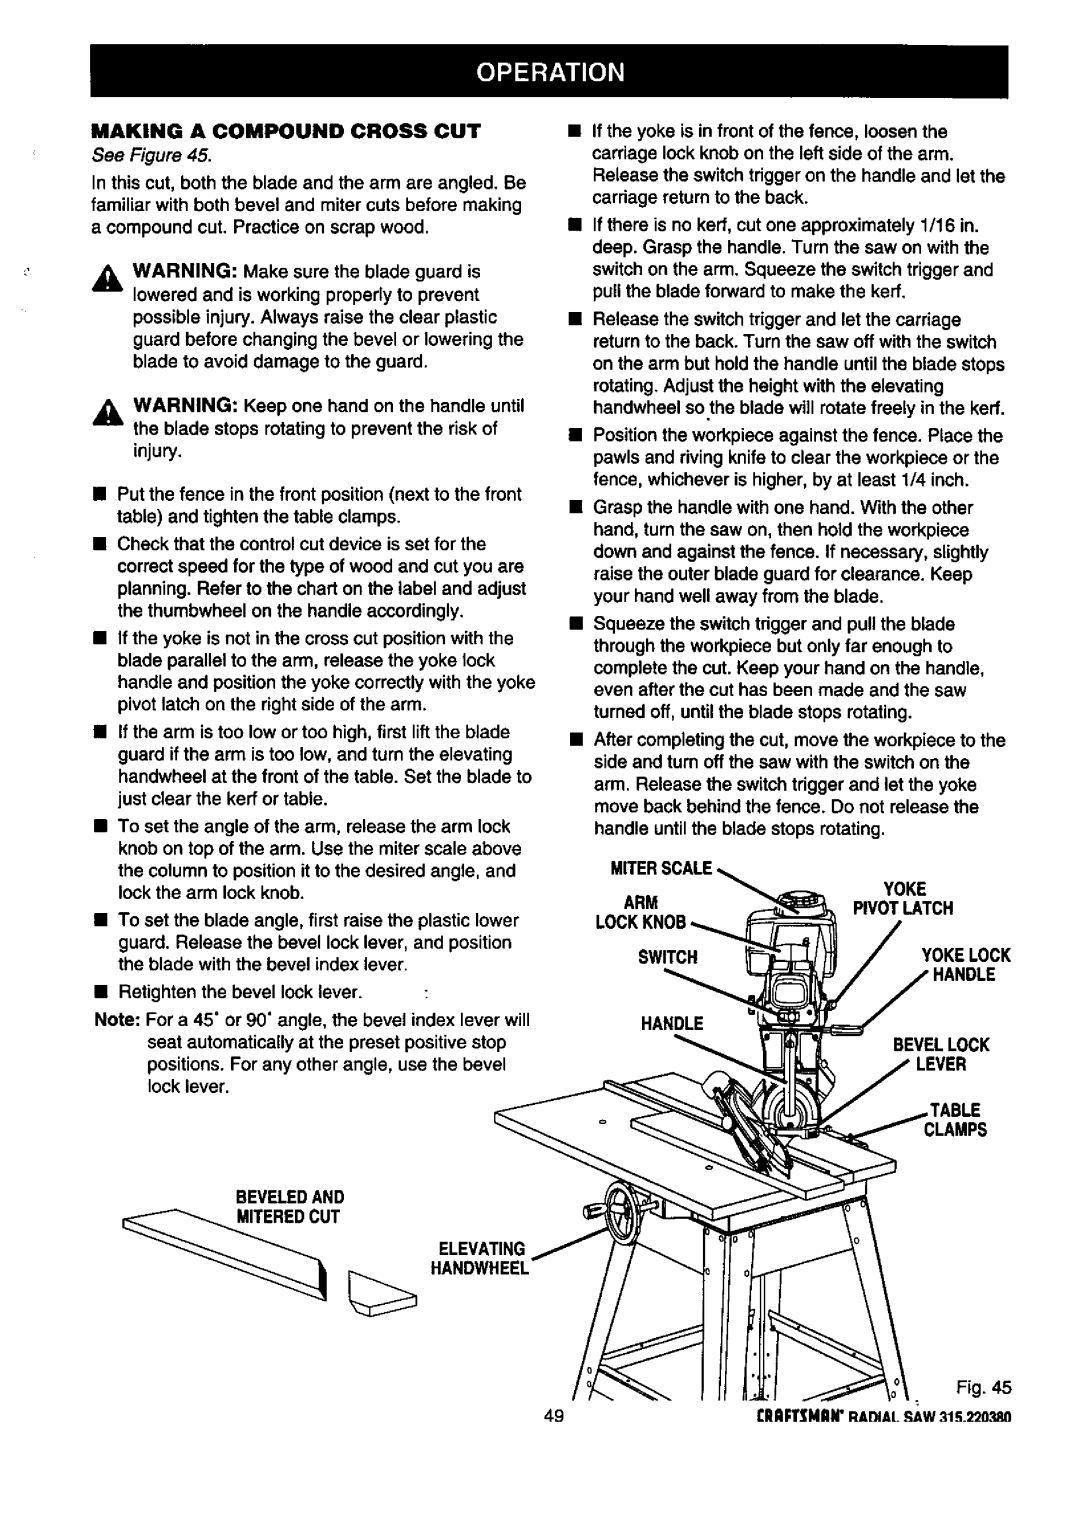
MAKING A COMPOUND CROSS CUT
See Figure 45.
In this cut, both the blade and the arm are angled. Be familiar with both bevel and miter cuts before making a compound cut. Practice on scrap wood.
WARNING: Make sure the blade guard is lowered and is working properly to prevent
possible injury. Always raise the clear plastic guard before changing the bevel or lowering the blade to avoid damage to the guard.
,_ WARNING: Keep one hand on the handle until the blade stops rotating to prevent the risk of
injury.
•Put the fence in the front position (next to the front table) and tighten the table clamps.
•Check that the control cut device is set for the correct speed for the type of wood and cut you are planning. Refer to the chart on the label and adjust the thumbwheel on the handle accordingly.
•If the yoke is not in the cross cut position with the blade parallel to the arm, release the yoke lock handle and position the yoke correctly with the yoke pivot latch on the right side of the arm.
•If the arm is too low or too high, first lift the blade guard if the arm is too low, and tum the elevating handwheel at the front of the table. Set the blade to just clear the kerr or table.
•To set the angle of the arm, release the arm lock knob on top of the arm. Use the miter scale above
the column to position it to the desired angle, and lock the arm lock knob.
•To set the blade angle, first raise the plastic lower guard. Release the bevel lock lever, and position the blade with the bevel index lever.
•Retighten the bevel lock lever.
Note: For a 45" or 90" angle, the bevel index lever will seat automatically at the preset positive stop
positions. For any other angle, use the bevel lock lever.
BEVELEDAND
ELEVATING
HANDWHEEL
•If the yoke is in front of the fence, loosen the carriage lock knob on the left side of the arm.
Release the switch trigger on the handle and let the carriage retum to the back.
•If there is no kerr, cut one approximately 1/16 in. deep. Grasp the handle. Tum the saw on with the switch on the arm. Squeeze the switch trigger and pull the blade forward to make the keff.
•Release the switch trigger and let the carriage return to the back. Turn the saw off with the switch on the arm but hold the handle until the blade stops rotating. Adjust the height with the elevating handwheel so the blade will rotate freely in the keff.
•Position the workpiece against the fence. Place the pawls and riving knife to clear the workpiece or the fence, whichever is higher, by at least 1/4 inch.
•Grasp the handle with one hand. With the other hand, turn the saw on, then hold the workpiece down and against the fence. If necessary, slightly raise the outer blade guard for clearance. Keep your hand well away from the blade.
•Squeeze the switch tdgger and pull the blade through the workpiece but only far enough to
complete the cut. Keep your hand on the handle, even after the cut has been made and the saw
turned off, until the blade stops rotating.
•After completing the cut, move the workpiece to the side and turn off the saw with the switch on the arm. Release the switch trigger and let the yoke move back behind the fence. Do not release the handle until the blade stops rotating.
MITER
YOKE
ARMPIVOTLATCH
SWITCHYOKELOCK
HANDLE
BEVELLOCK
LEVER
CLAMPS
Fig. 45
49 | £RAFTIMAN" RADIAL _,W 31E_2"20._BO |