NAVIGATING THE MOVIE/AUDIO RECORDING MENU
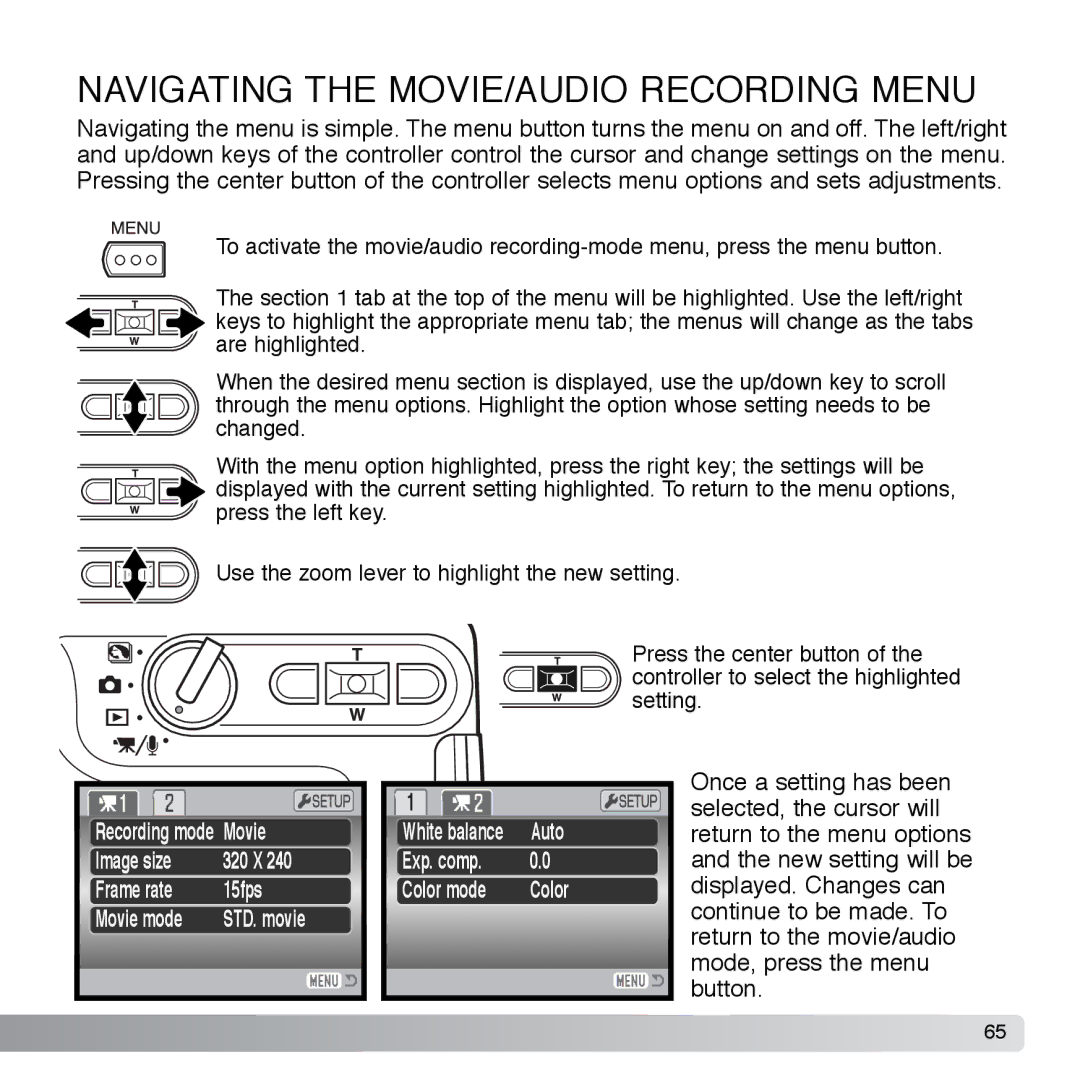
Navigating the menu is simple. The menu button turns the menu on and off. The left/right and up/down keys of the controller control the cursor and change settings on the menu. Pressing the center button of the controller selects menu options and sets adjustments.
To activate the movie/audio
The section 1 tab at the top of the menu will be highlighted. Use the left/right keys to highlight the appropriate menu tab; the menus will change as the tabs are highlighted.
When the desired menu section is displayed, use the up/down key to scroll through the menu options. Highlight the option whose setting needs to be changed.
With the menu option highlighted, press the right key; the settings will be displayed with the current setting highlighted. To return to the menu options, press the left key.
Use the zoom lever to highlight the new setting.
|
|
|
| Press the center button of the |
|
|
|
| controller to select the highlighted |
|
|
|
| setting. |
|
|
|
| Once a setting has been |
Recording mode Movie | White balance | Auto | selected, the cursor will | |
return to the menu options | ||||
Image size | 320 X 240 | Exp. comp. | 0.0 | and the new setting will be |
Frame rate | 15fps | Color mode | Color | displayed. Changes can |
Movie mode | STD. movie |
|
| continue to be made. To |
|
| return to the movie/audio | ||
|
|
|
| |
|
|
|
| mode, press the menu |
|
|
|
| button. |
65
