DSL-564T ADSL Router User’s Guide
8.Click the Apply button when you have entered all the information. The web browser will briefly go blank. You are now finished changing setting for the primary WAN connection known as Connection 1. It is now necessary to save the changes you just made and restart the Router.
9.To save the changes made to Connection 1, click the Tools tab and then click on the System Commands button. Click on the Save All button to store the configuration settings. Click on Back button to return to the System Commands menu.
10.Check the WAN connection status. Click the Status tab and then the Connection Status button. Look under WAN to view the State of Connection 1, it should read Connected. If the WAN connection state does not appear to Connected after a few minutes, go back to the Connection 1 Setup menu, check the settings and make sure they are correct.
Configure Connection 1 for CLIP
CLIP or IPoA connections function in a similar way to DHCP or Static IP connections. Certain CLIP connections function like P2P networks. The router must obtain IP settings from a server owned by an ISP, or use a static IP address assigned by the ISP.
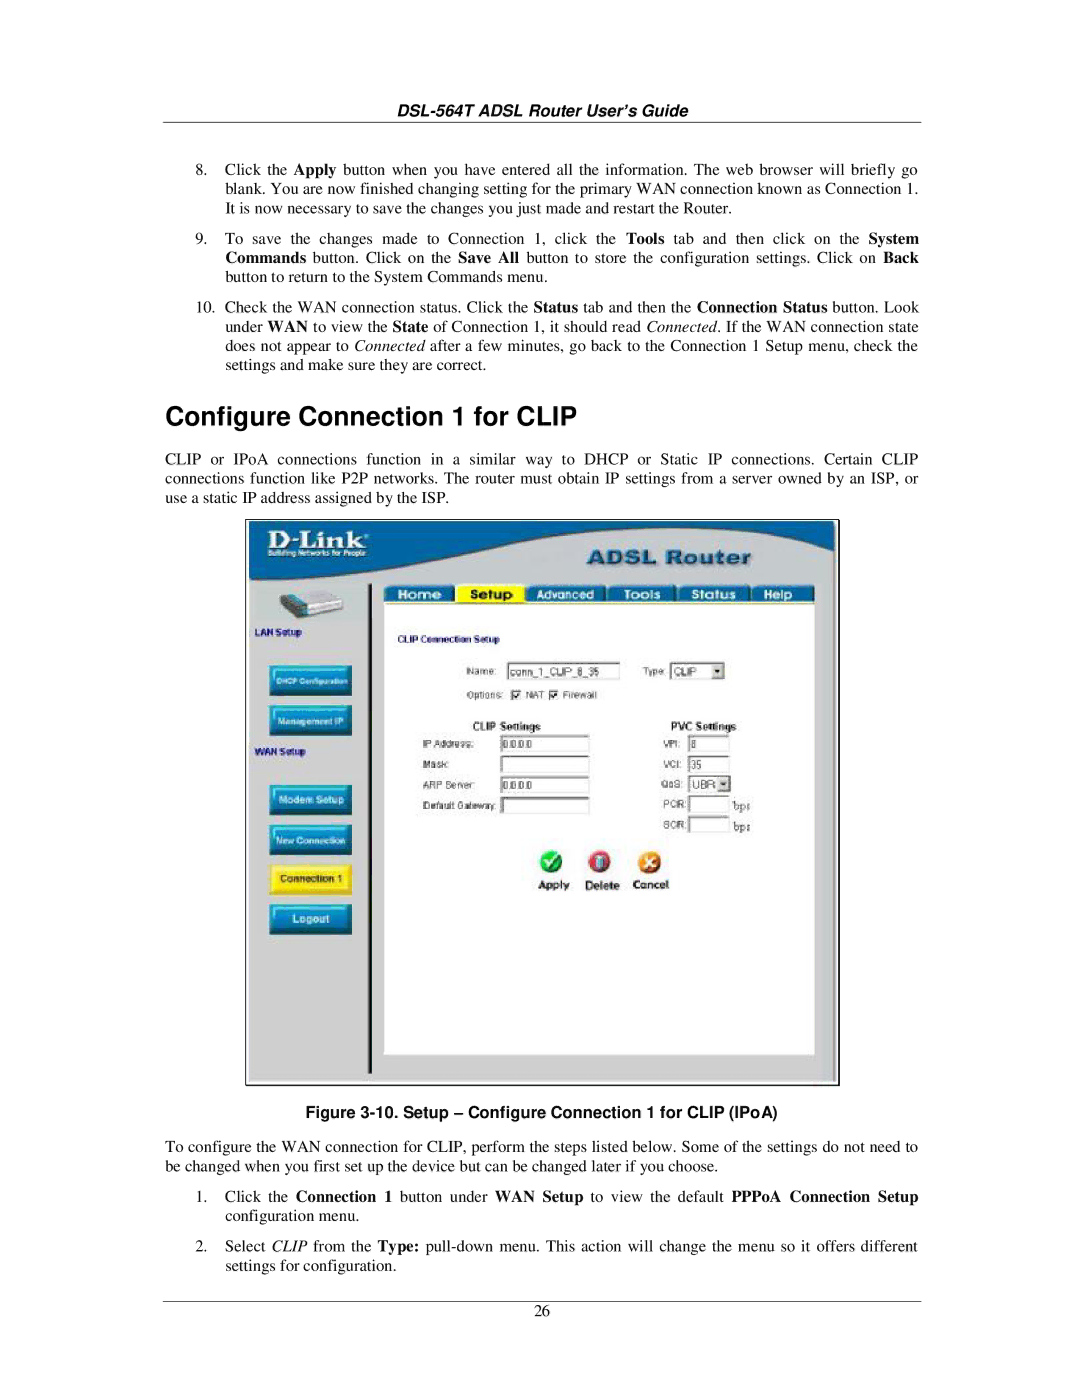
Figure 3-10. Setup – Configure Connection 1 for CLIP (IPoA)
To configure the WAN connection for CLIP, perform the steps listed below. Some of the settings do not need to be changed when you first set up the device but can be changed later if you choose.
1.Click the Connection 1 button under WAN Setup to view the default PPPoA Connection Setup configuration menu.
2.Select CLIP from the Type:
26