INSTALLATION
BUILT–IN CONSTRUCTION DETAILS
2" ![]()
grill
exhaust
![]() 3" (to
3" (to
12" (to combustible construction)
Bottom of |
|
support flange | 10" |
![]() 22"
22" ![]()
![]()
![]() 1-1/2"
1-1/2"![]()
![]()
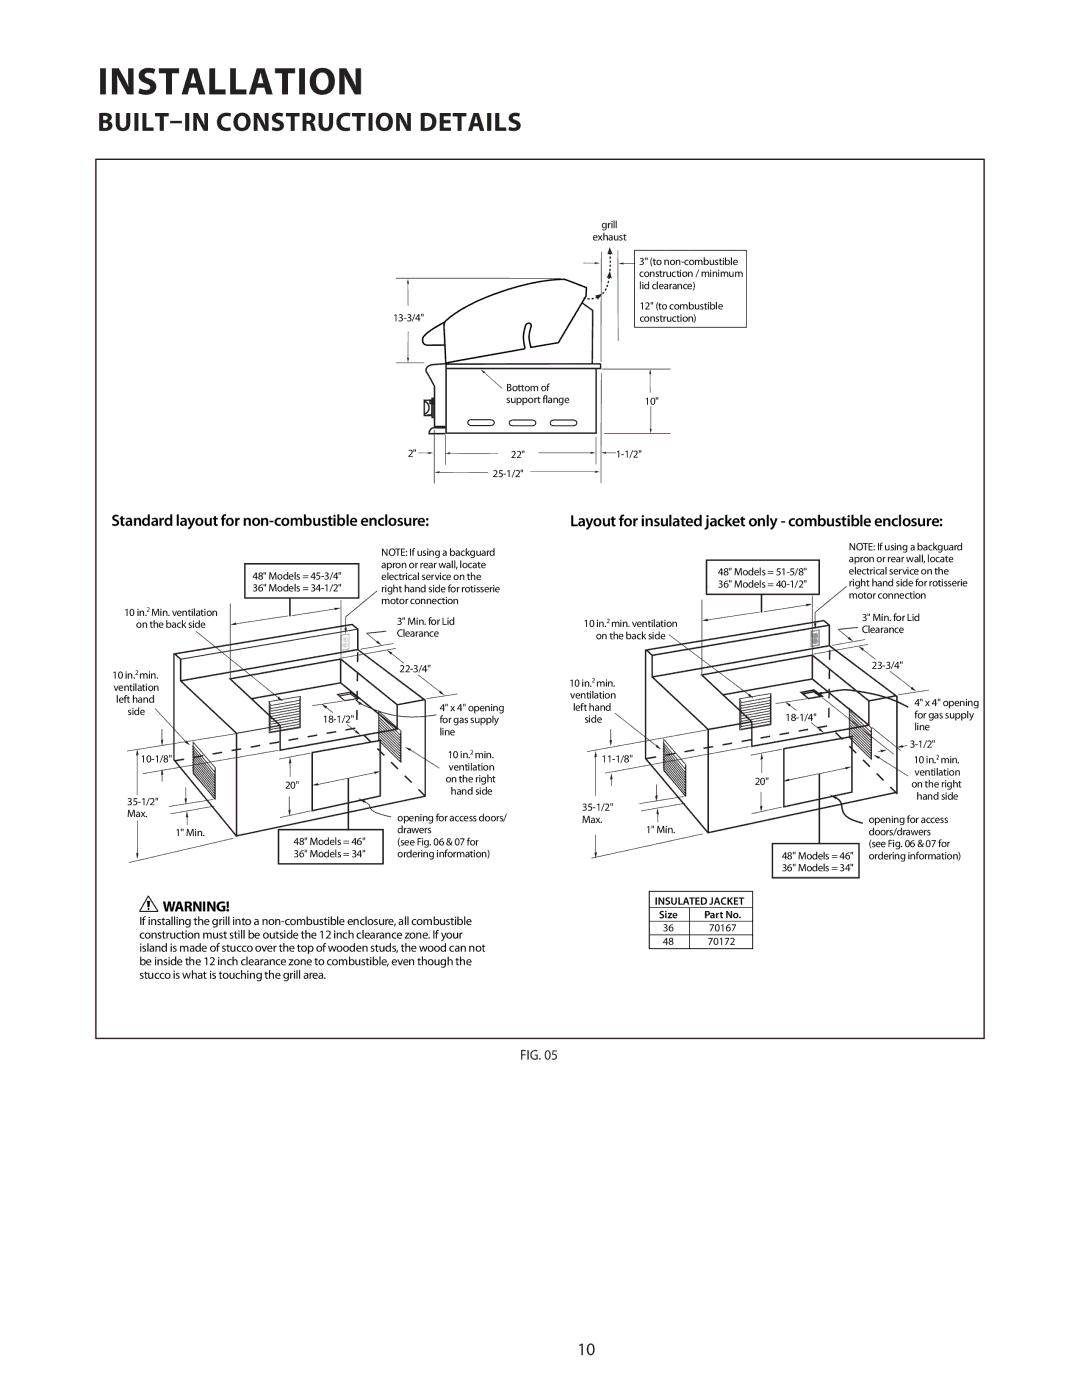
Standard layout for
Layout for insulated jacket only - combustible enclosure:
10 in.2 Min. ventilation
on the back side
10in.2 min. ventilation left hand
side
48" Models =
NOTE: If using a backguard apron or rear wall, locate electrical service on the right hand side for rotisserie motor connection
3" Min. for Lid Clearance
4" x 4" opening for gas supply line
10 in.2 min. ventilation
on the back side
10in.2 min. ventilation left hand
side
| NOTE: If using a backguard |
| apron or rear wall, locate |
48" Models = | electrical service on the |
36" Models = | right hand side for rotisserie |
| motor connection |
| 3" Min. for Lid |
| Clearance |
|
![]() 4" x 4" opening
4" x 4" opening
![]()
1" Min.
| 10 in.2 min. | |
| ventilation | |
20" | on the right | |
hand side | ||
| ||
| opening for access doors/ | |
48" Models = 46" | drawers | |
(see Fig. 06 & 07 for | ||
36" Models = 34" | ordering information) |
Max.![]() 1" Min.
1" Min.
20" |
48" Models = 46" 36" Models = 34"
10 in.2 min. ventilation on the right hand side
opening for access doors/drawers (see Fig. 06 & 07 for ordering information)
![]() WARNING!
WARNING!
If installing the grill into a
INSULATED JACKET
Size | Part No. |
3670167
4870172
FIG. 05
10
