T40 Installation and Assembly
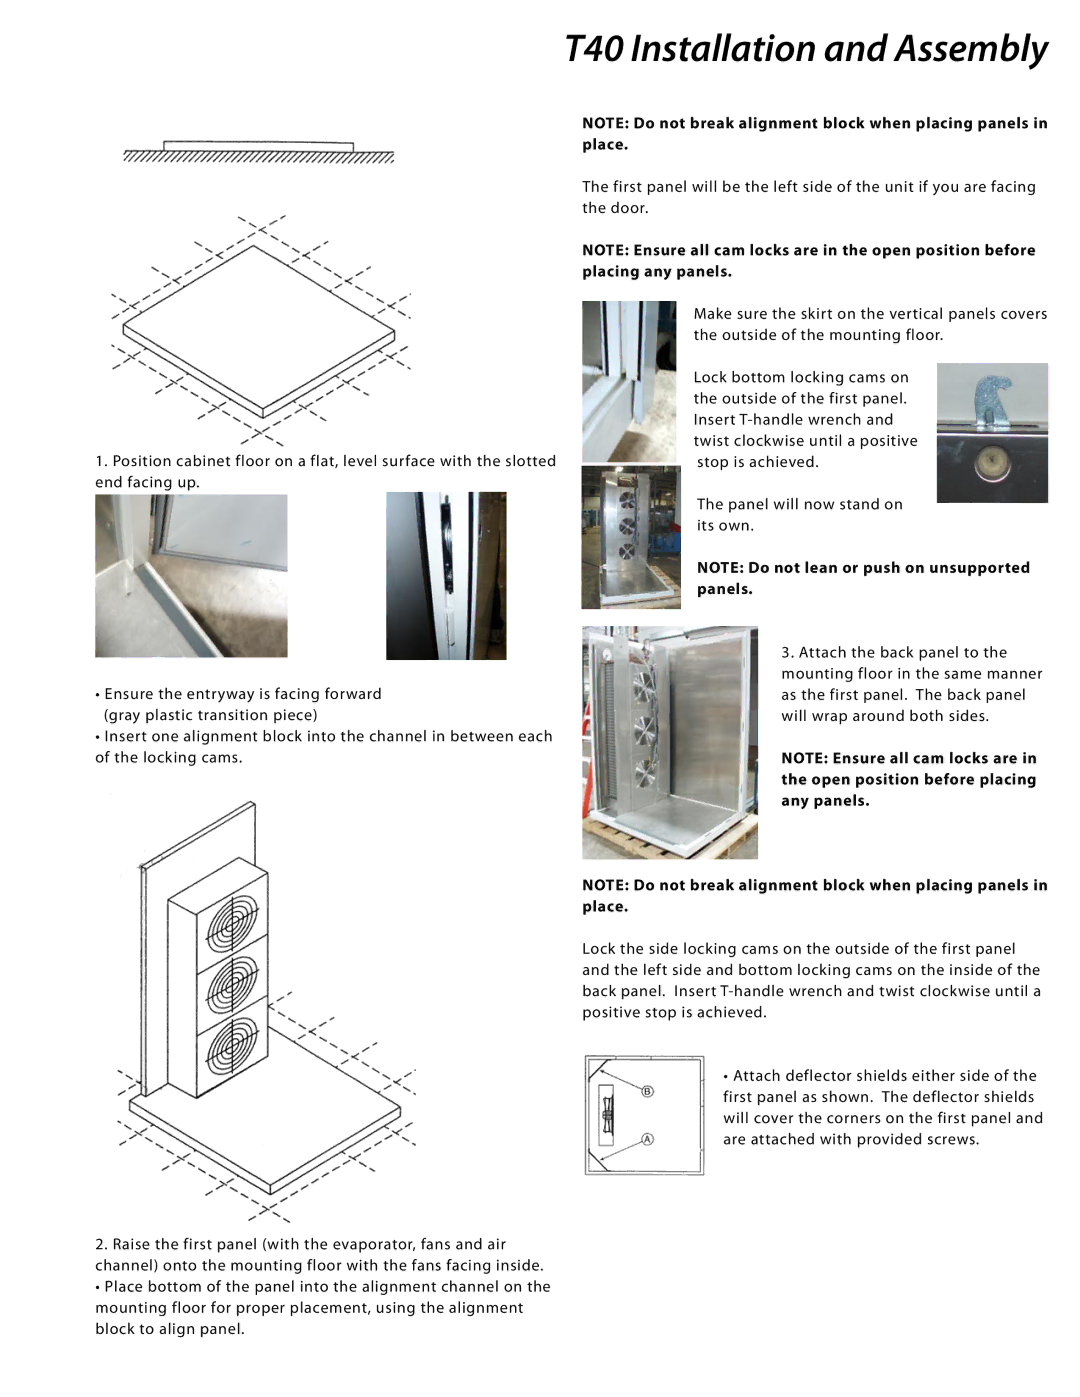
1.Position cabinet floor on a flat, level surface with the slotted end facing up.
NOTE: Do not break alignment block when placing panels in place.
The first panel will be the left side of the unit if you are facing the door.
NOTE: Ensure all cam locks are in the open position before placing any panels.
Make sure the skirt on the vertical panels covers the outside of the mounting floor.
Lock bottom locking cams on the outside of the first panel. Insert
The panel will now stand on its own.
NOTE: Do not lean or push on unsupported panels.
•Ensure the entryway is facing forward (gray plastic transition piece)
•Insert one alignment block into the channel in between each of the locking cams.
2.Raise the first panel (with the evaporator, fans and air channel) onto the mounting floor with the fans facing inside.
• Place bottom of the panel into the alignment channel on the mounting floor for proper placement, using the alignment block to align panel.
3.Attach the back panel to the mounting floor in the same manner as the first panel. The back panel will wrap around both sides.
NOTE: Ensure all cam locks are in the open position before placing any panels.
NOTE: Do not break alignment block when placing panels in place.
Lock the side locking cams on the outside of the first panel and the left side and bottom locking cams on the inside of the back panel. Insert
•Attach deflector shields either side of the first panel as shown. The deflector shields will cover the corners on the first panel and are attached with provided screws.