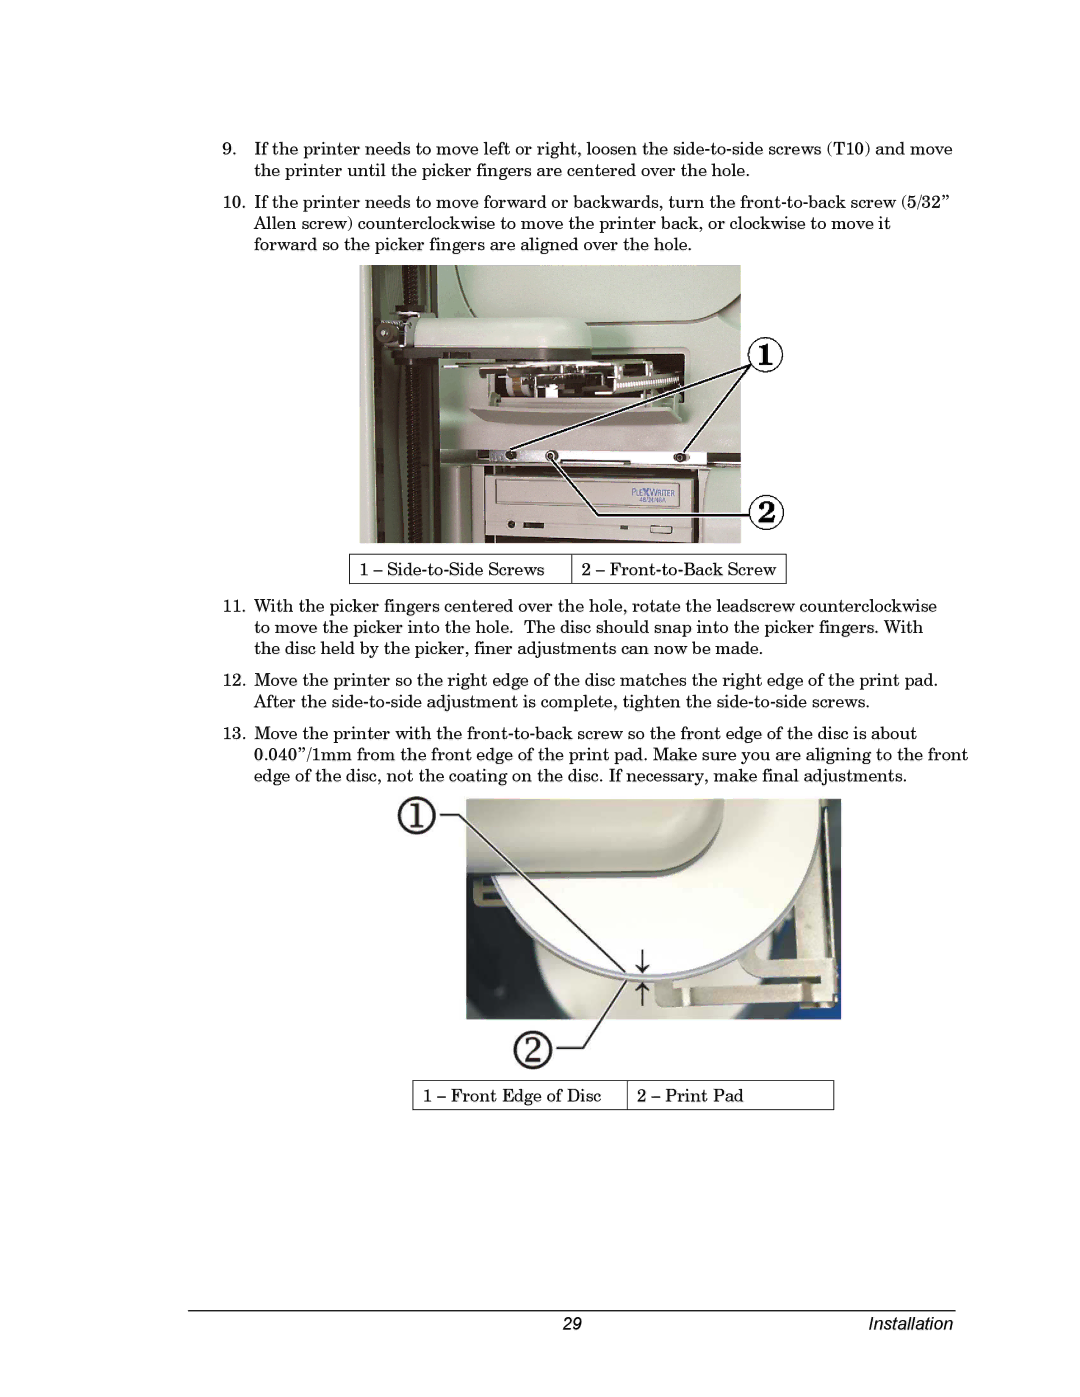
9. If the printer needs to move left or right, loosen the side-to-side screws (T10) and move
the printer until the picker fingers are centered over the hole.
10. If the printer needs to move forward or backwards, turn the front-to-back screw (5/32”
Allen screw) counterclockwise to move the printer back, or clockwise to move it
forward so the picker fingers are aligned over the hole.
1 – Side-to-Side Screws 2 – Front-to-Back Screw
11. With the picker fingers centered over the hole, rotate the leadscrew counterclockwise
to move the picker into the hole. The disc should snap into the picker fingers. With
the disc held by the picker, finer adjustments can now be made.
12. Move the printer so the right edge of the disc matches the right edge of the print pad.
After the side-to-side adjustment is complete, tighten the side-to-side screws.
13. Move the printer with the front-to-back screw so the front edge of the disc is about
0.040”/1mm from the front edge of the print pad. Make sure you are aligning to the front
edge of the disc, not the coating on the disc. If necessary, make final adjustments.
1 – Front Edge of Disc 2 – Print Pad
29 Installation