Removing the Battery Latch Assembly
1.Follow the instructions in “Before You Begin” on page 6.
2.Remove the system board (see “Removing the System Board” on page 102).
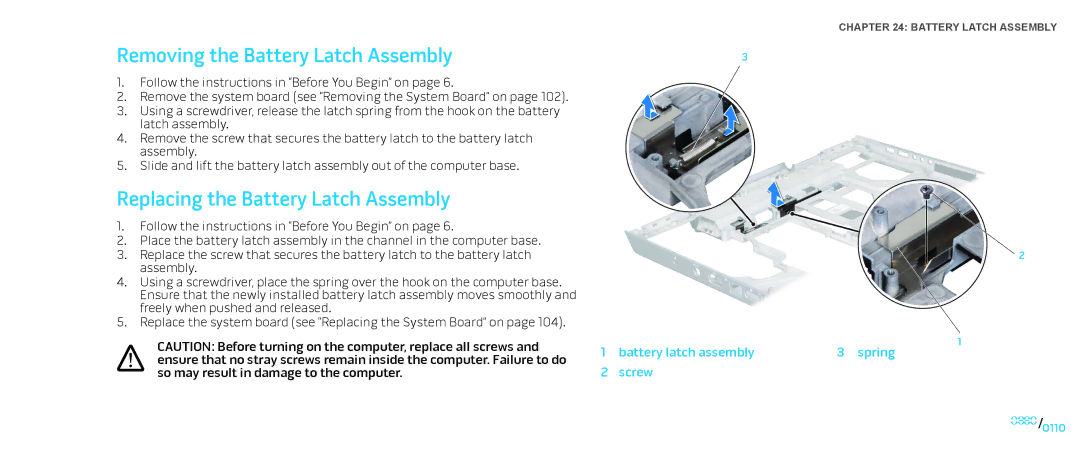
3.Using a screwdriver, release the latch spring from the hook on the battery latch assembly.
4.Remove the screw that secures the battery latch to the battery latch assembly.
5.Slide and lift the battery latch assembly out of the computer base.
Replacing the Battery Latch Assembly
1.Follow the instructions in “Before You Begin” on page 6.
2.Place the battery latch assembly in the channel in the computer base.
3.Replace the screw that secures the battery latch to the battery latch assembly.
4.Using a screwdriver, place the spring over the hook on the computer base. Ensure that the newly installed battery latch assembly moves smoothly and freely when pushed and released.
5.Replace the system board (see “Replacing the System Board” on page 104).
CAUTION: Before turning on the computer, replace all screws and ensure that no stray screws remain inside the computer. Failure to do so may result in damage to the computer.
CHAPTER 24: BATTERY LATCH ASSEMBLY
3
2
1 | battery latch assembly | 1 |
3 spring | ||
2 | screw |
|
0110/0110