6.Perform the following steps:
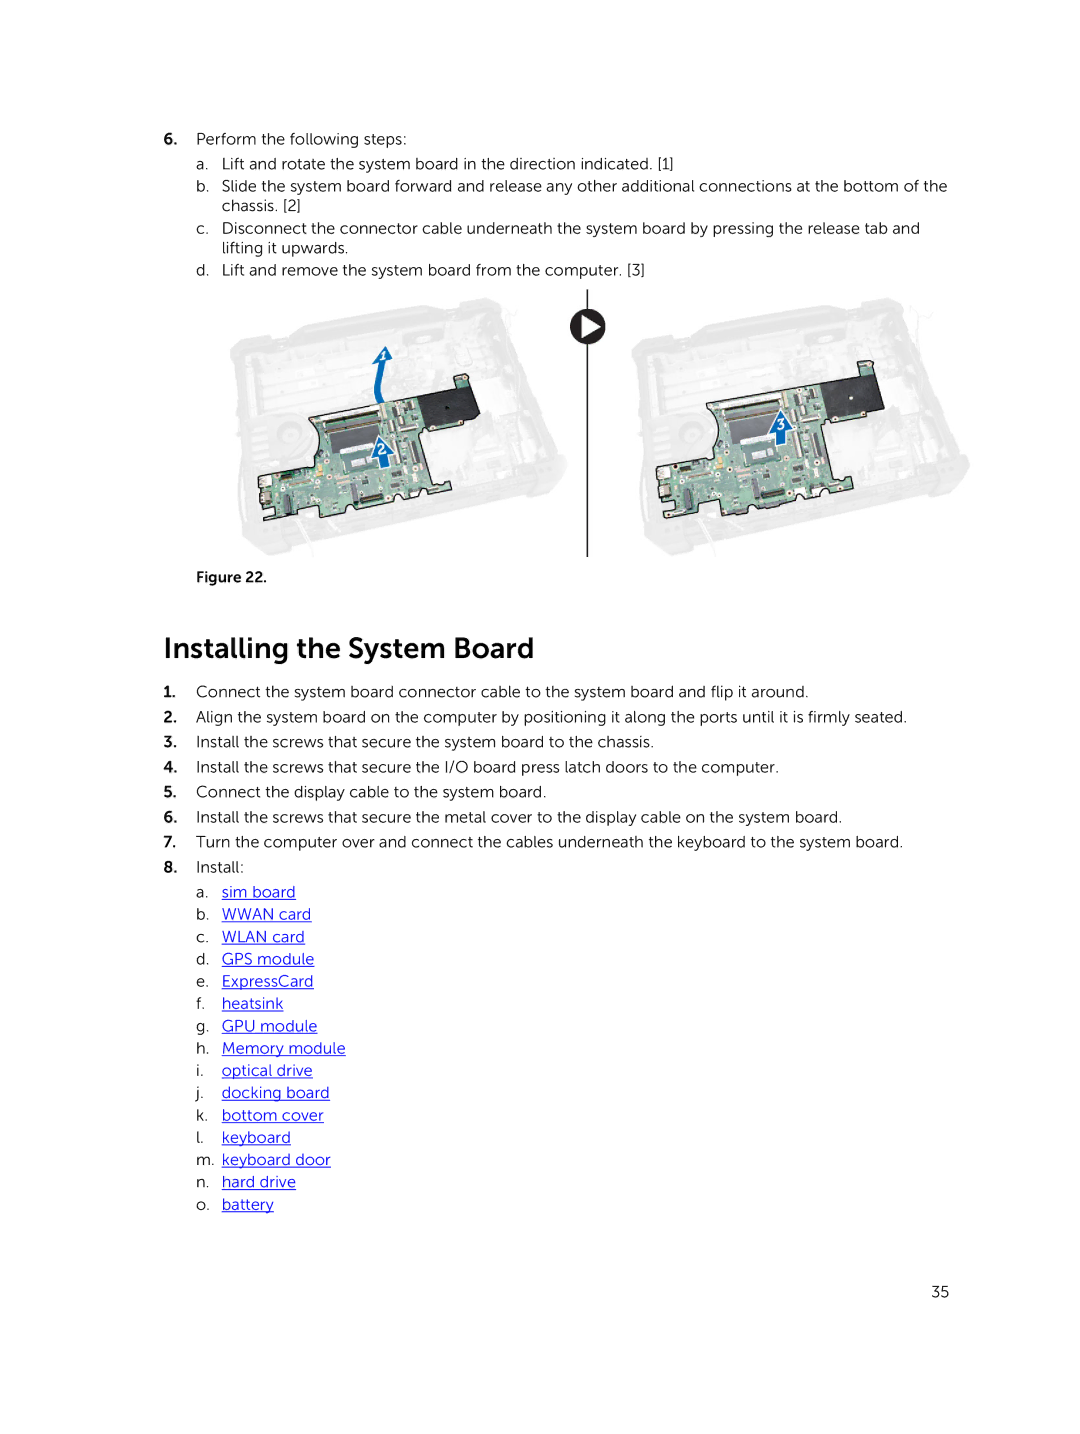
a.Lift and rotate the system board in the direction indicated. [1]
b.Slide the system board forward and release any other additional connections at the bottom of the chassis. [2]
c.Disconnect the connector cable underneath the system board by pressing the release tab and lifting it upwards.
d.Lift and remove the system board from the computer. [3]
Figure 22.
Installing the System Board
1.Connect the system board connector cable to the system board and flip it around.
2.Align the system board on the computer by positioning it along the ports until it is firmly seated.
3.Install the screws that secure the system board to the chassis.
4.Install the screws that secure the I/O board press latch doors to the computer.
5.Connect the display cable to the system board.
6.Install the screws that secure the metal cover to the display cable on the system board.
7.Turn the computer over and connect the cables underneath the keyboard to the system board.
8.Install:
a.sim board
b.WWAN card
c.WLAN card
d.GPS module
e.ExpressCard
f.heatsink
g.GPU module
h.Memory module
i.optical drive
j.docking board
k.bottom cover
l.keyboard
m.keyboard door
n.hard drive
o.battery
35