NOTE: The procedure for removing a 3.5 inch HDD0 and HDD1 cage is identical.
1.If installed, remove the front bezel.
2.Turn off the system and attached peripherals, and disconnect the system from the electrical outlet and from the peripherals.
3.Open the system.
4.Disconnect the power and data cables from the hard drive.
NOTE: If you have installed a PowerEdge RAID Controller (PERC) card, the power and data cables are connected to the PERC card cable adapter. To disconnect the power and data cables, remove the PERC card cable adapter from the hard drive.
5.If applicable, remove the optical drive installed on top of the
6.Pull the release pin, slide the
7.Lift the
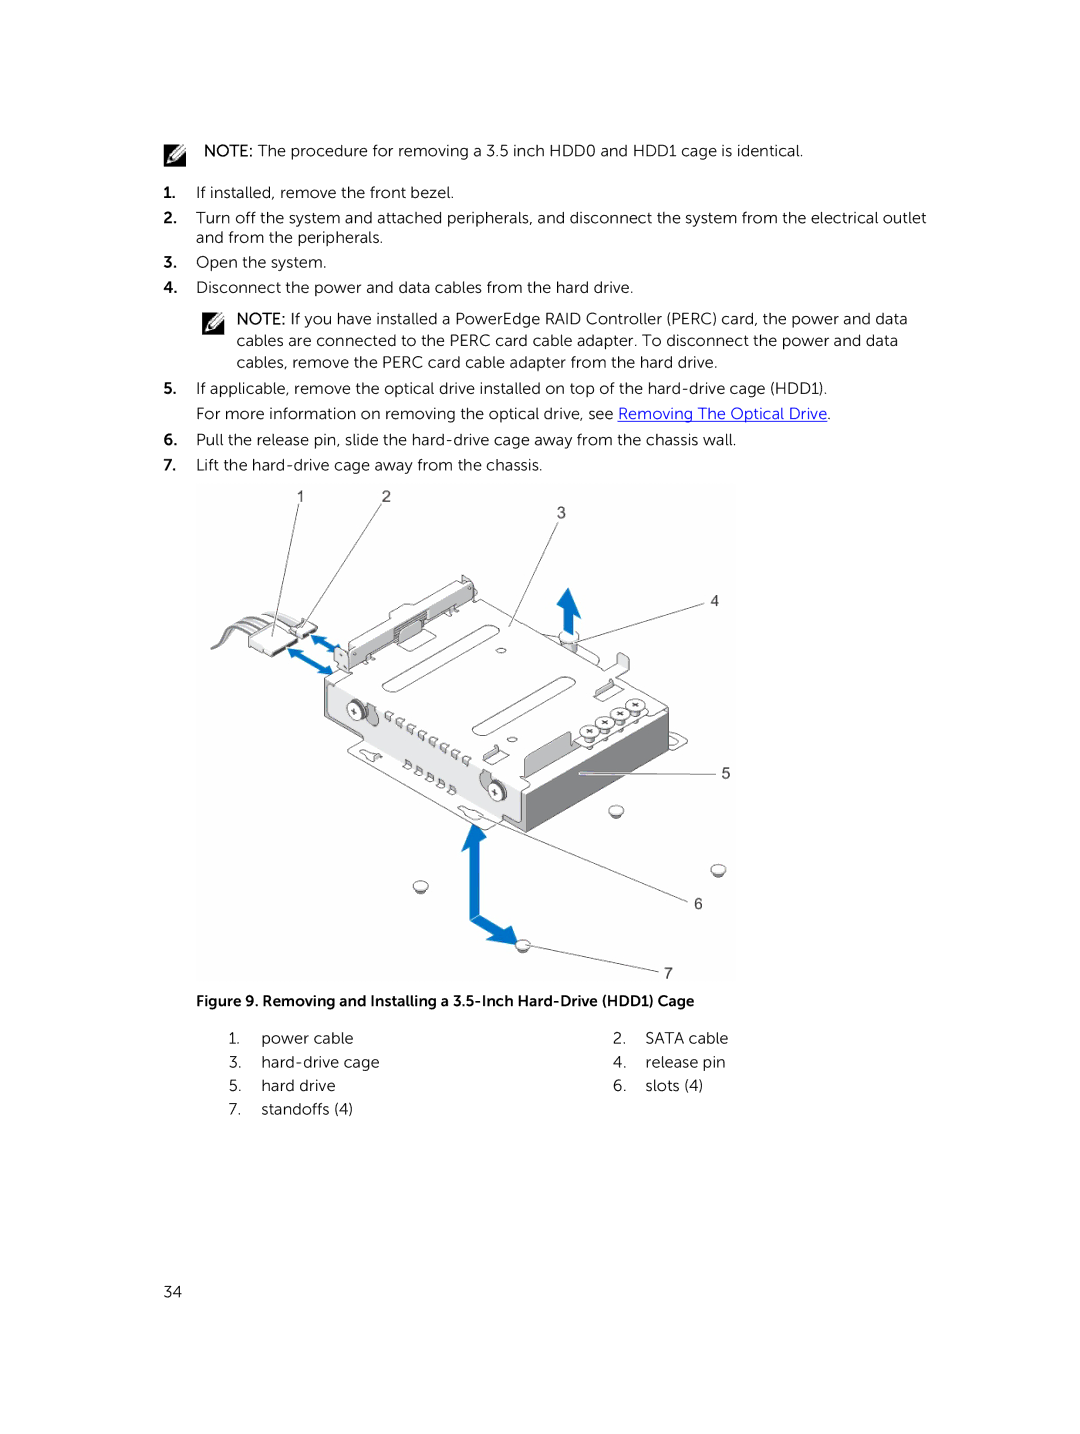
Figure 9. Removing and Installing a 3.5-Inch Hard-Drive (HDD1) Cage
1. | power cable | 2. | SATA cable |
3. |
| 4. | release pin |
5. | hard drive | 6. | slots (4) |
7.standoffs (4)
34