chap. 2 using the controls and setting the modes en
1.6 INSTALLATION
1)Check that the appliance has not suffered any damage due to transportation.
2)Place the appliance on a flat, stable surface out of the re- ach of children (the glass door becomes very hot while the oven is in operation).
3)Before using this appliance, move it two inches away from the wall or any object on the counter top. Remove any object that may have been placed on top of the appliance. Do not use on surfaces where heat may be a problem.
4)Initial
This is normal. It is due to the protective substance on heating elements which protects them from salt effects during shipping from the factory.
5)When a function is started, the Start/STOP button will light.
6)If ERR message is shown on display, the oven has been damaged. Please contact an authorized service center.
1.7 IMPORTANT TIPS AND TECHNIQUES
Accessories and utensils
The bake pan (H) is designed to permit the circulating heat to surround the food (except for the bottom surface) more effec- tively. Use it as you would any shallow baking or roasting pan. Other utensils you own can be used provided that an inch or so of space remains open to allow circulation of the
Preheating the oven
To
&BAKE). After having pressed START/STOP, if no duration has been set, the display will show the countdown starting from the default duration of 30 minutes. On reaching the set tempe- rature, the control will emit 3 “beeps” 3 times.
bake, keep warm, broil, toast, dehydrate, smart cookie and piz- za functions.
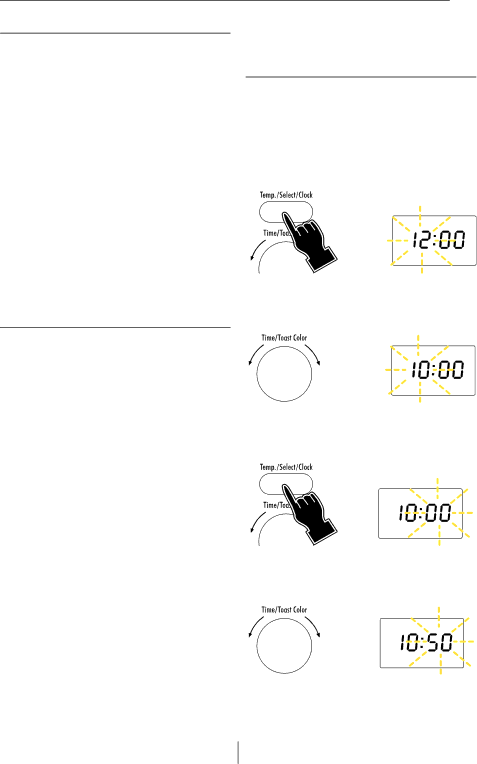
2.1 SETTING THE CLOCK
When the appliance is connected to the power supply for the first time, or after a power outage, four dashes will appear on the display
1Press the TEMP./SELECT/CLOCK button (11). (the hours flash on display)
2Turn the TIME/TOAST COLOR knob (12) to the desired time. The times set will begin blinking on the display.
3Press the TEMP./SELECT/CLOCK button (11) the minutes begin to flash on the display.
4Turn the TIME/TOAST COLOR knob (12) to the desired time. The time set will begin blinking on the display.
Using aluminum foil
Do NOT allow foil to touch sides of the oven or the heating
elements. Foil can be used to cover foods or the bake pan (for |
|
|
easier |
|
|
food or the edges of the pan or dish. DO NOT cover the broiling |
|
|
rack as this can cause accumulated grease to catch fire. DO NOT | 5 | Press the TEMP./SELECT/CLOCK button (11) at any time |
cover the crumb tray (C). Unlike an ordinary |
DE’LONGHI features 8 functions: convection/defrost, traditional | during cooking process to display the current time. (the |
|
7